国内如何注册香港Stripe个人账户(可全球收款,2024年最新教程)

文章目录
引言
Stripe是什么? 它是一个收款工具,做跨境电商、外贸的人用它收取国外的美元。
一直认为stripe注册的门槛挺高:需要什么海外公司、美国税号等等。
今天因为使用medium,需要绑定stripe账号,带着试一试的心态,花了不到2小时,注册、KYC成功了。
所有的注册要求,国内都能搞定。
个人猜测:现在经济下行,都在抢客户,放松了大陆限制;防君子不妨小人。
关键点:国外的银行账号、地址等,使用万里汇的。
特别注意: 注册成功后,先少量收款,测试没问题后,再做正式收款。
下面是我的注册教程:
前期准备:
① 护照:大陆的护照就行
② 美国电话号:Google voice,或者实体卡(3美元一个月,paygo,参考教程:http://yesaiwen.com/introduce-ultramobile-paygo-iphone7/)
③ 谷歌二次验证器:完全免费的。
1.获取香港银行账户(不用去香港)
使用万里汇来获取香港银行的账号。
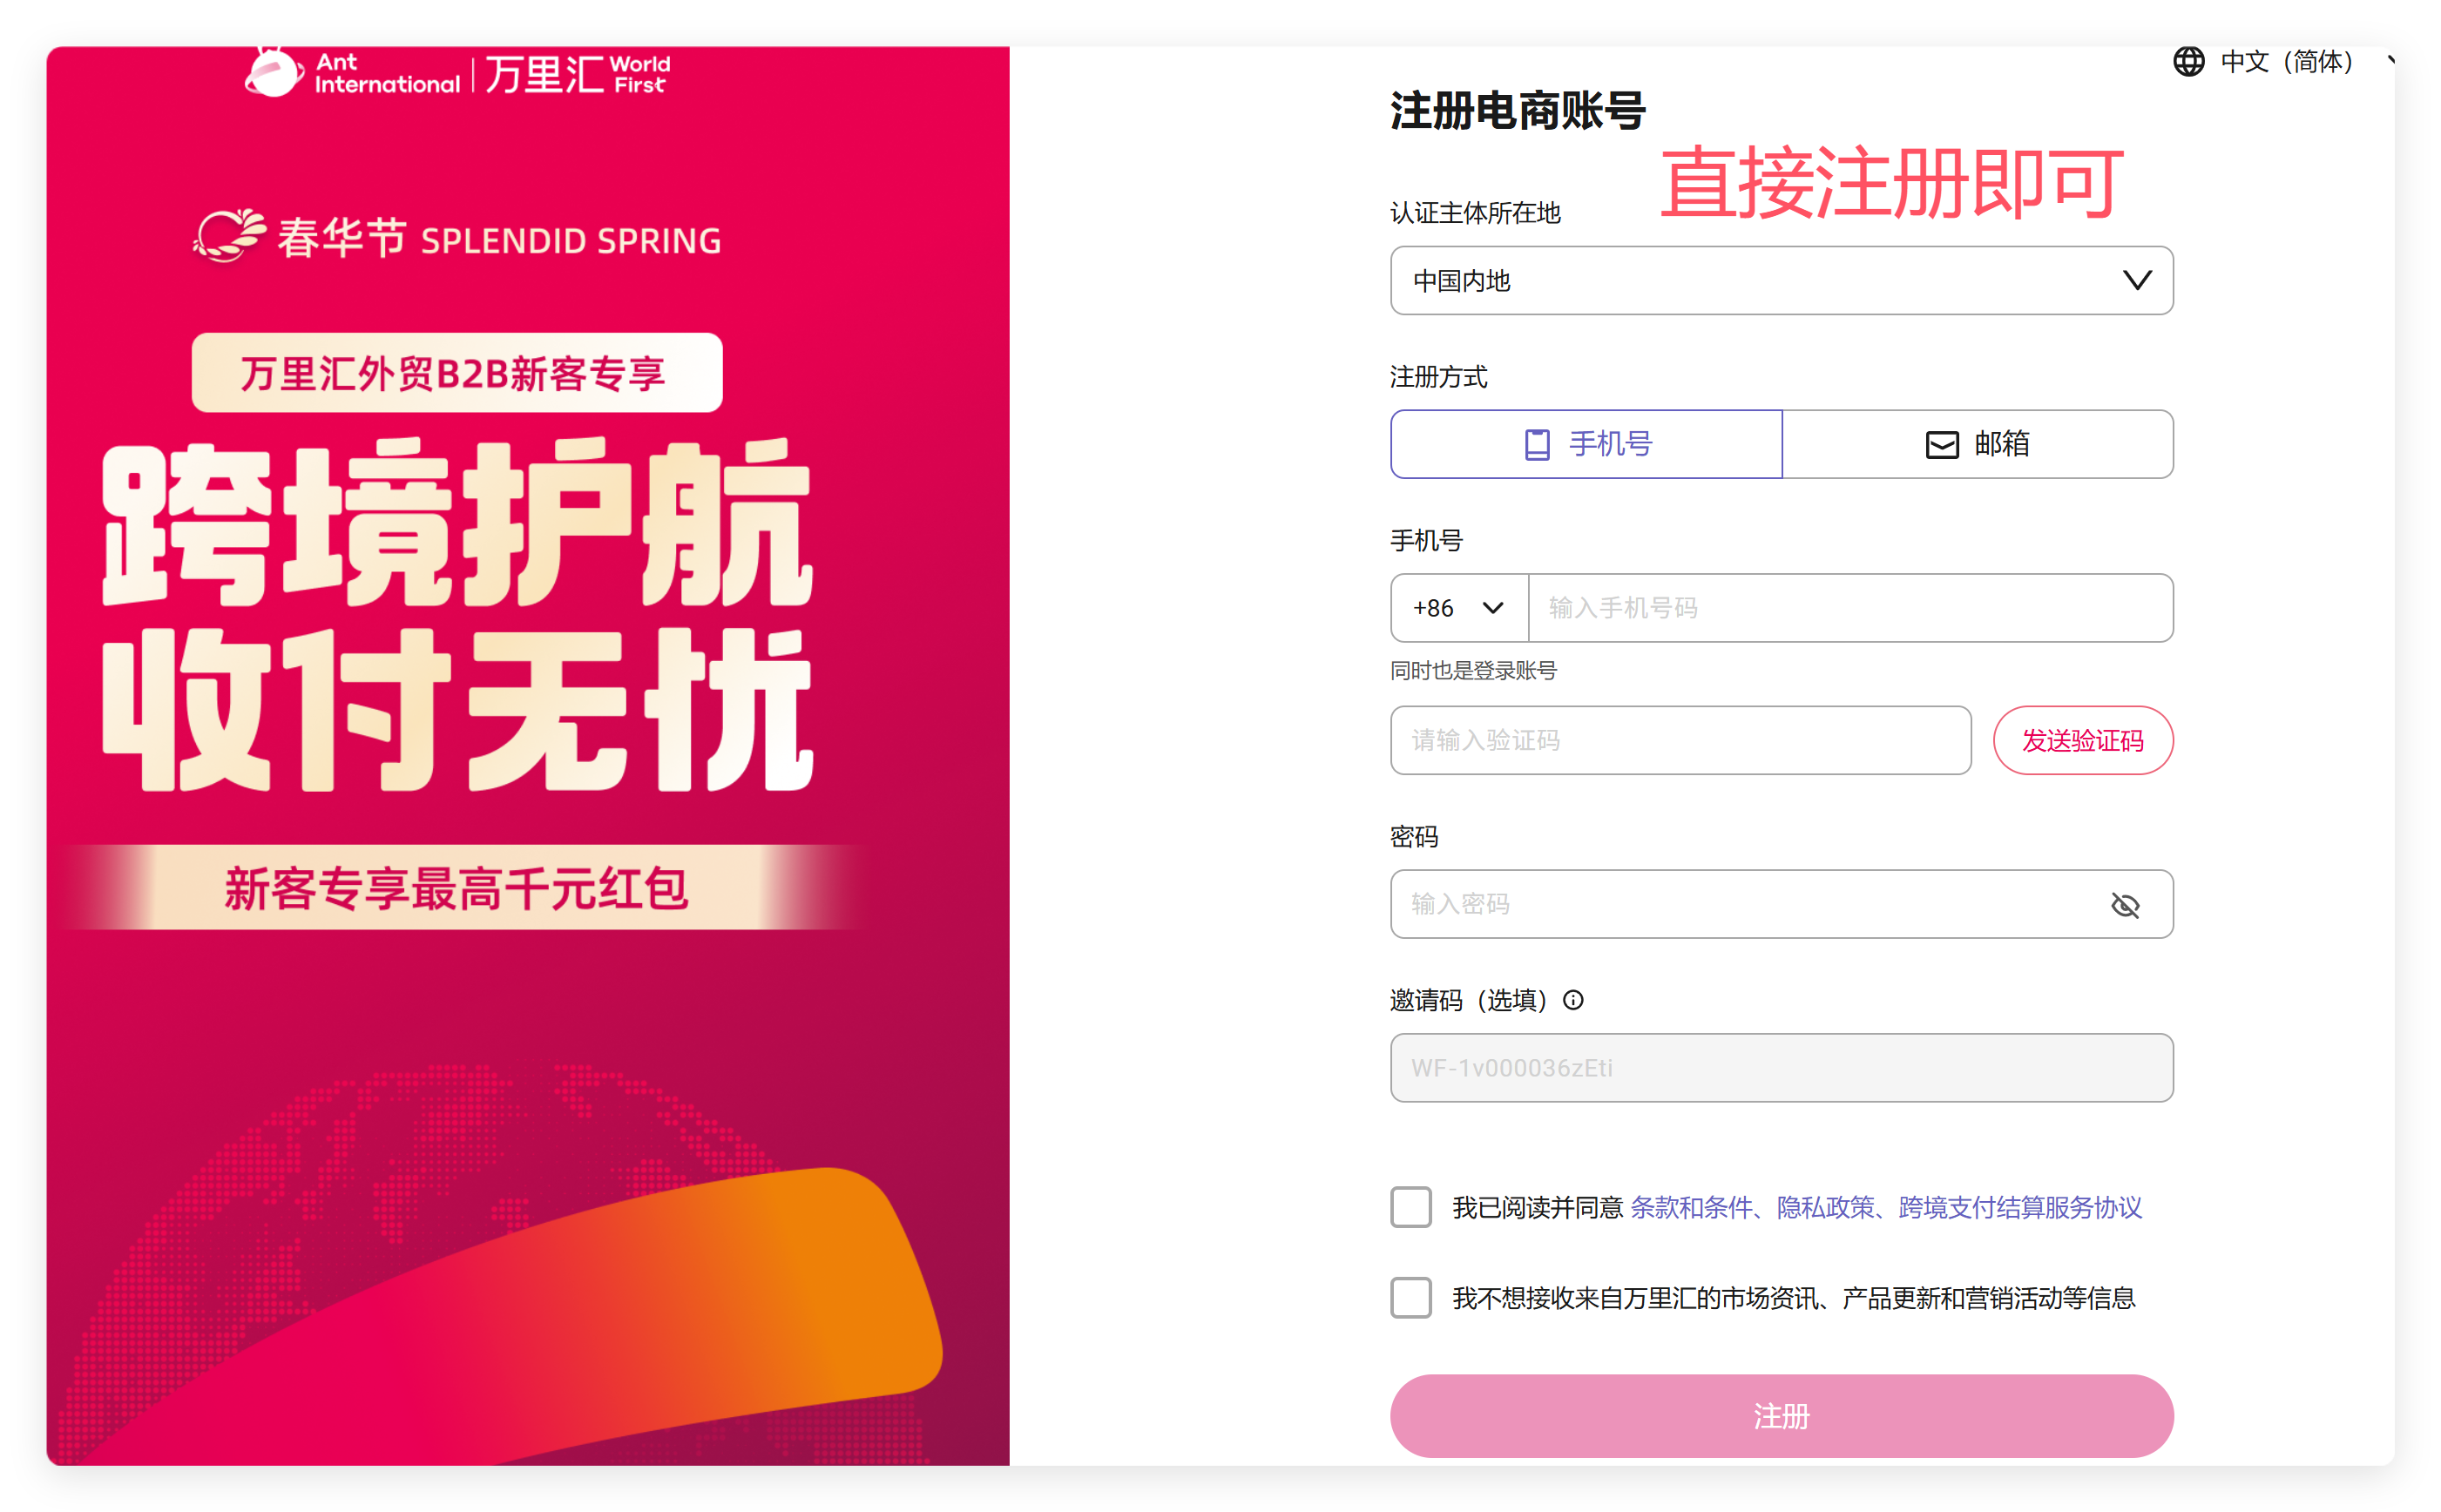
1.1 注册万里汇
万里汇是蚂蚁集团控制的跨境电商收款平台,拥有合规的金融牌照。
支付宝属于蚂蚁集团的产品。
注册网址: http://m.mrw.so/5NGIaA
新用户点击:立即注册,不用管是不是电商账号;
老用户点击“登录报名”即可
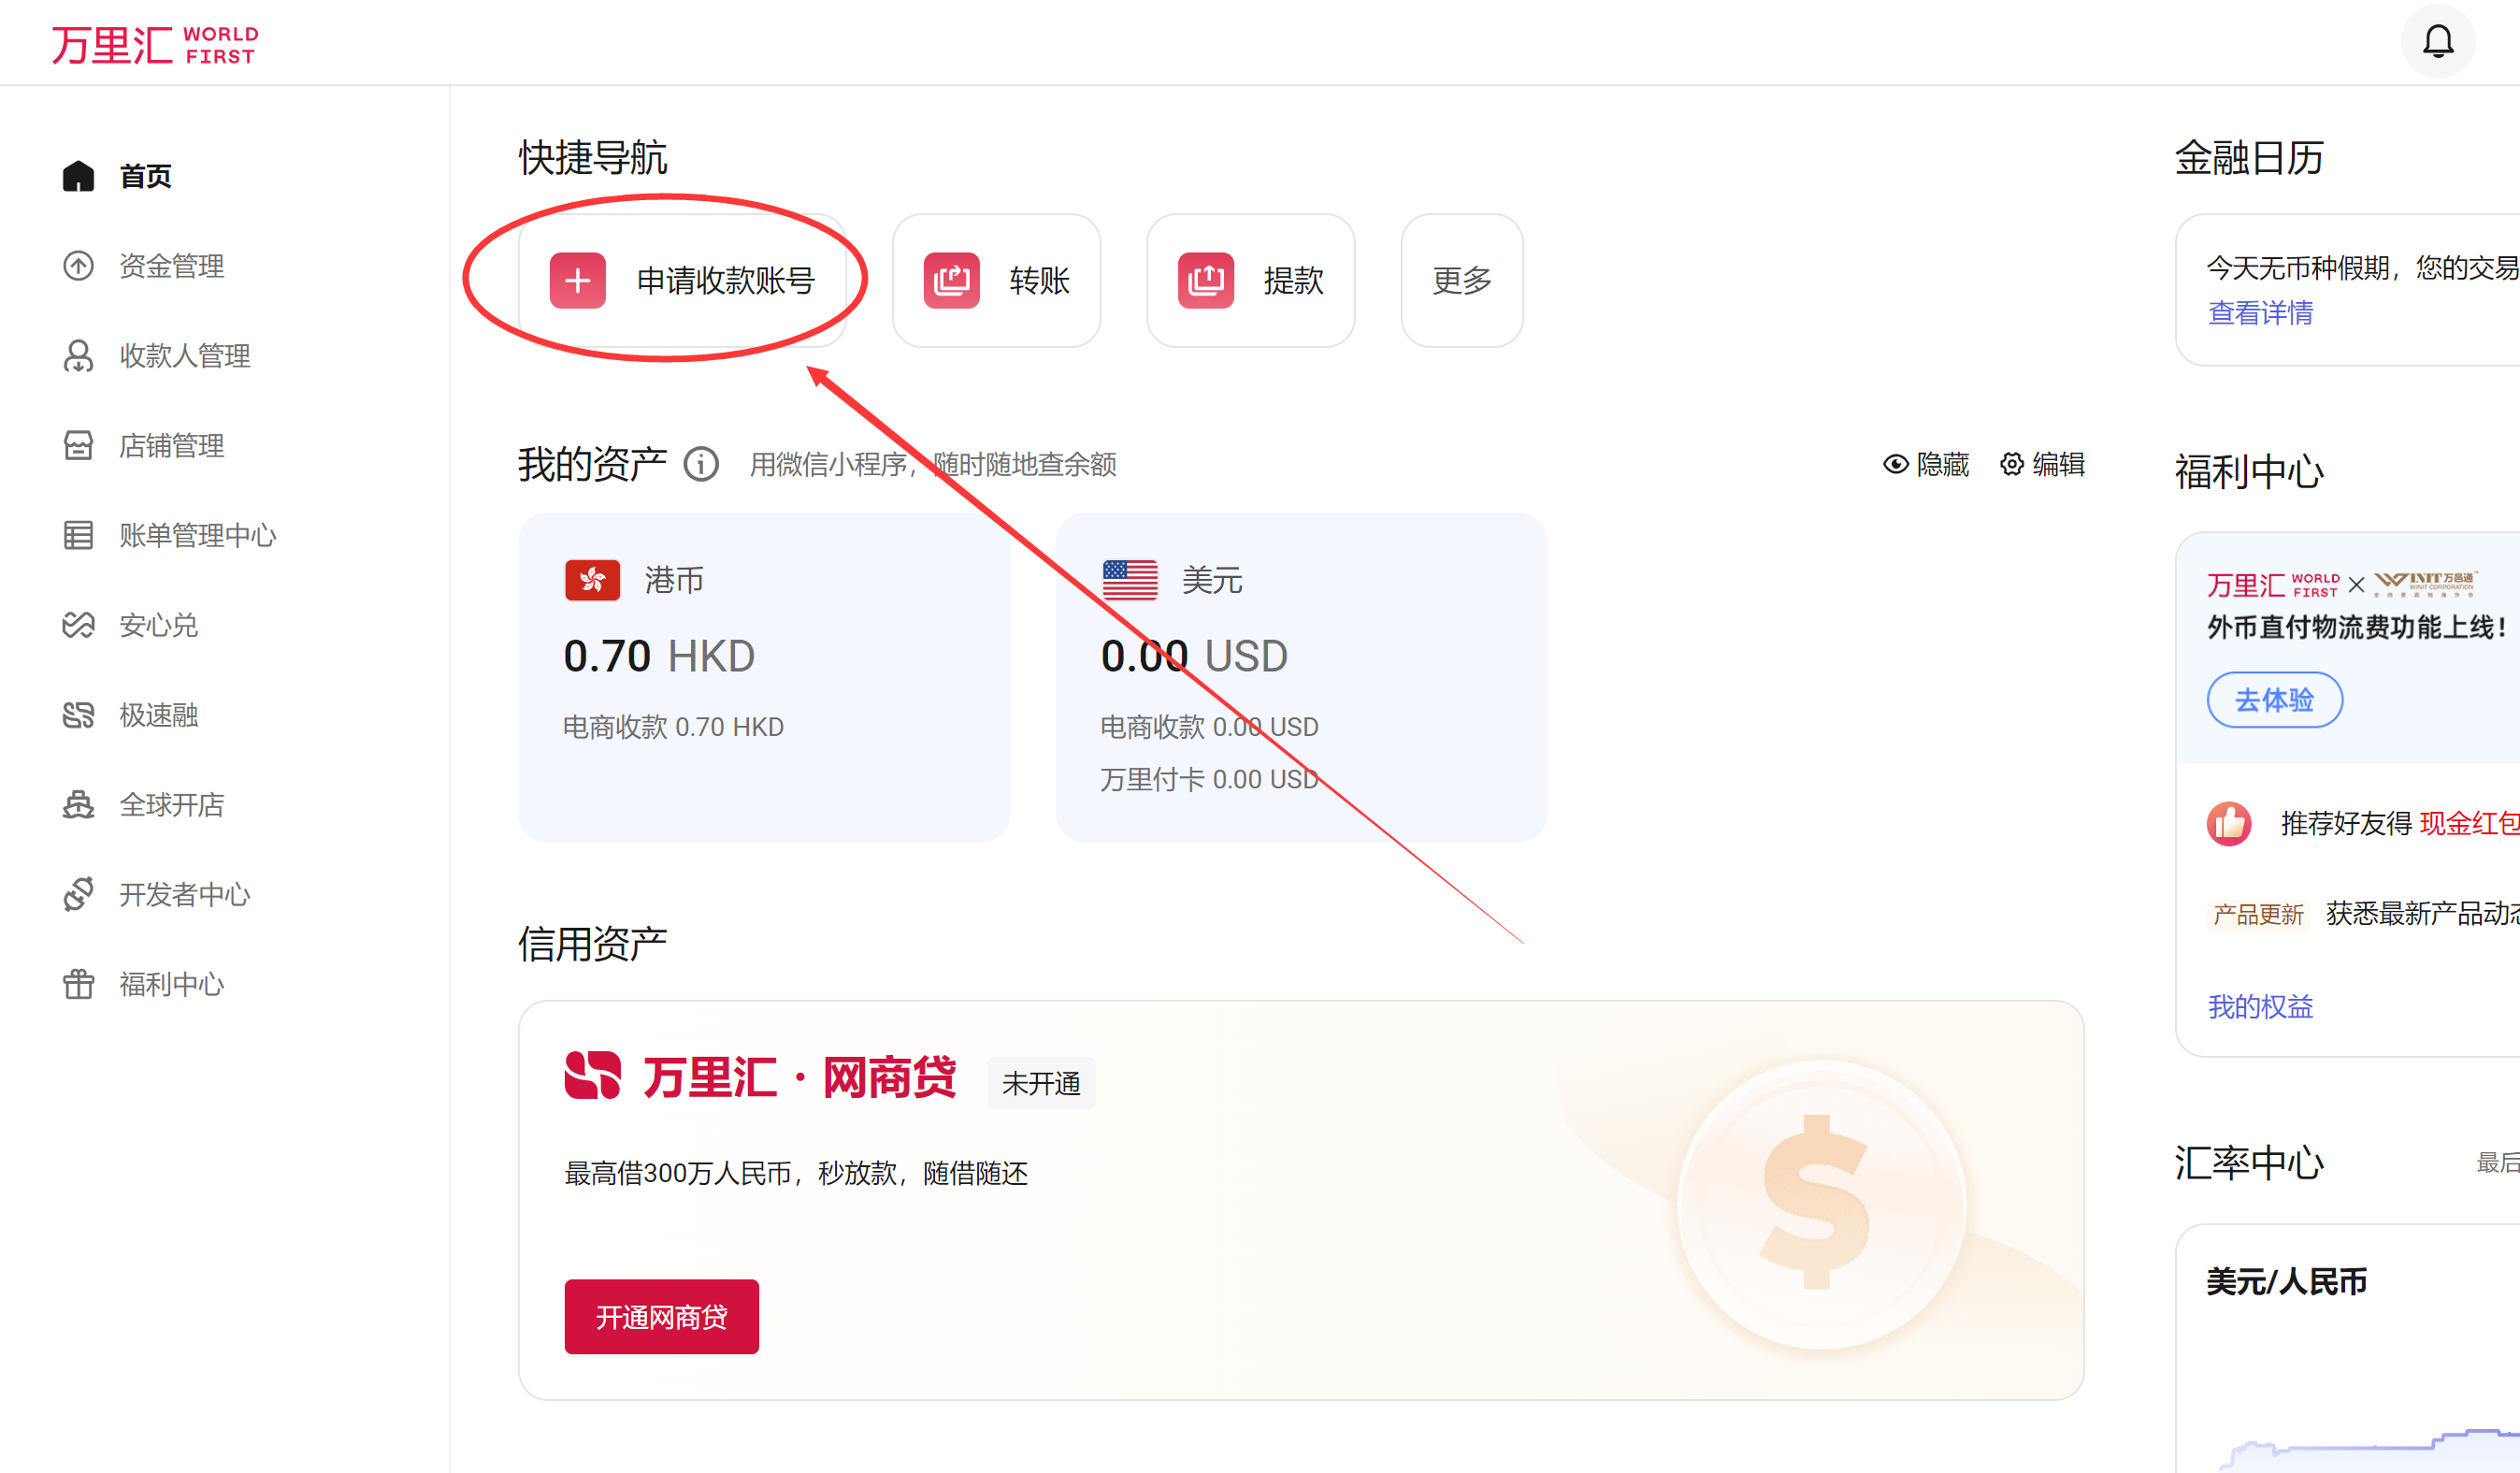
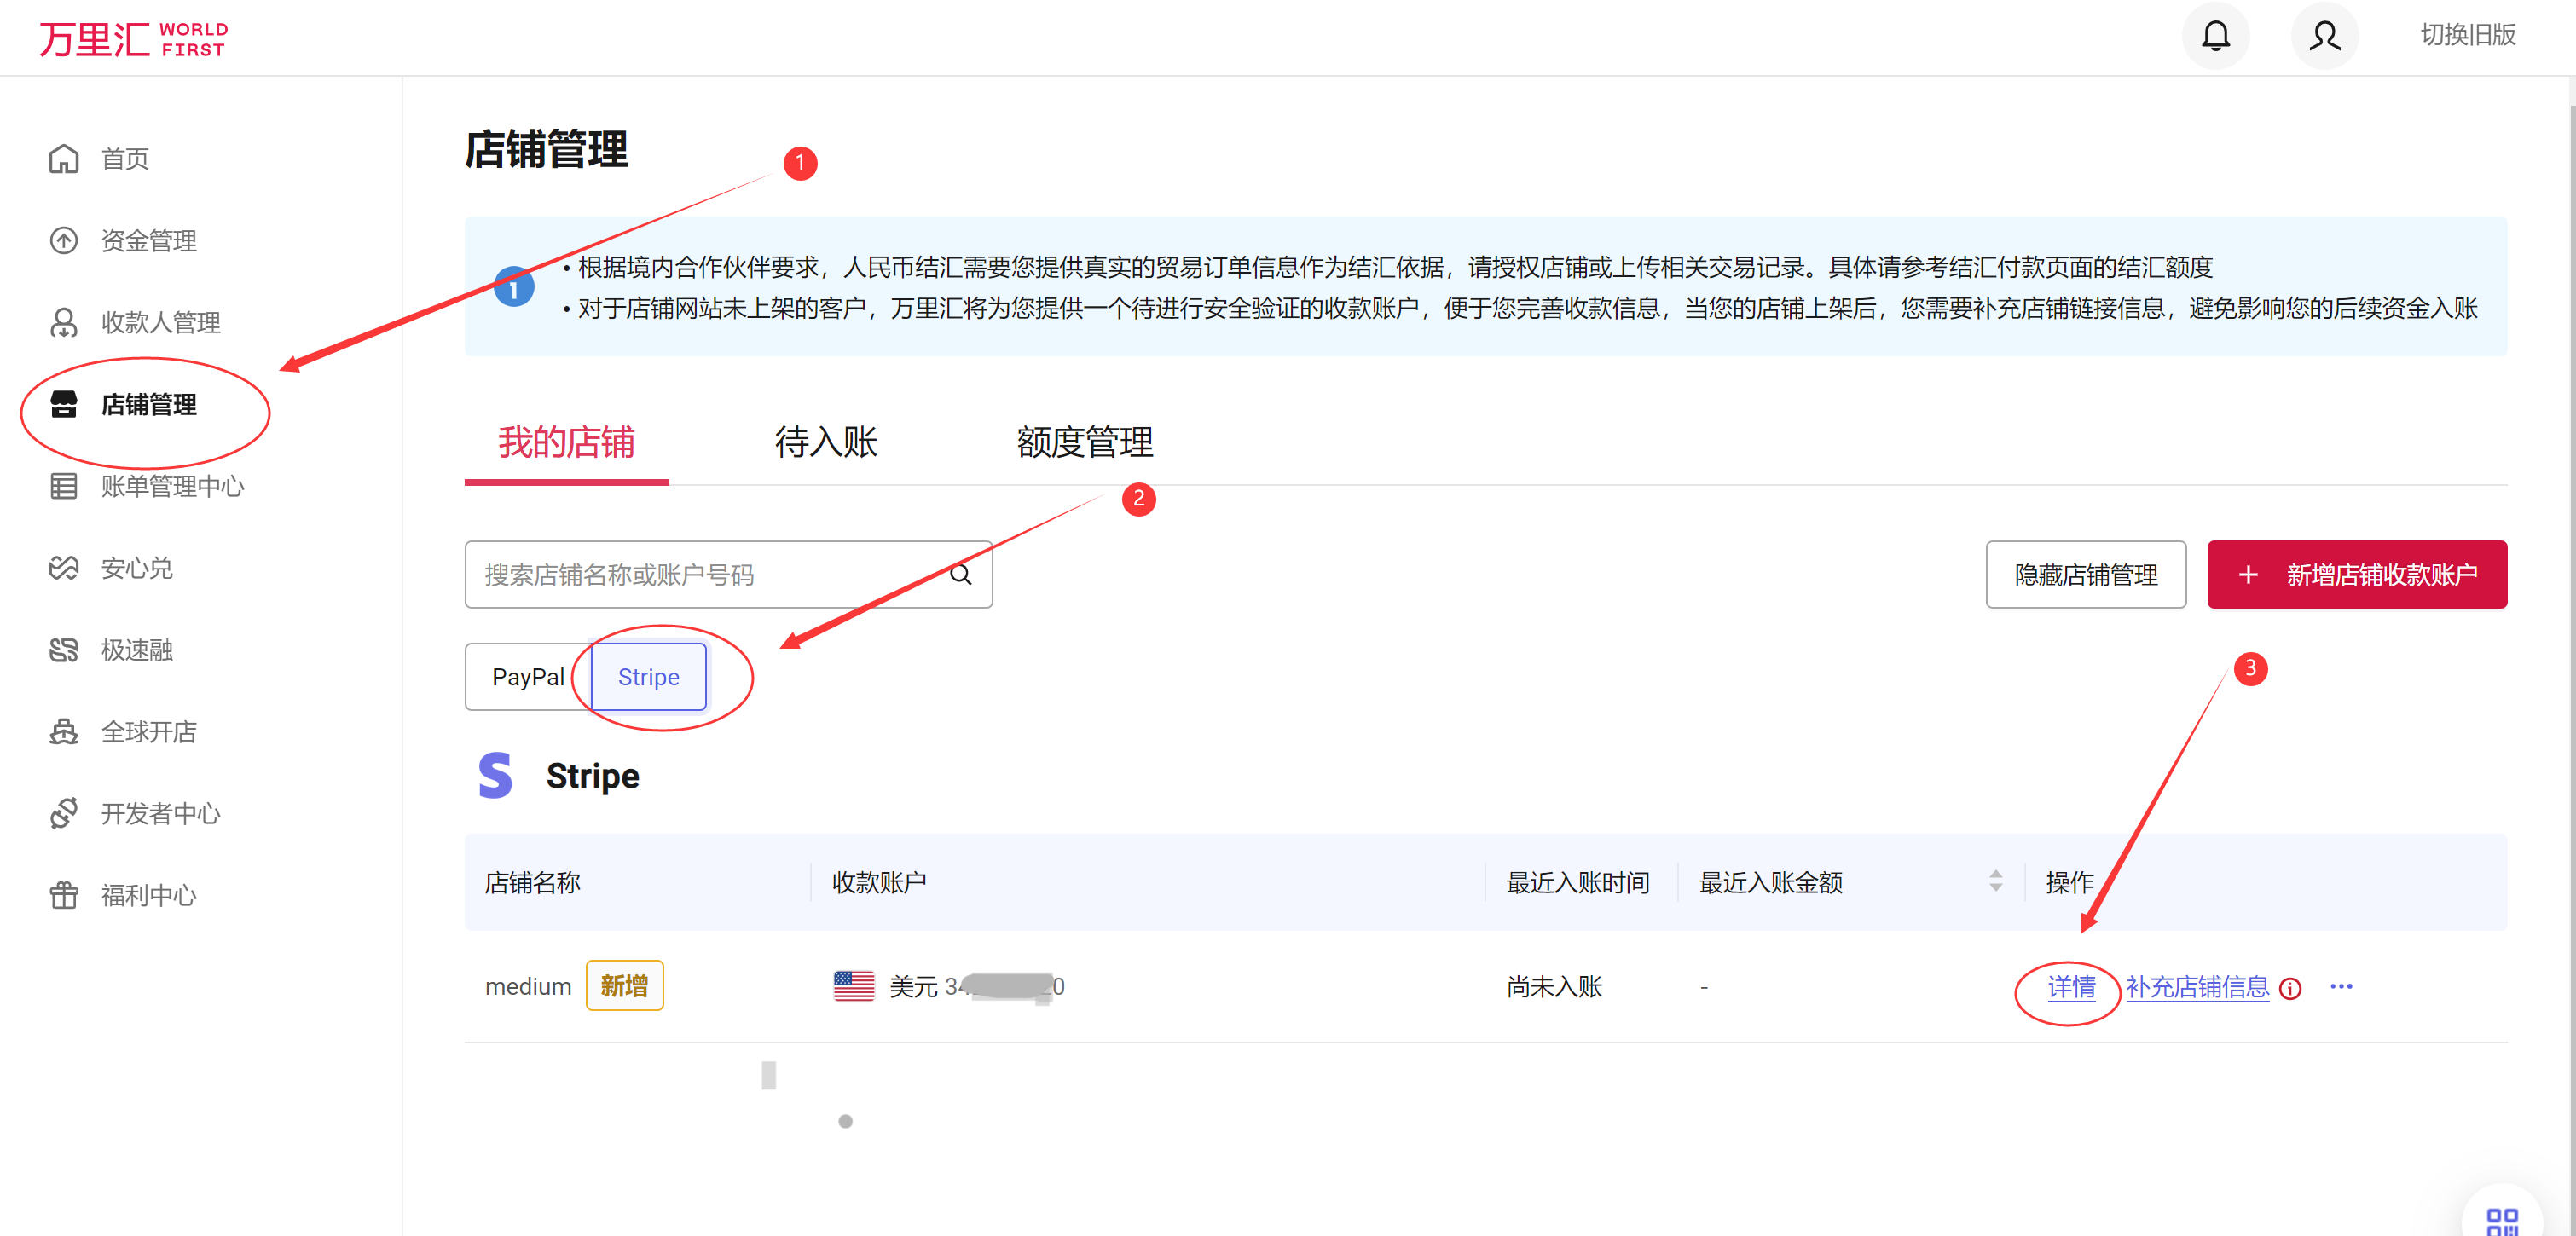
1.2 申请收款账号
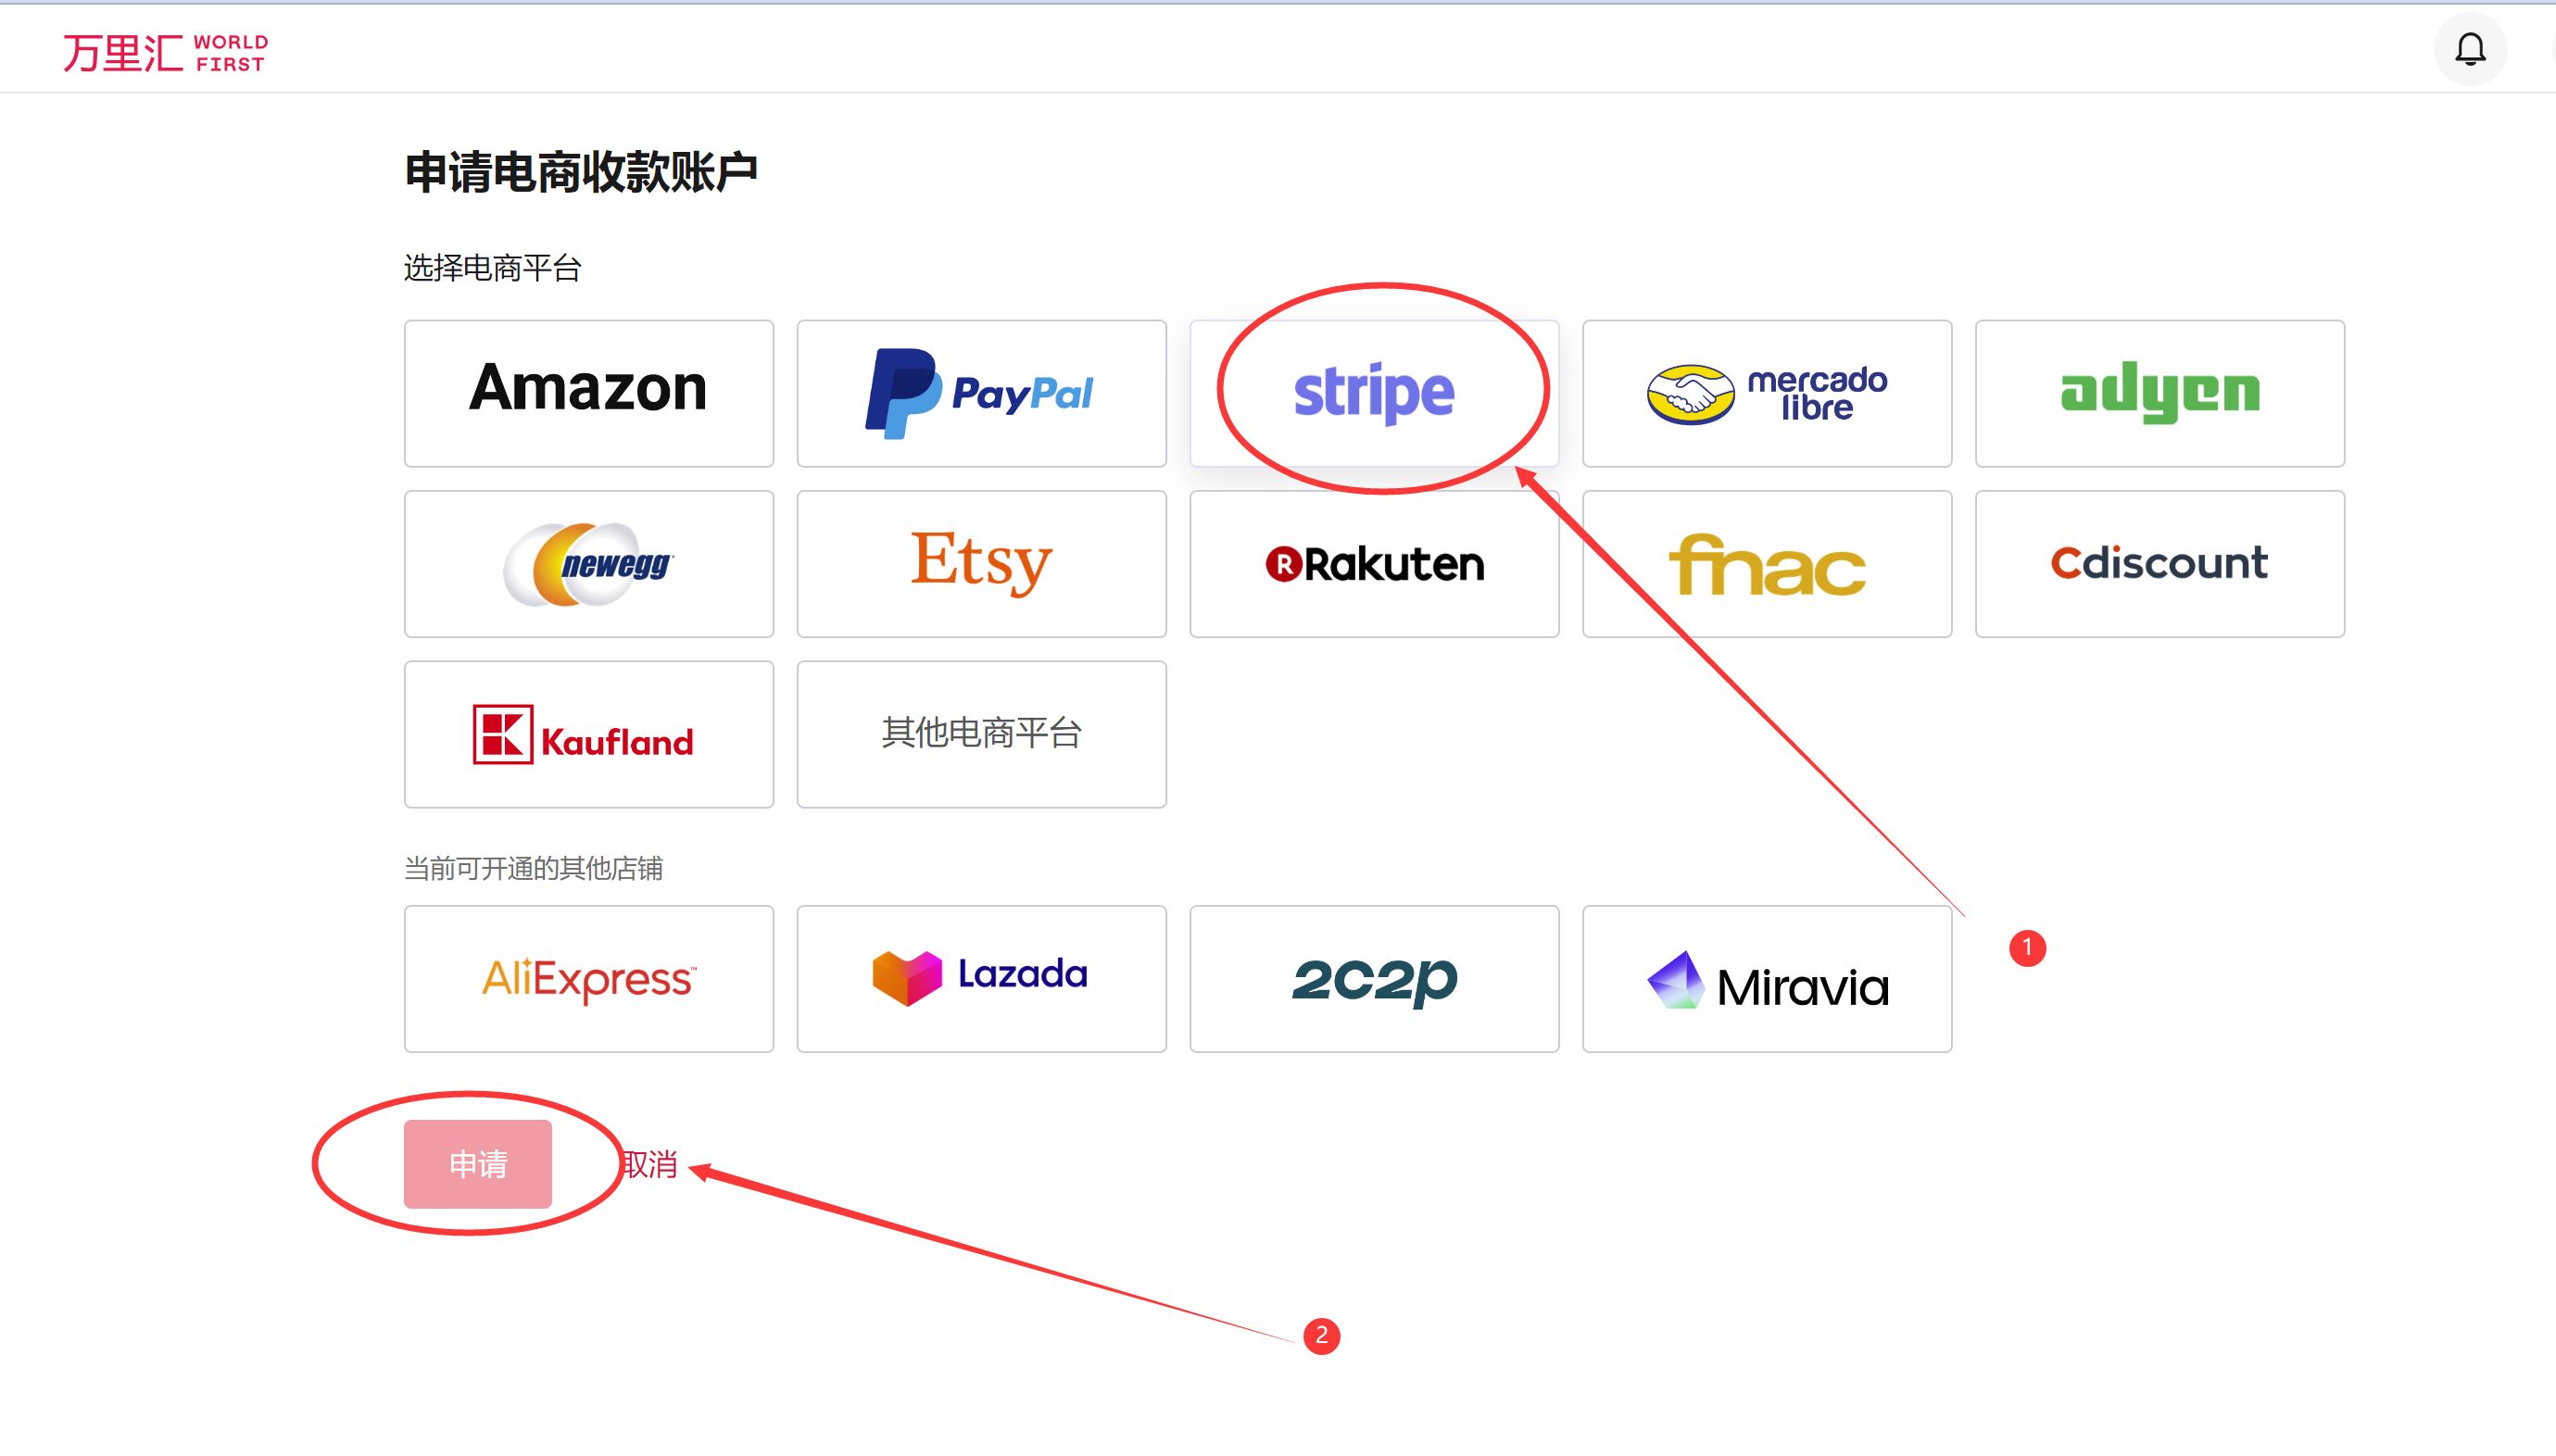
选择stripe
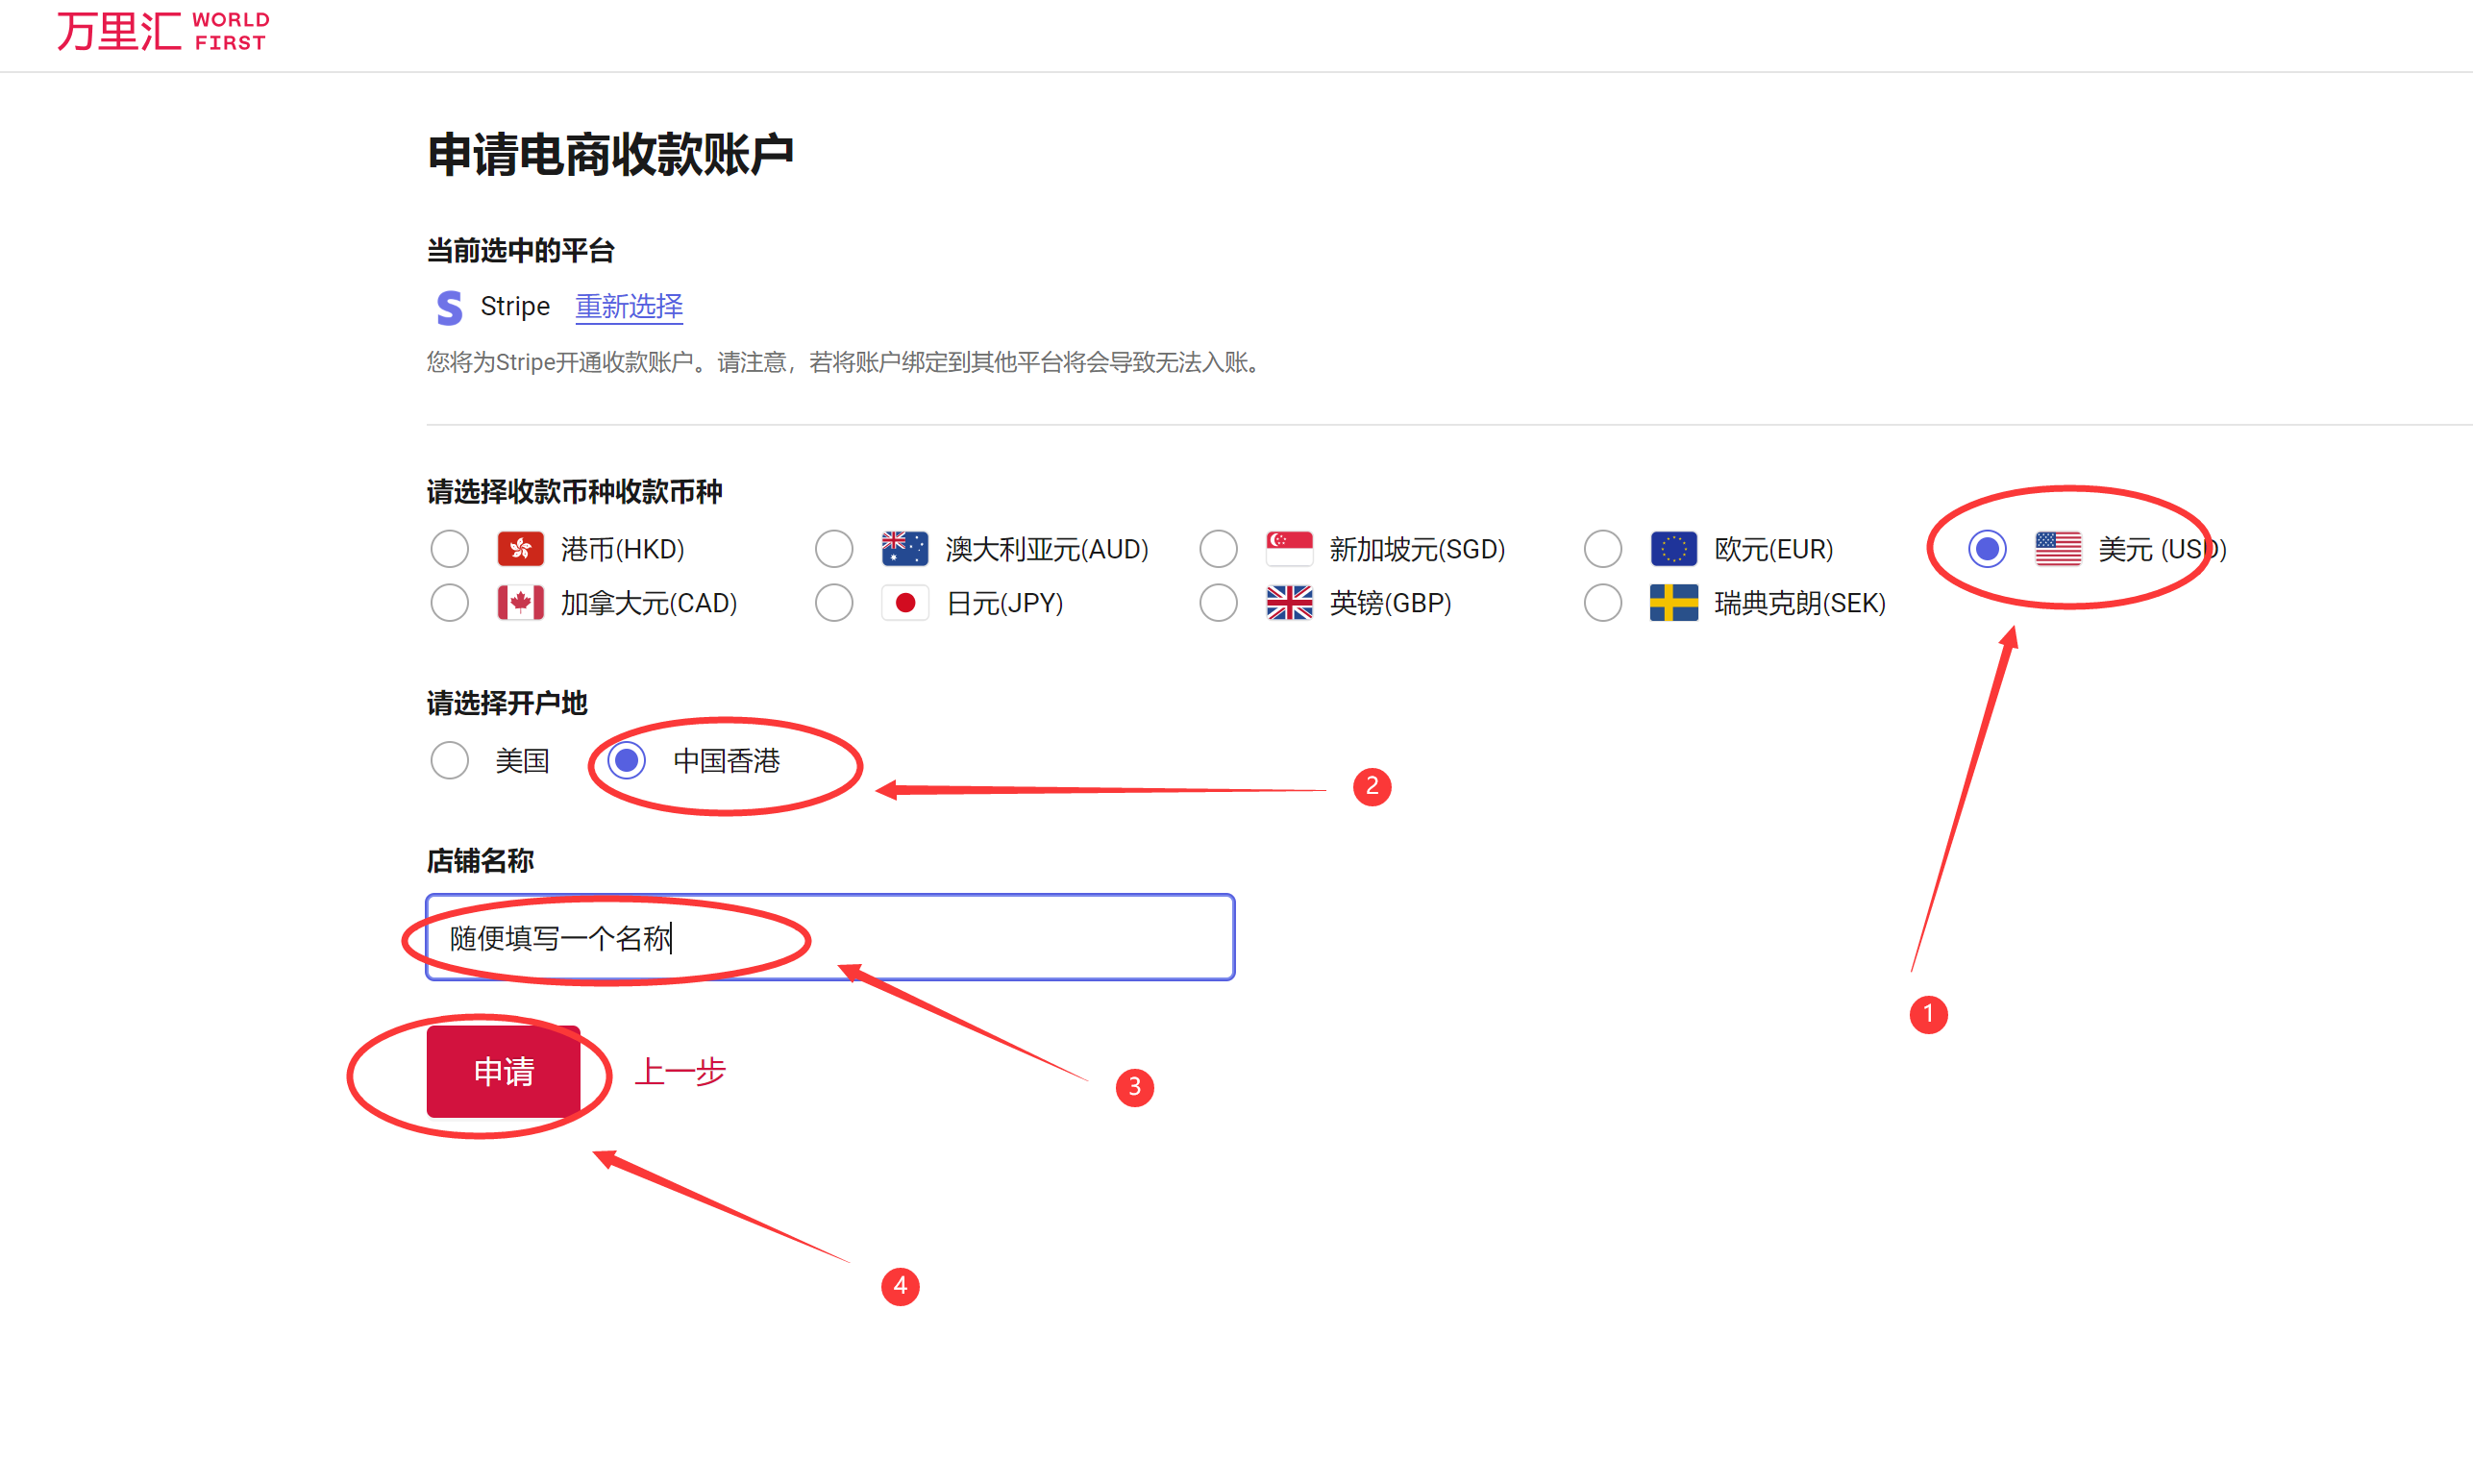
选择美元,香港。 店铺名称可以随便写
1.3 查看香港银行卡号
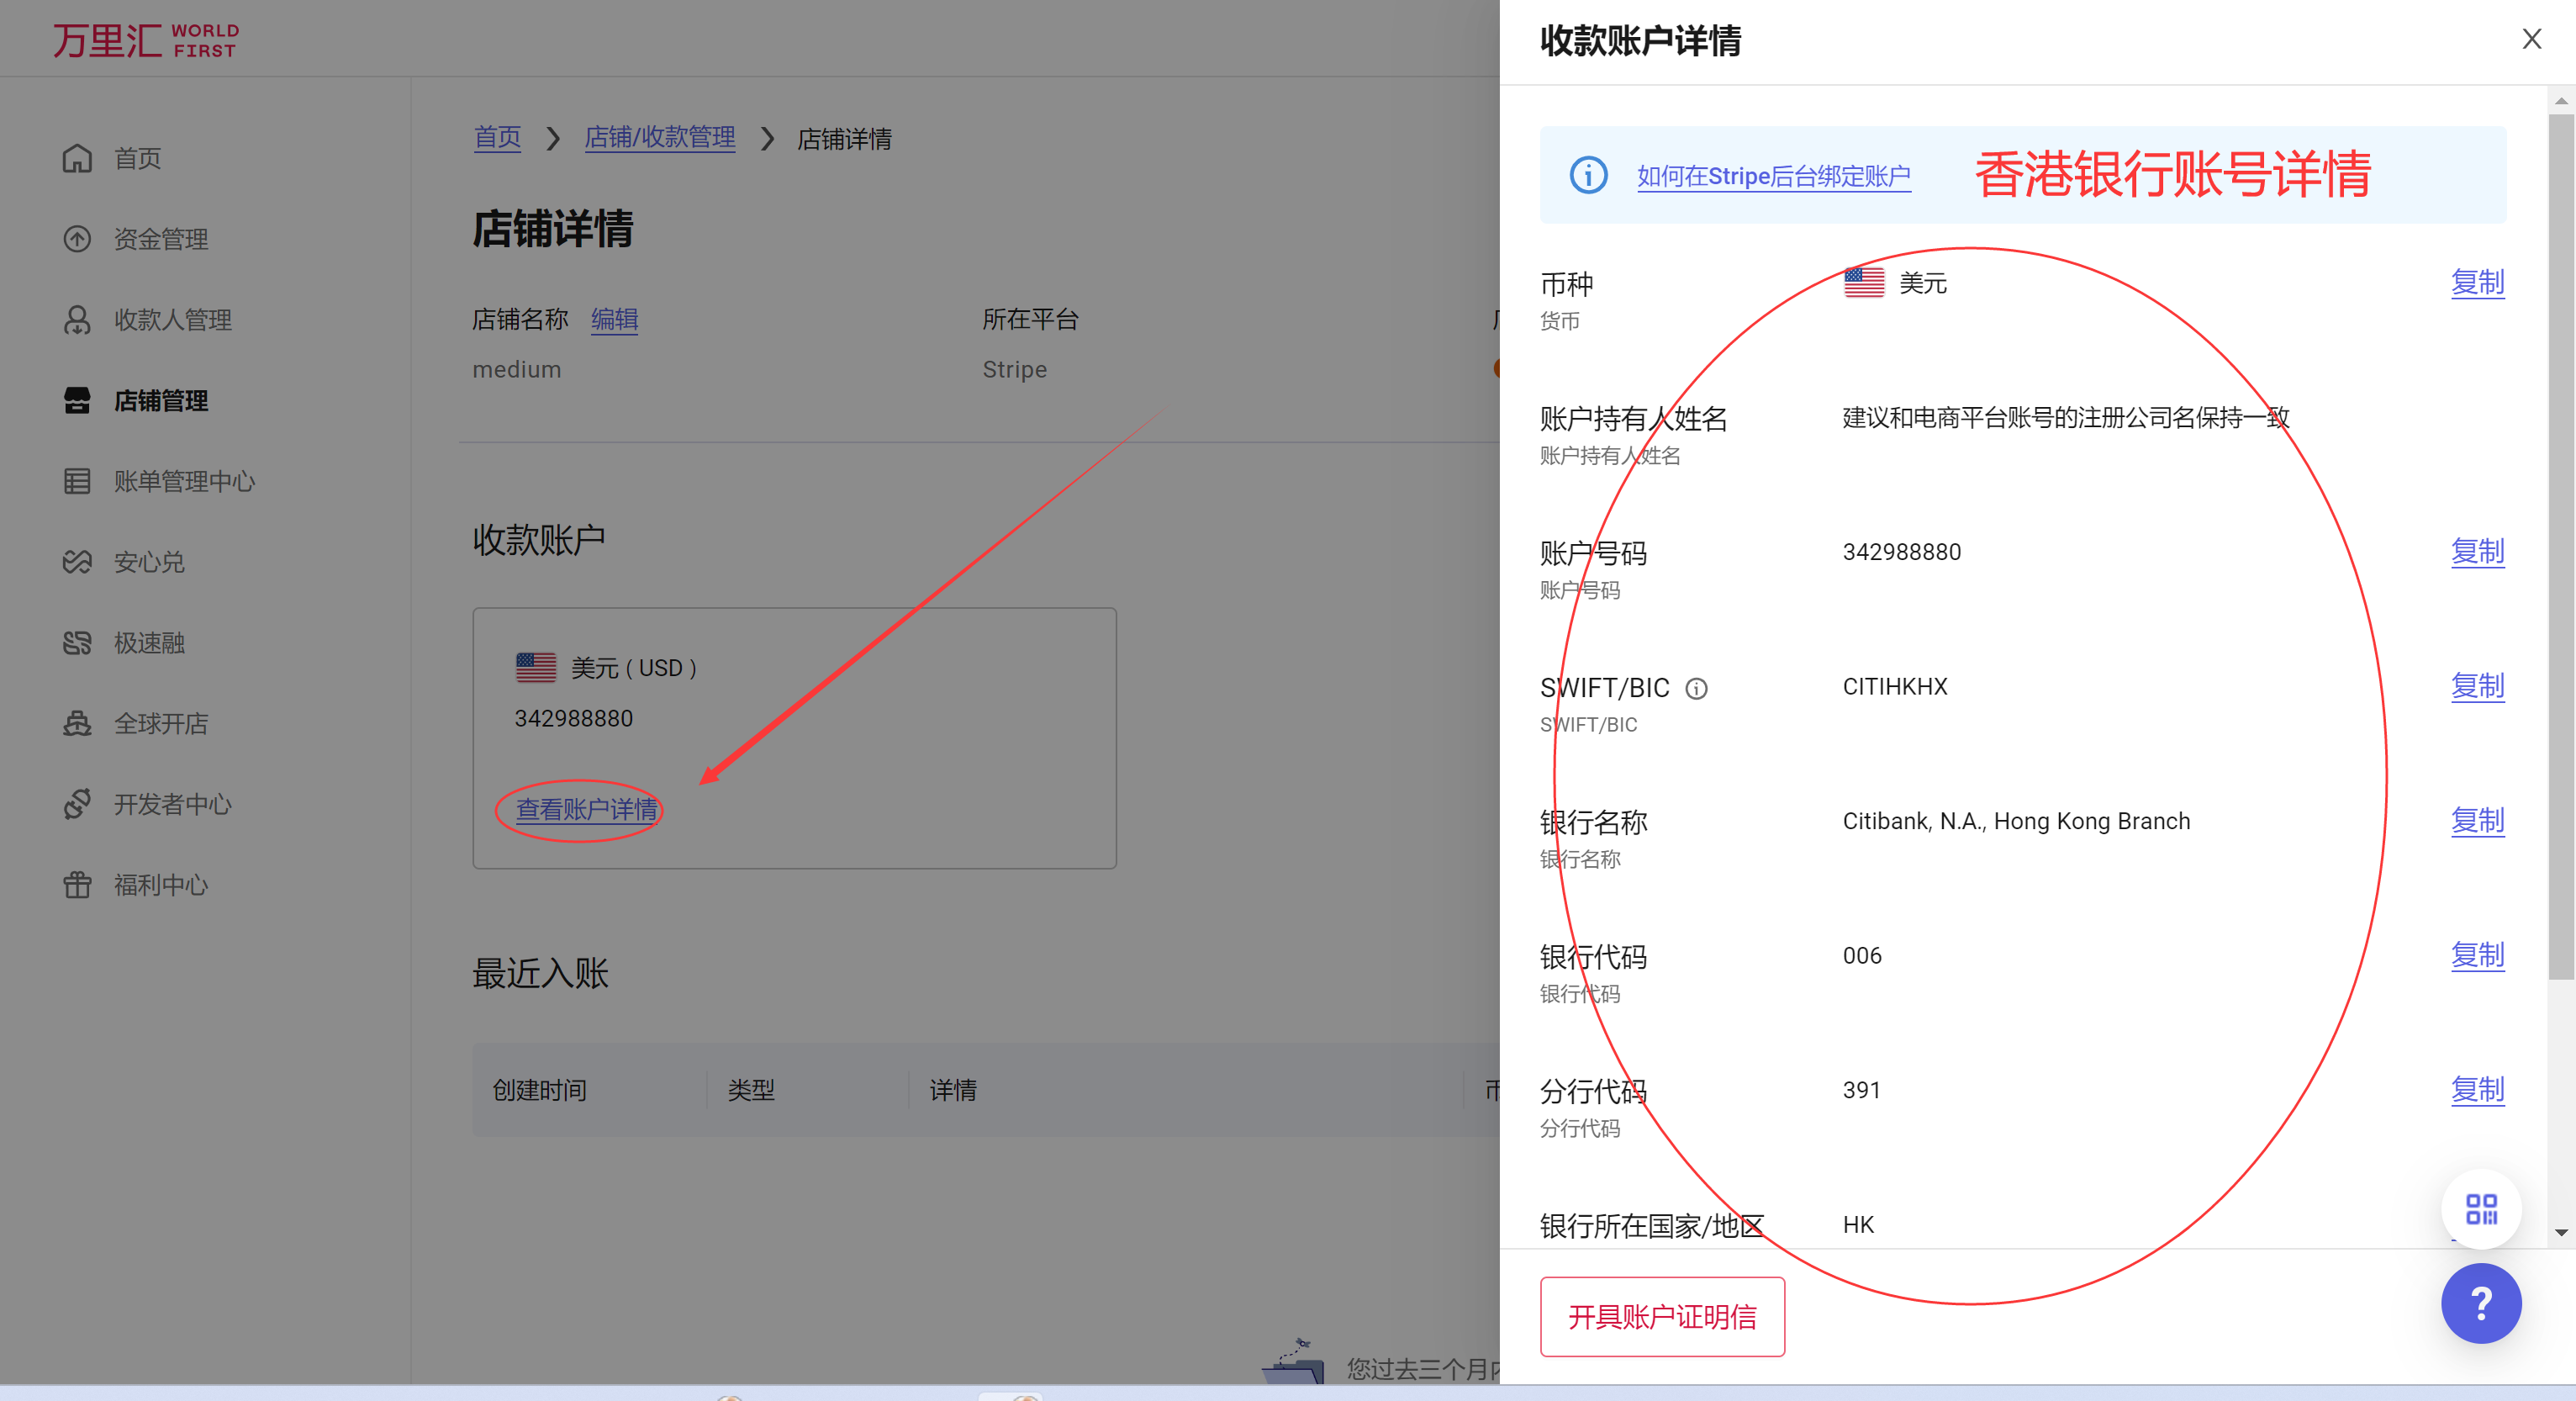
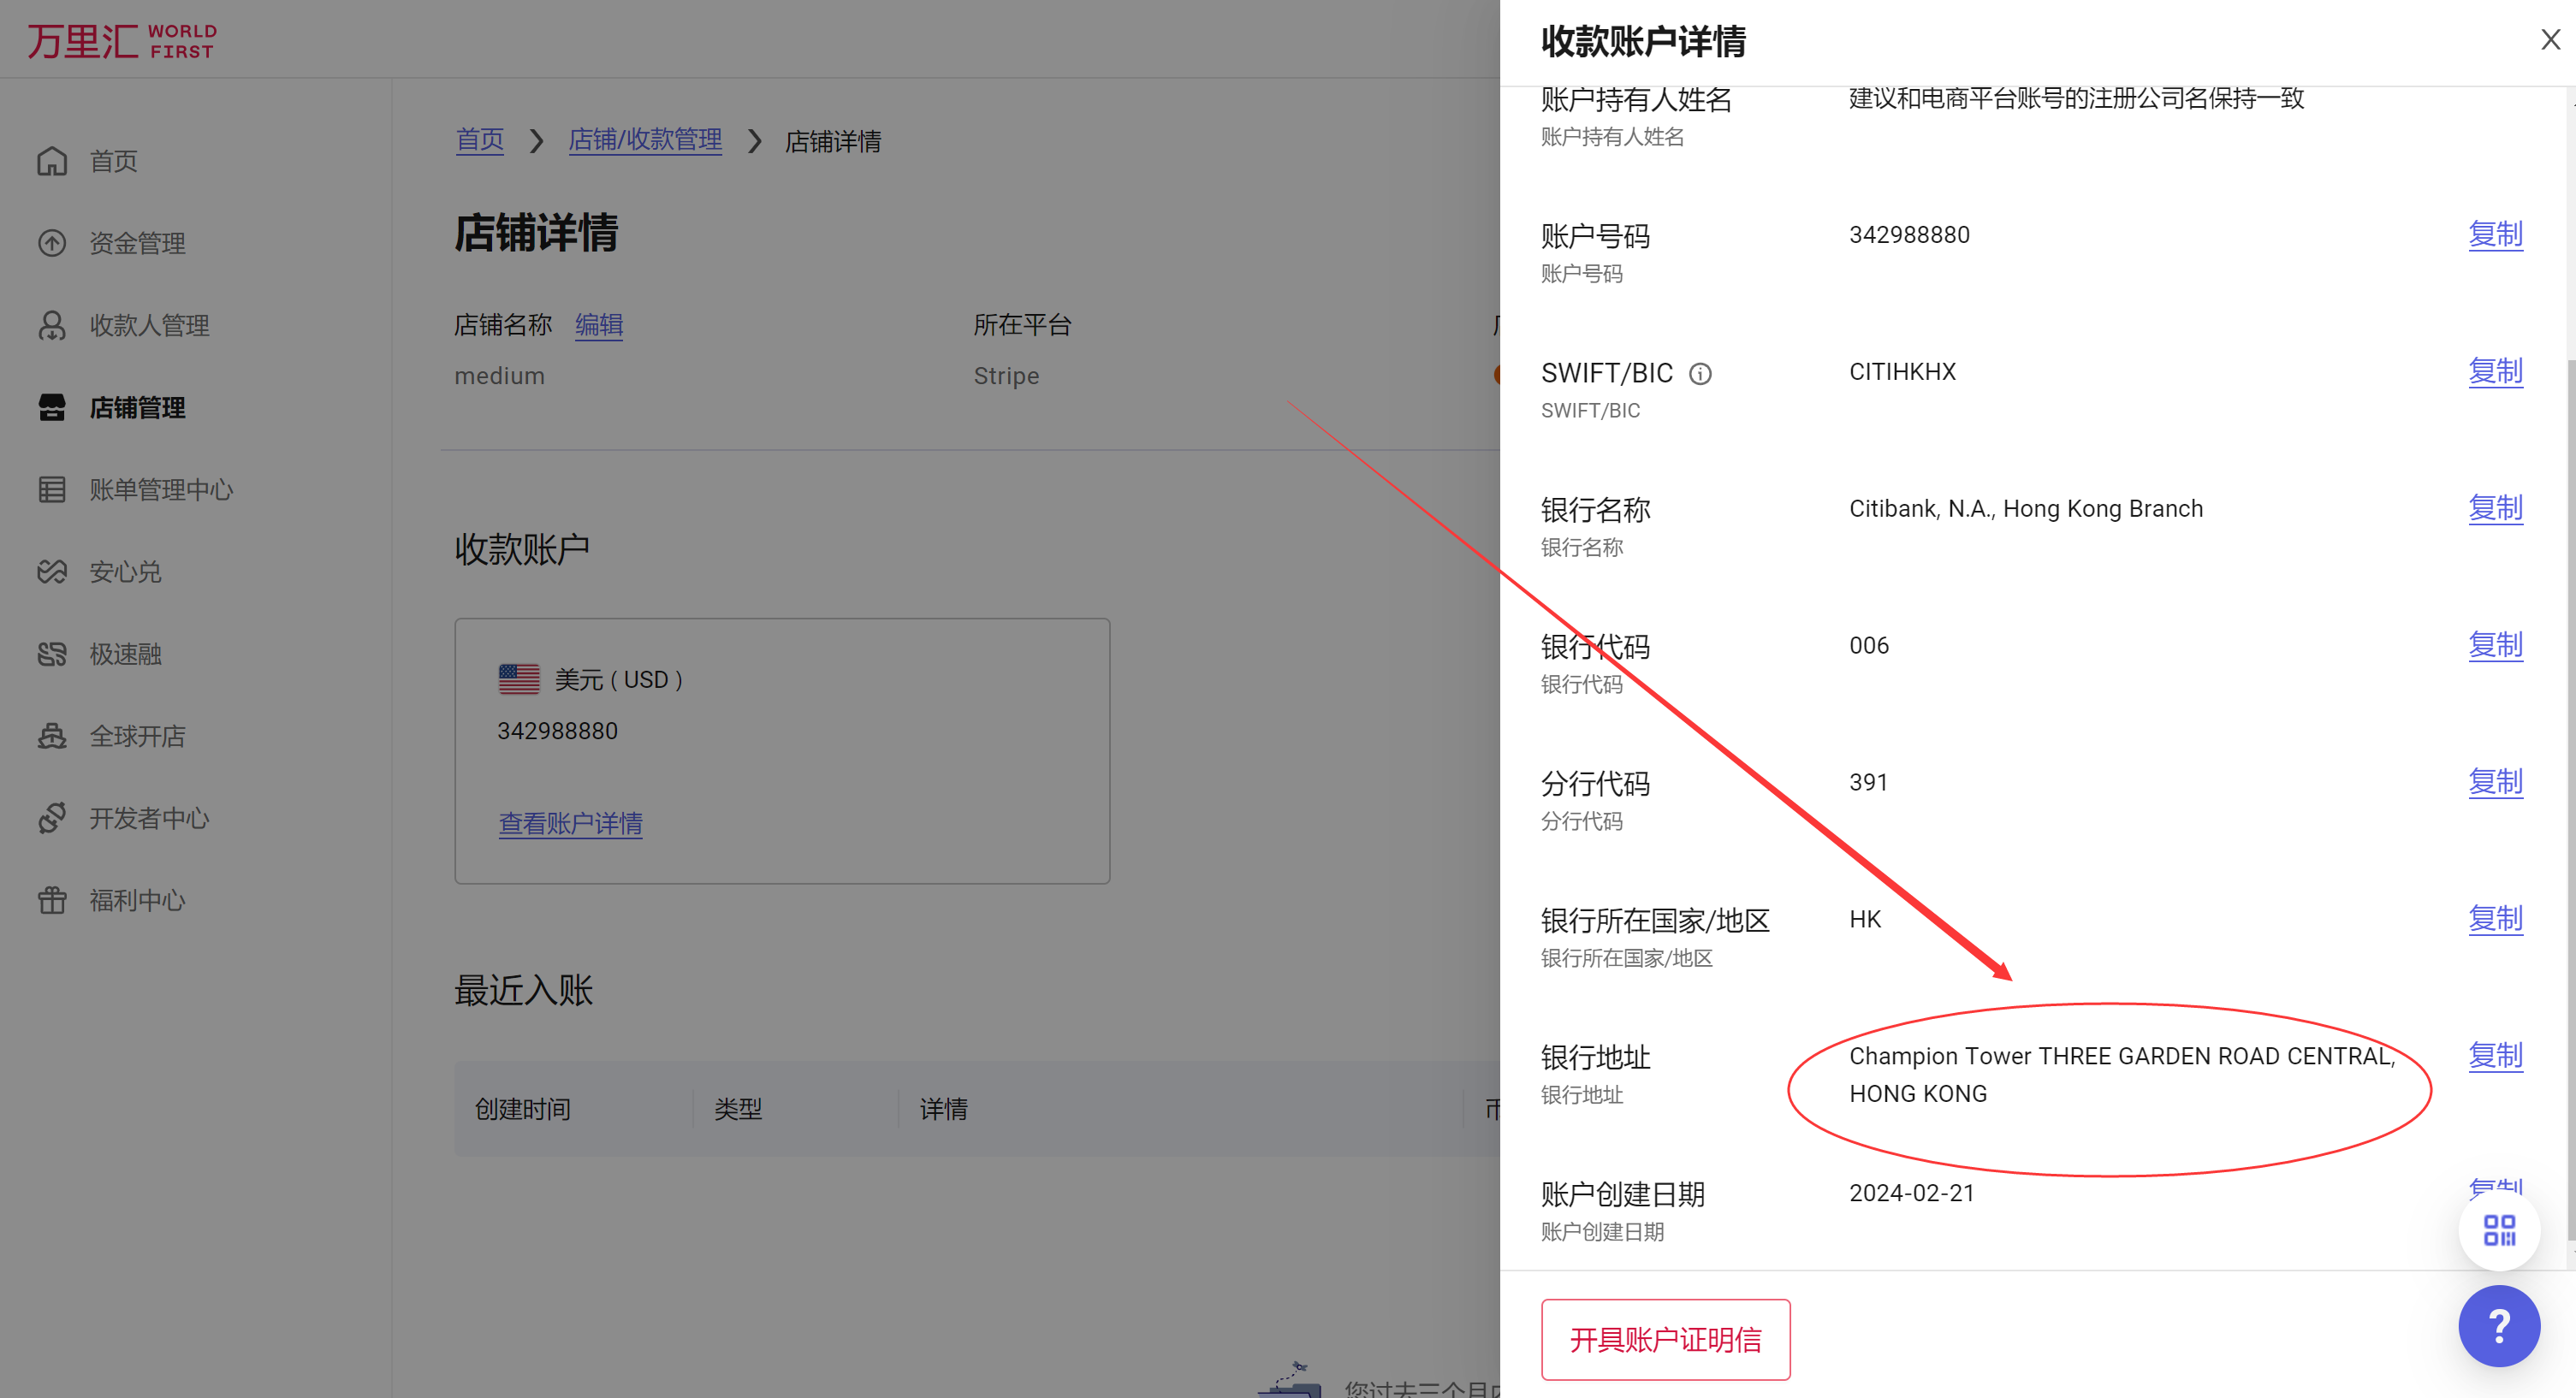
1.4 香港银行账号详情
点击“查看账户详情”, 就可以看到详细的花旗银行的账号信息。
2.注册stripe香港账户
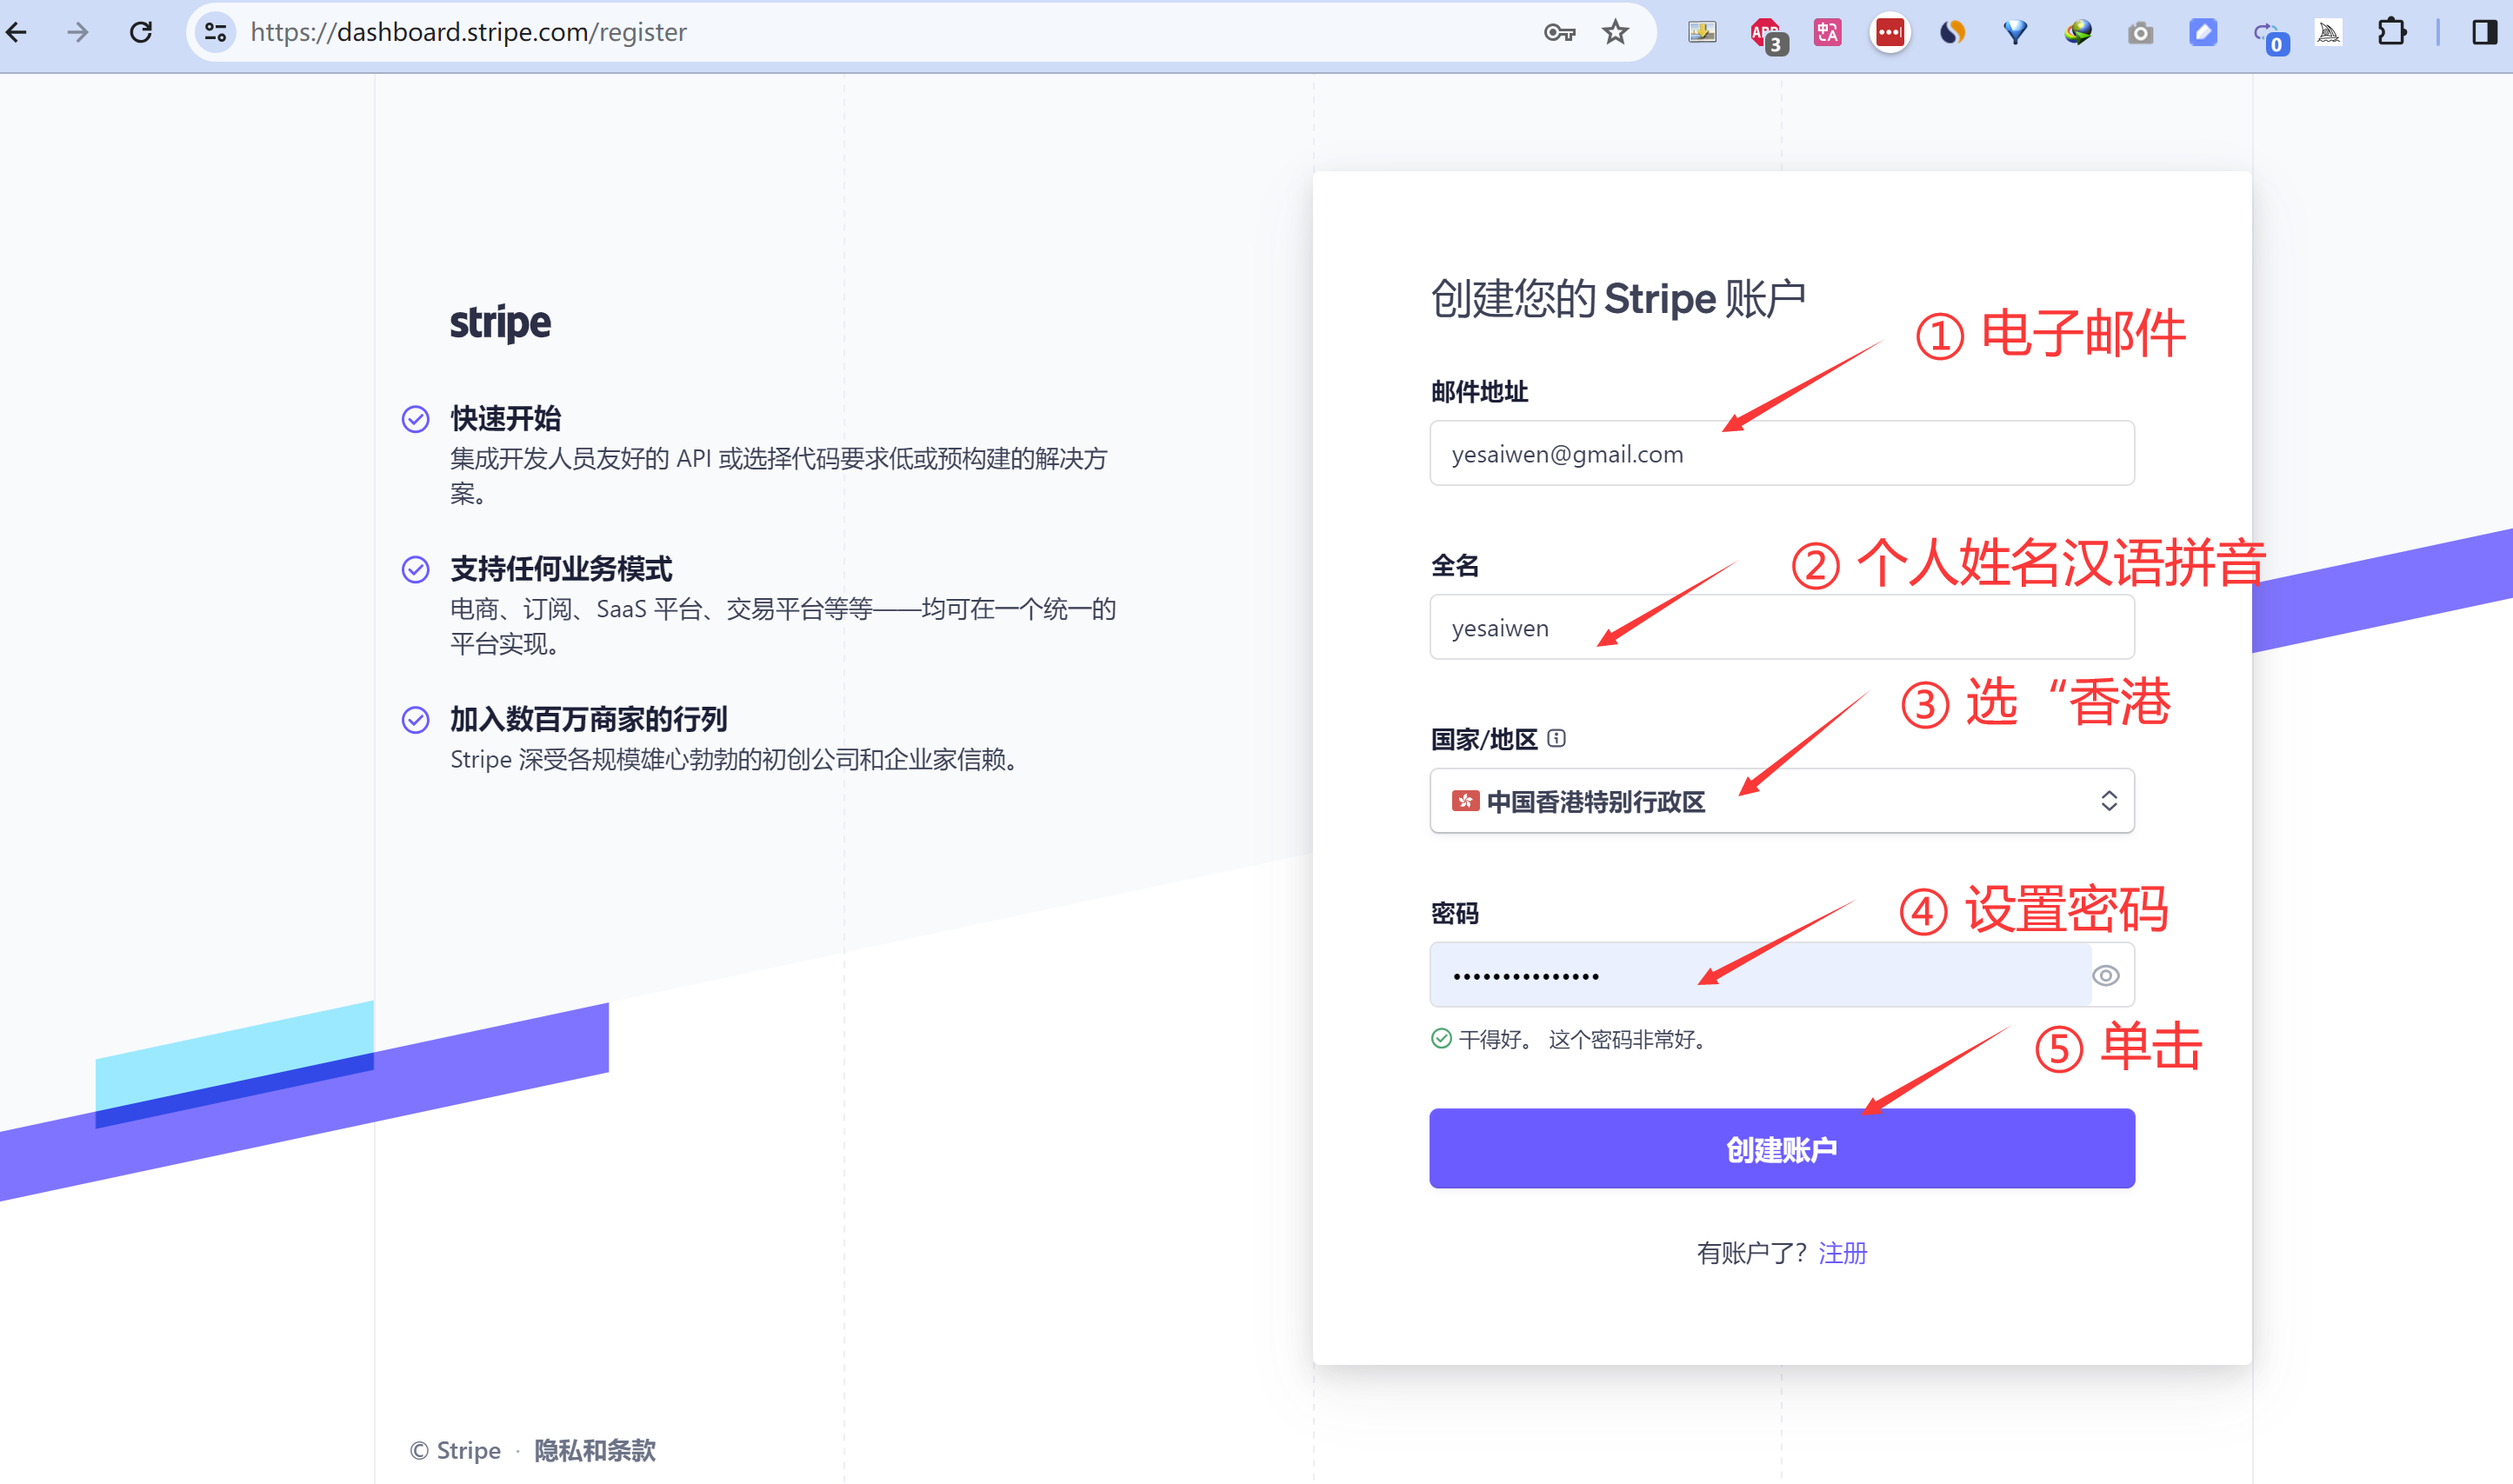
2.1 注册
https://dashboard.stripe.com/register
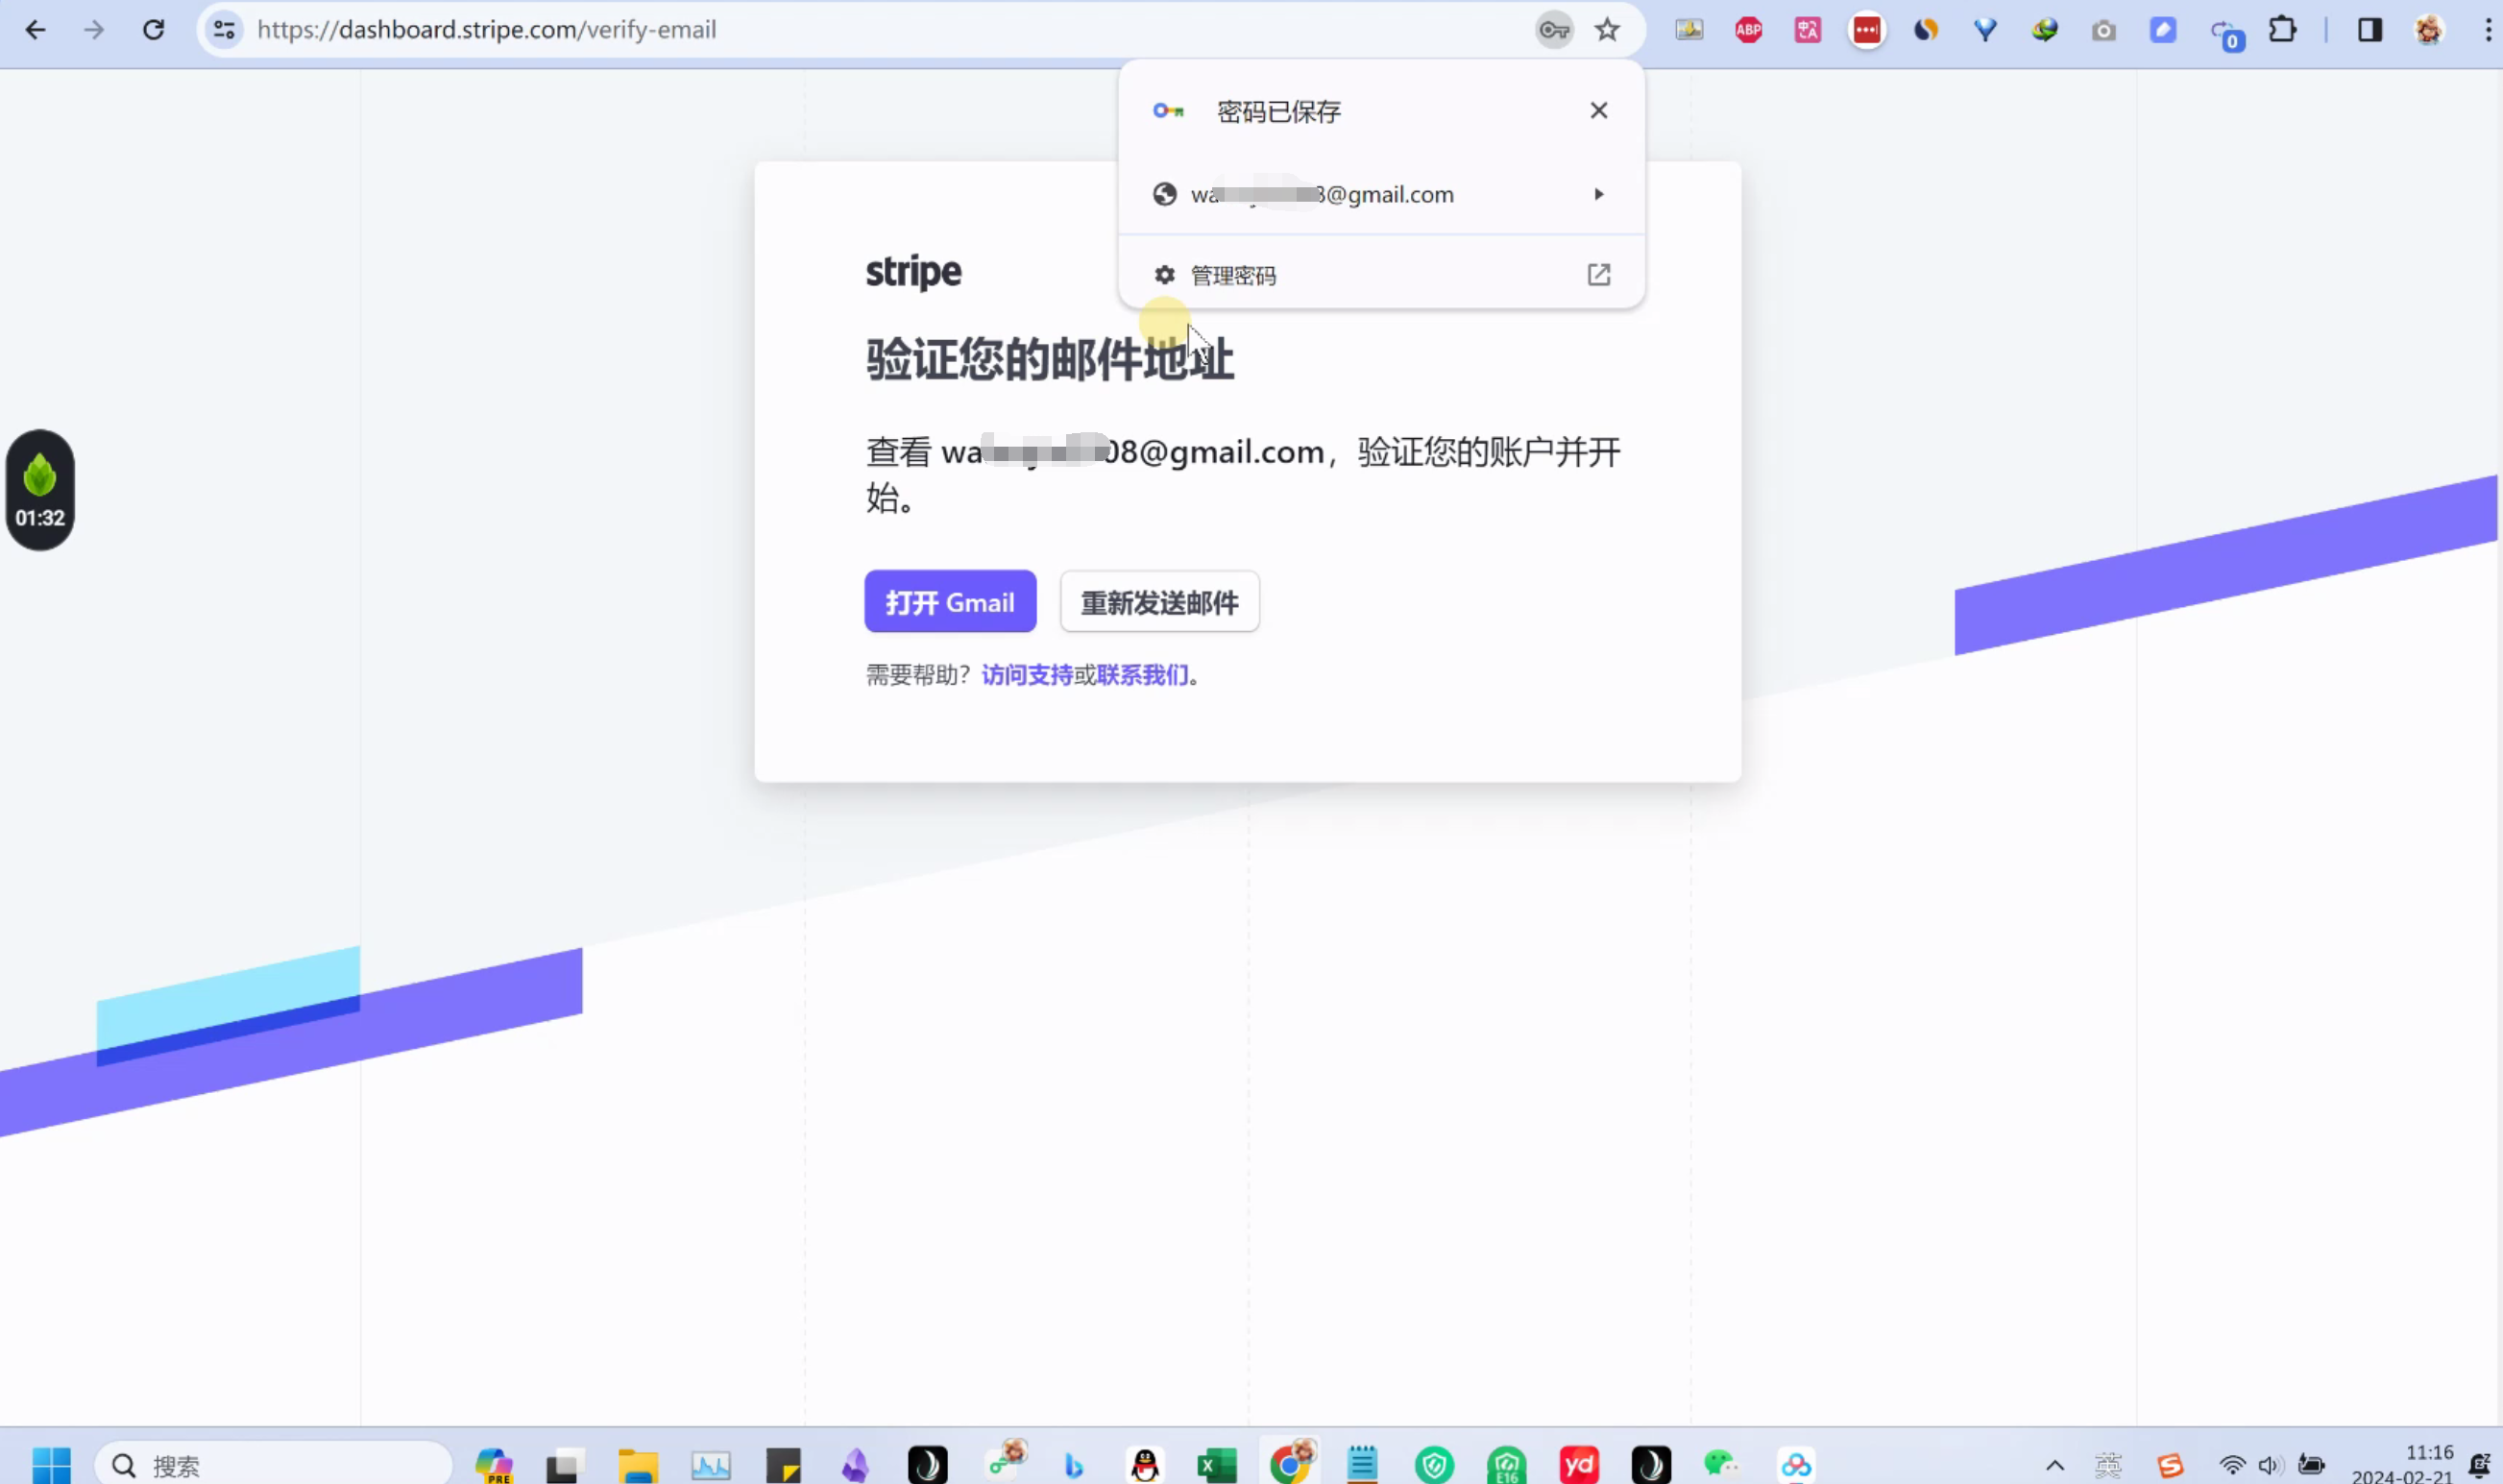
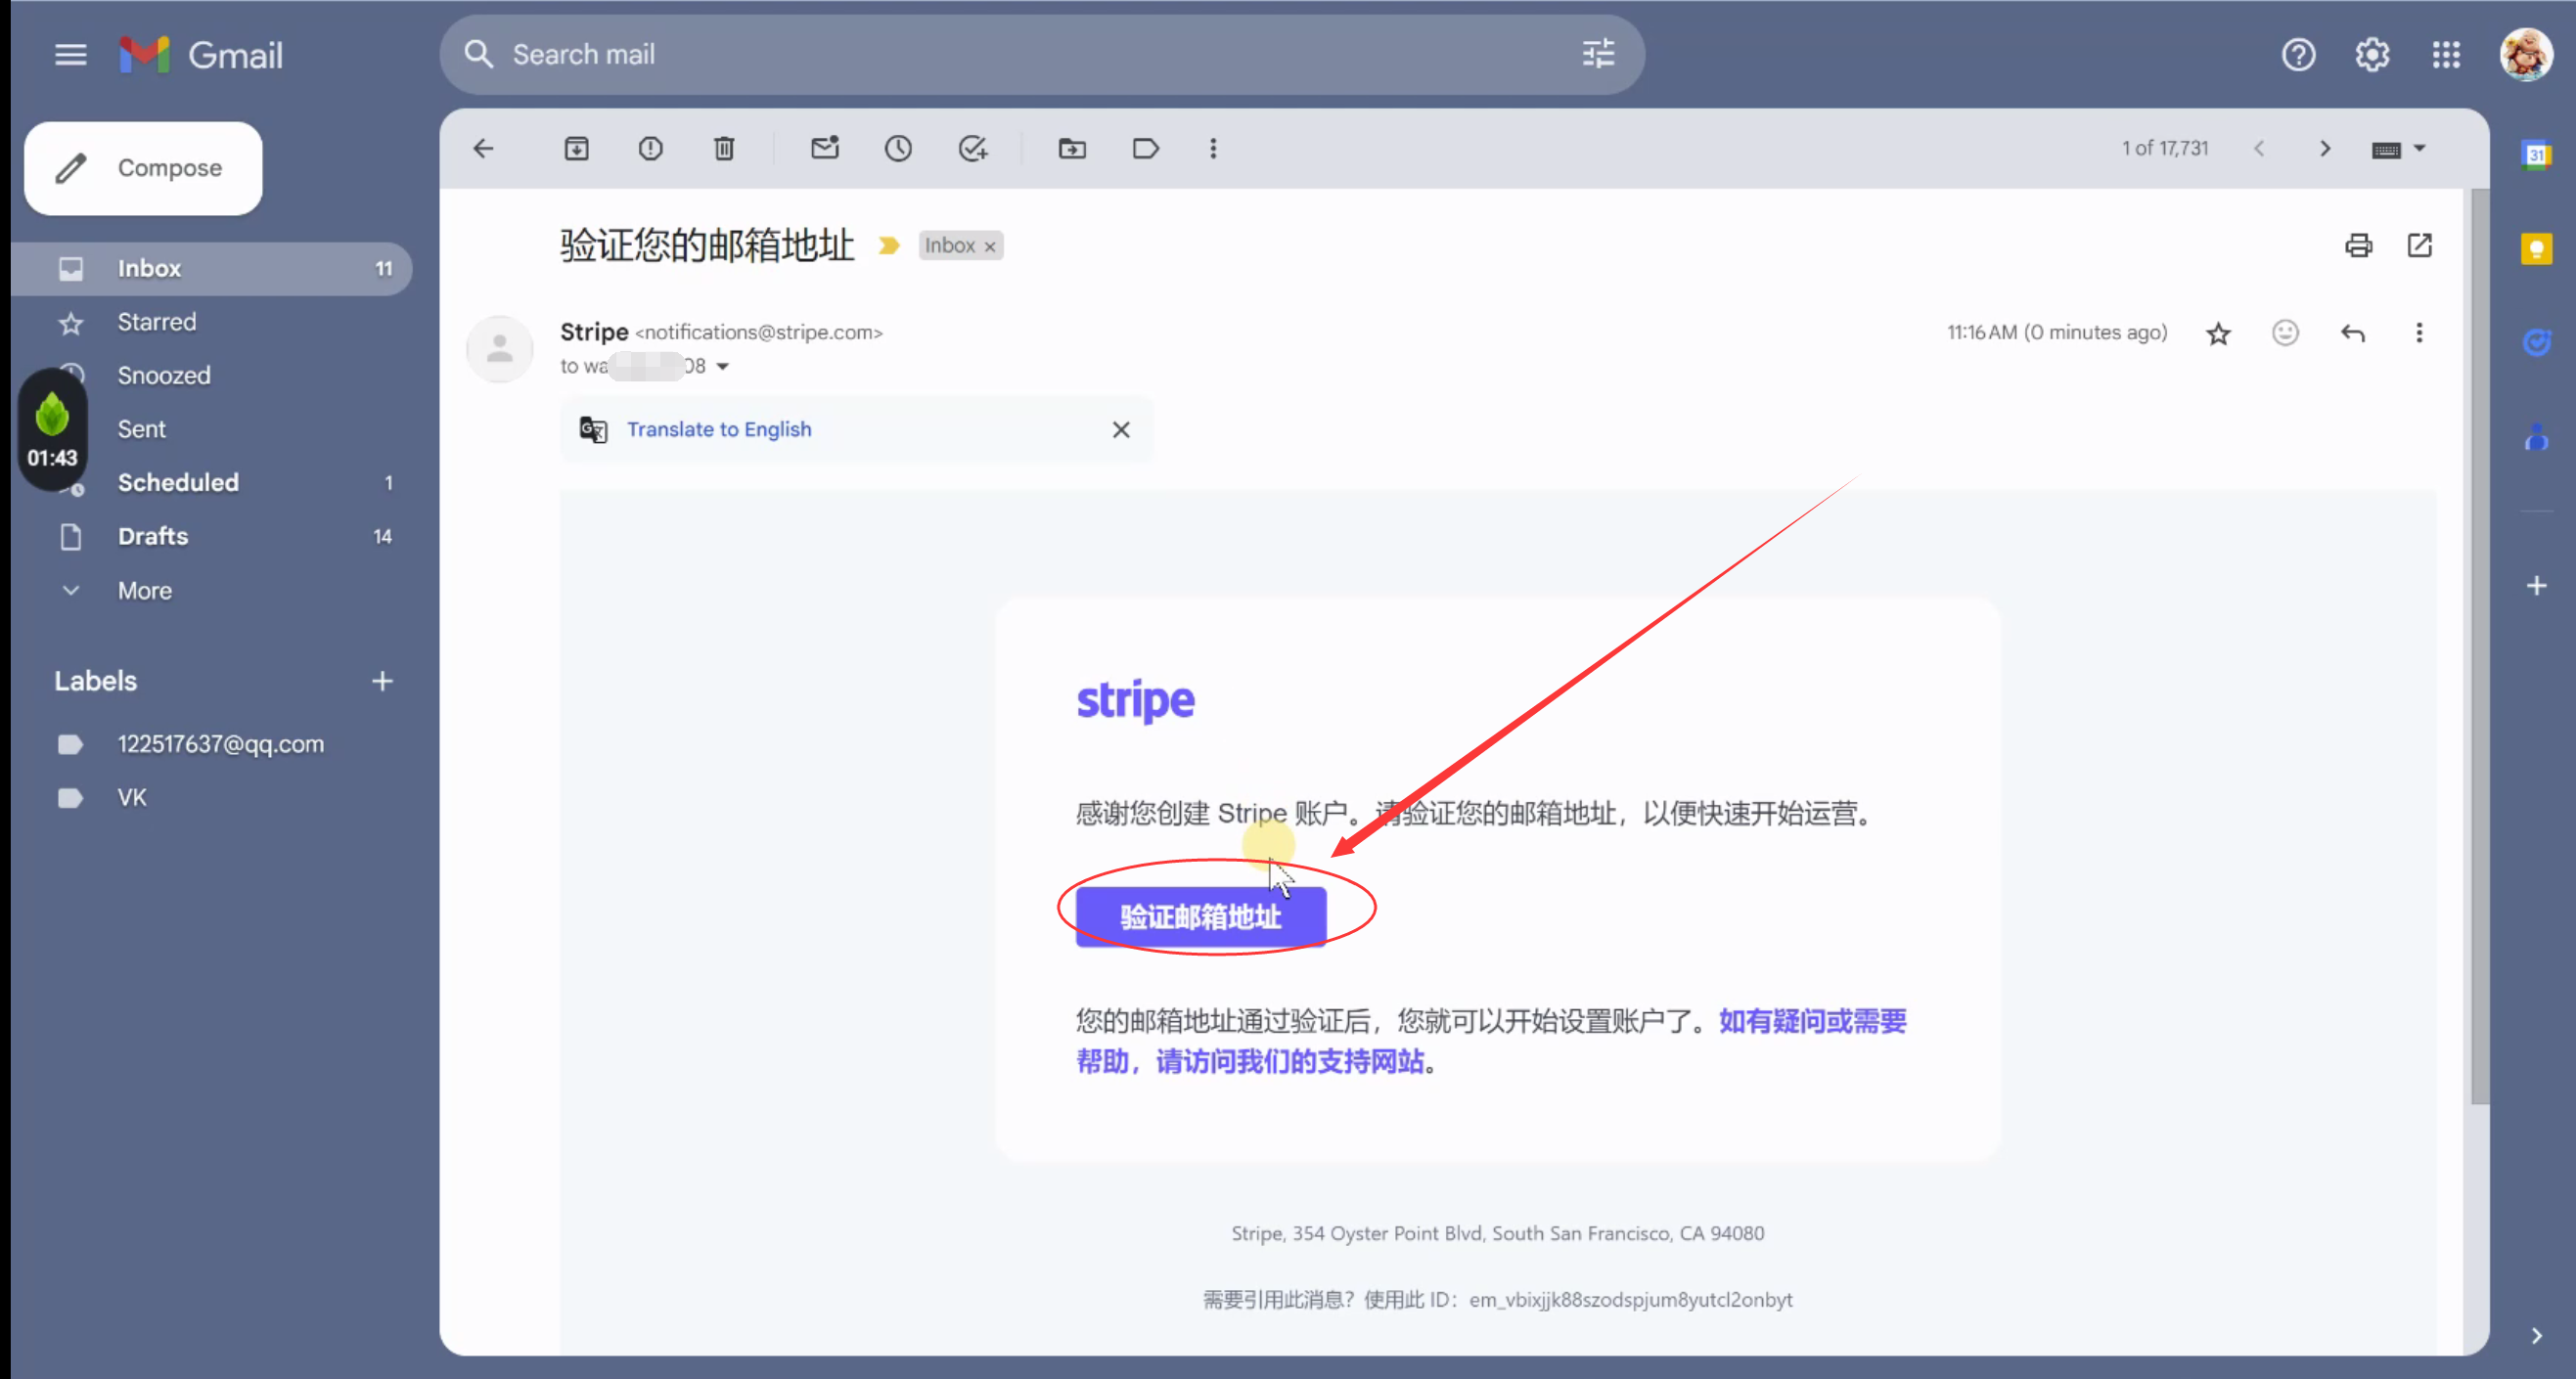
2.2 验证邮箱
打开自己的邮箱,验证一查就可以了
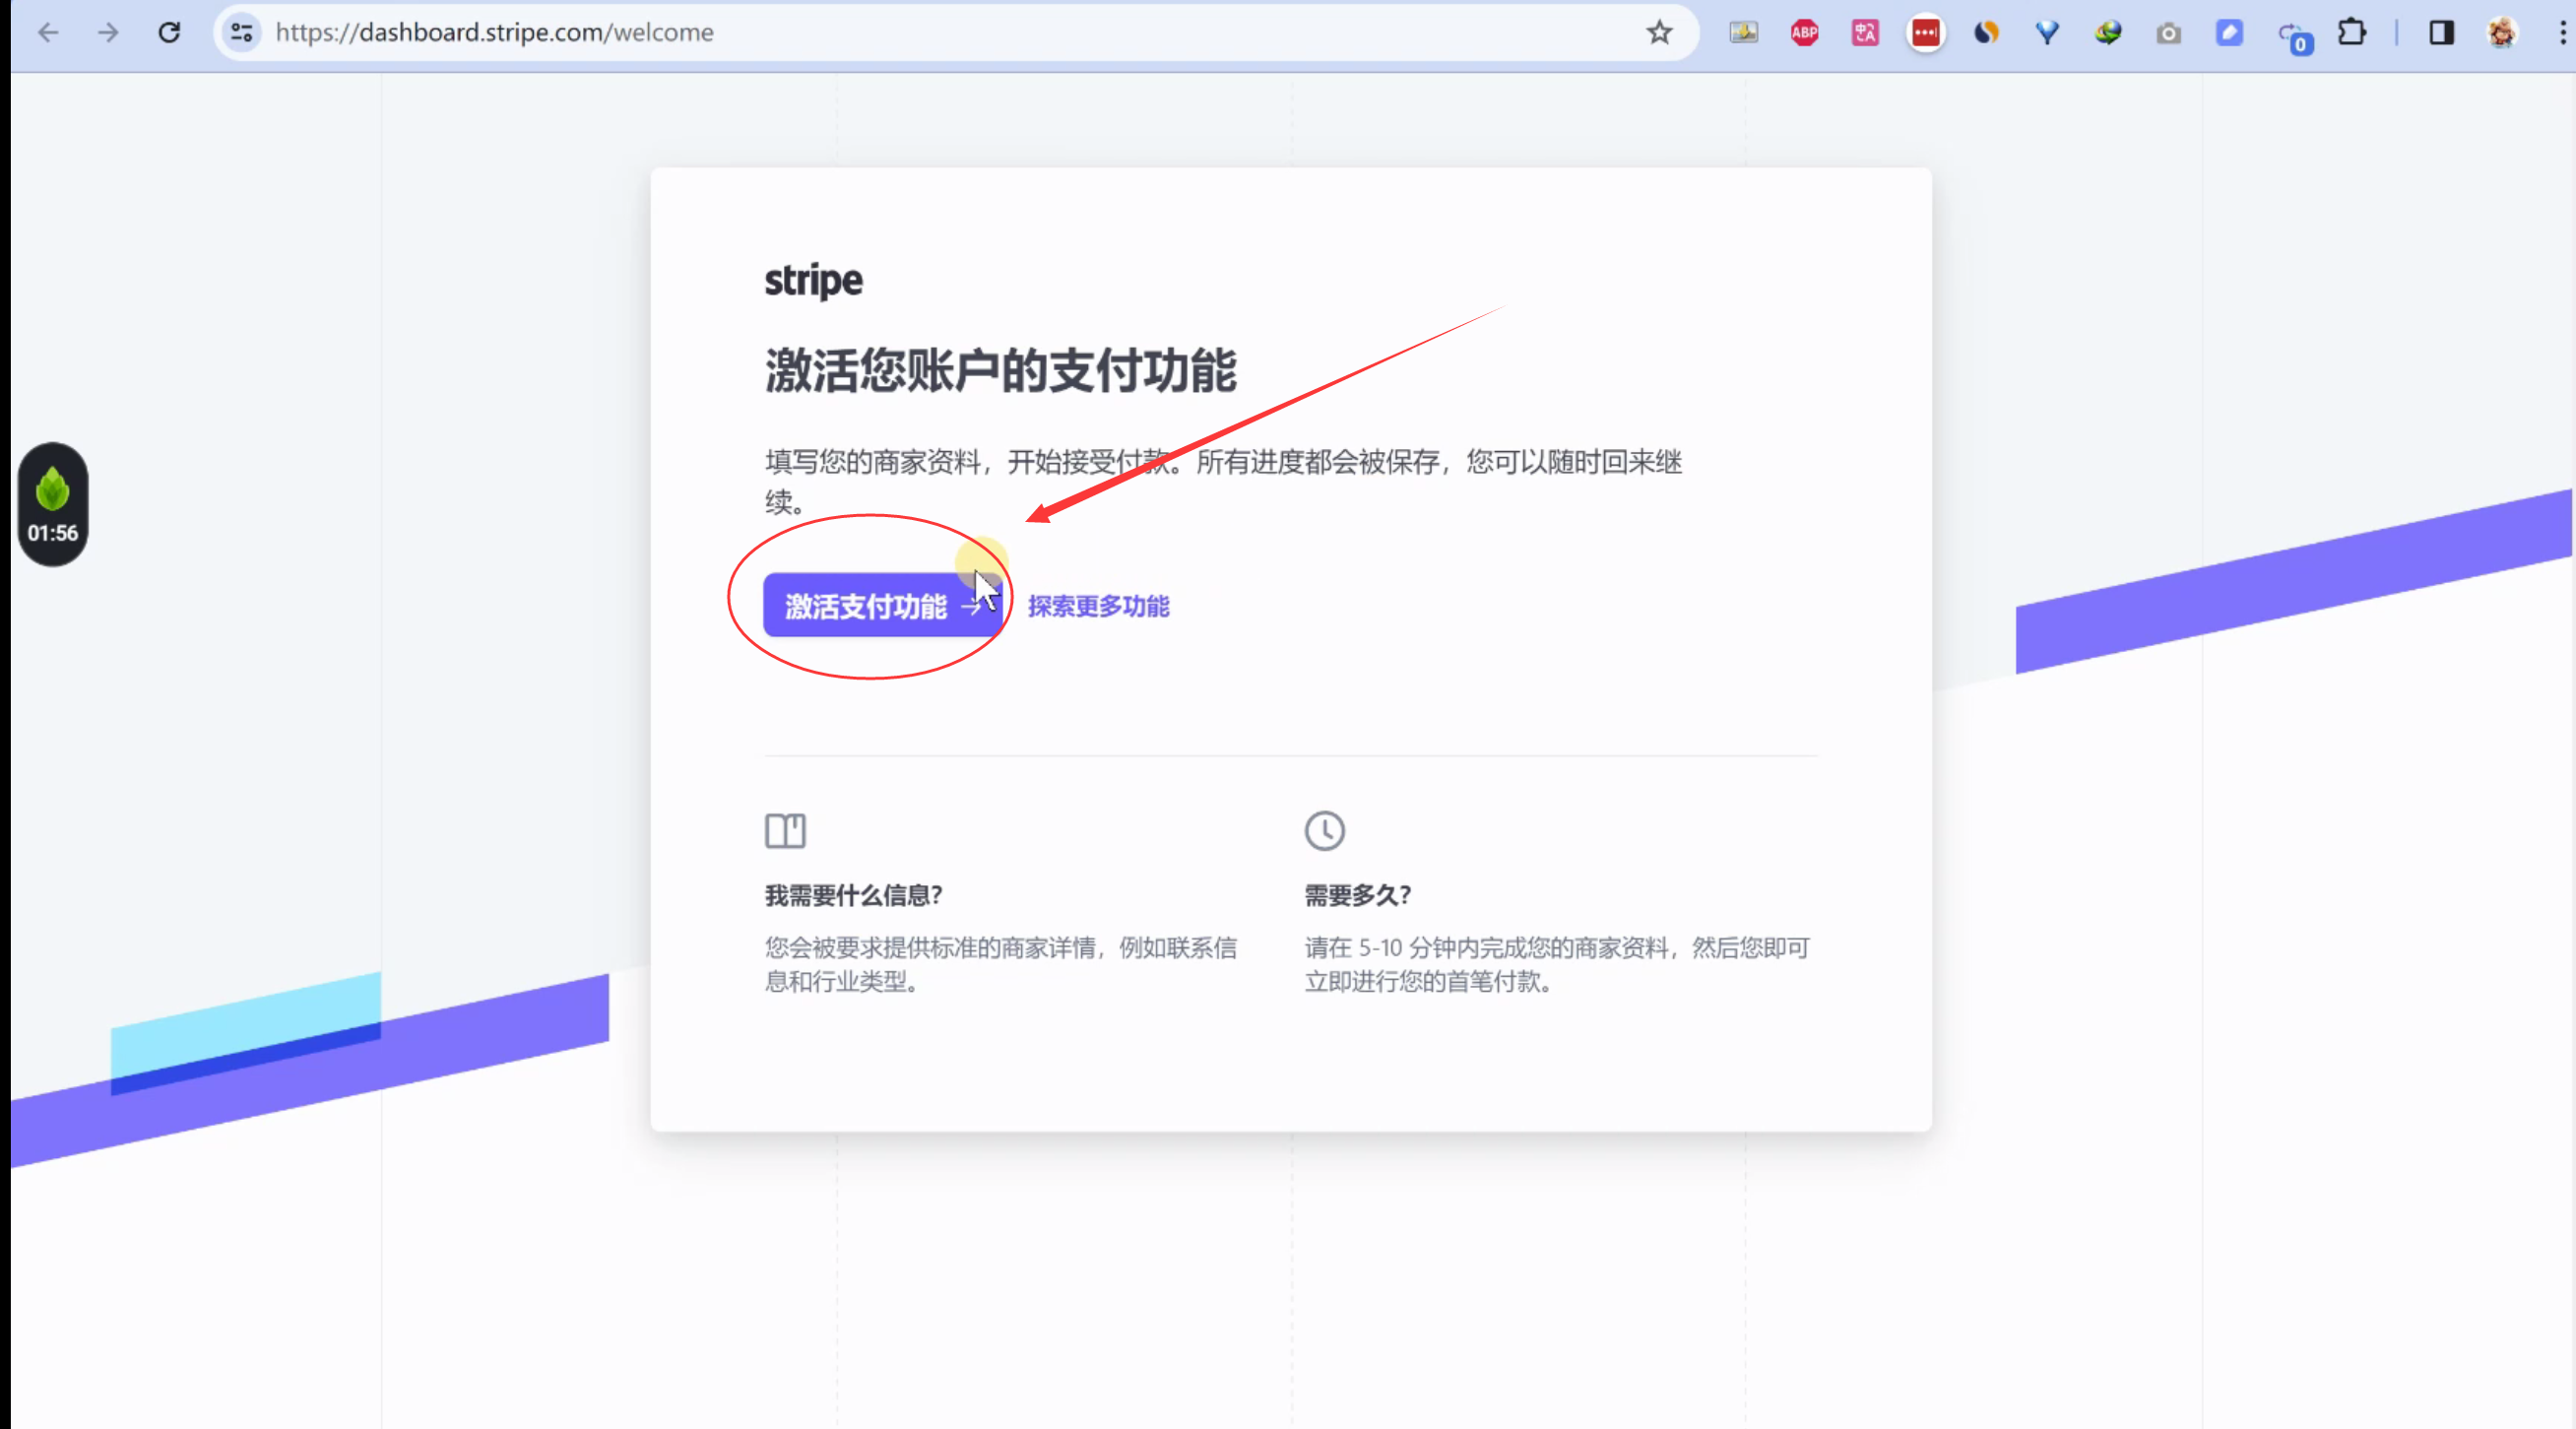
3 激活支付功能
3.1.验证业务
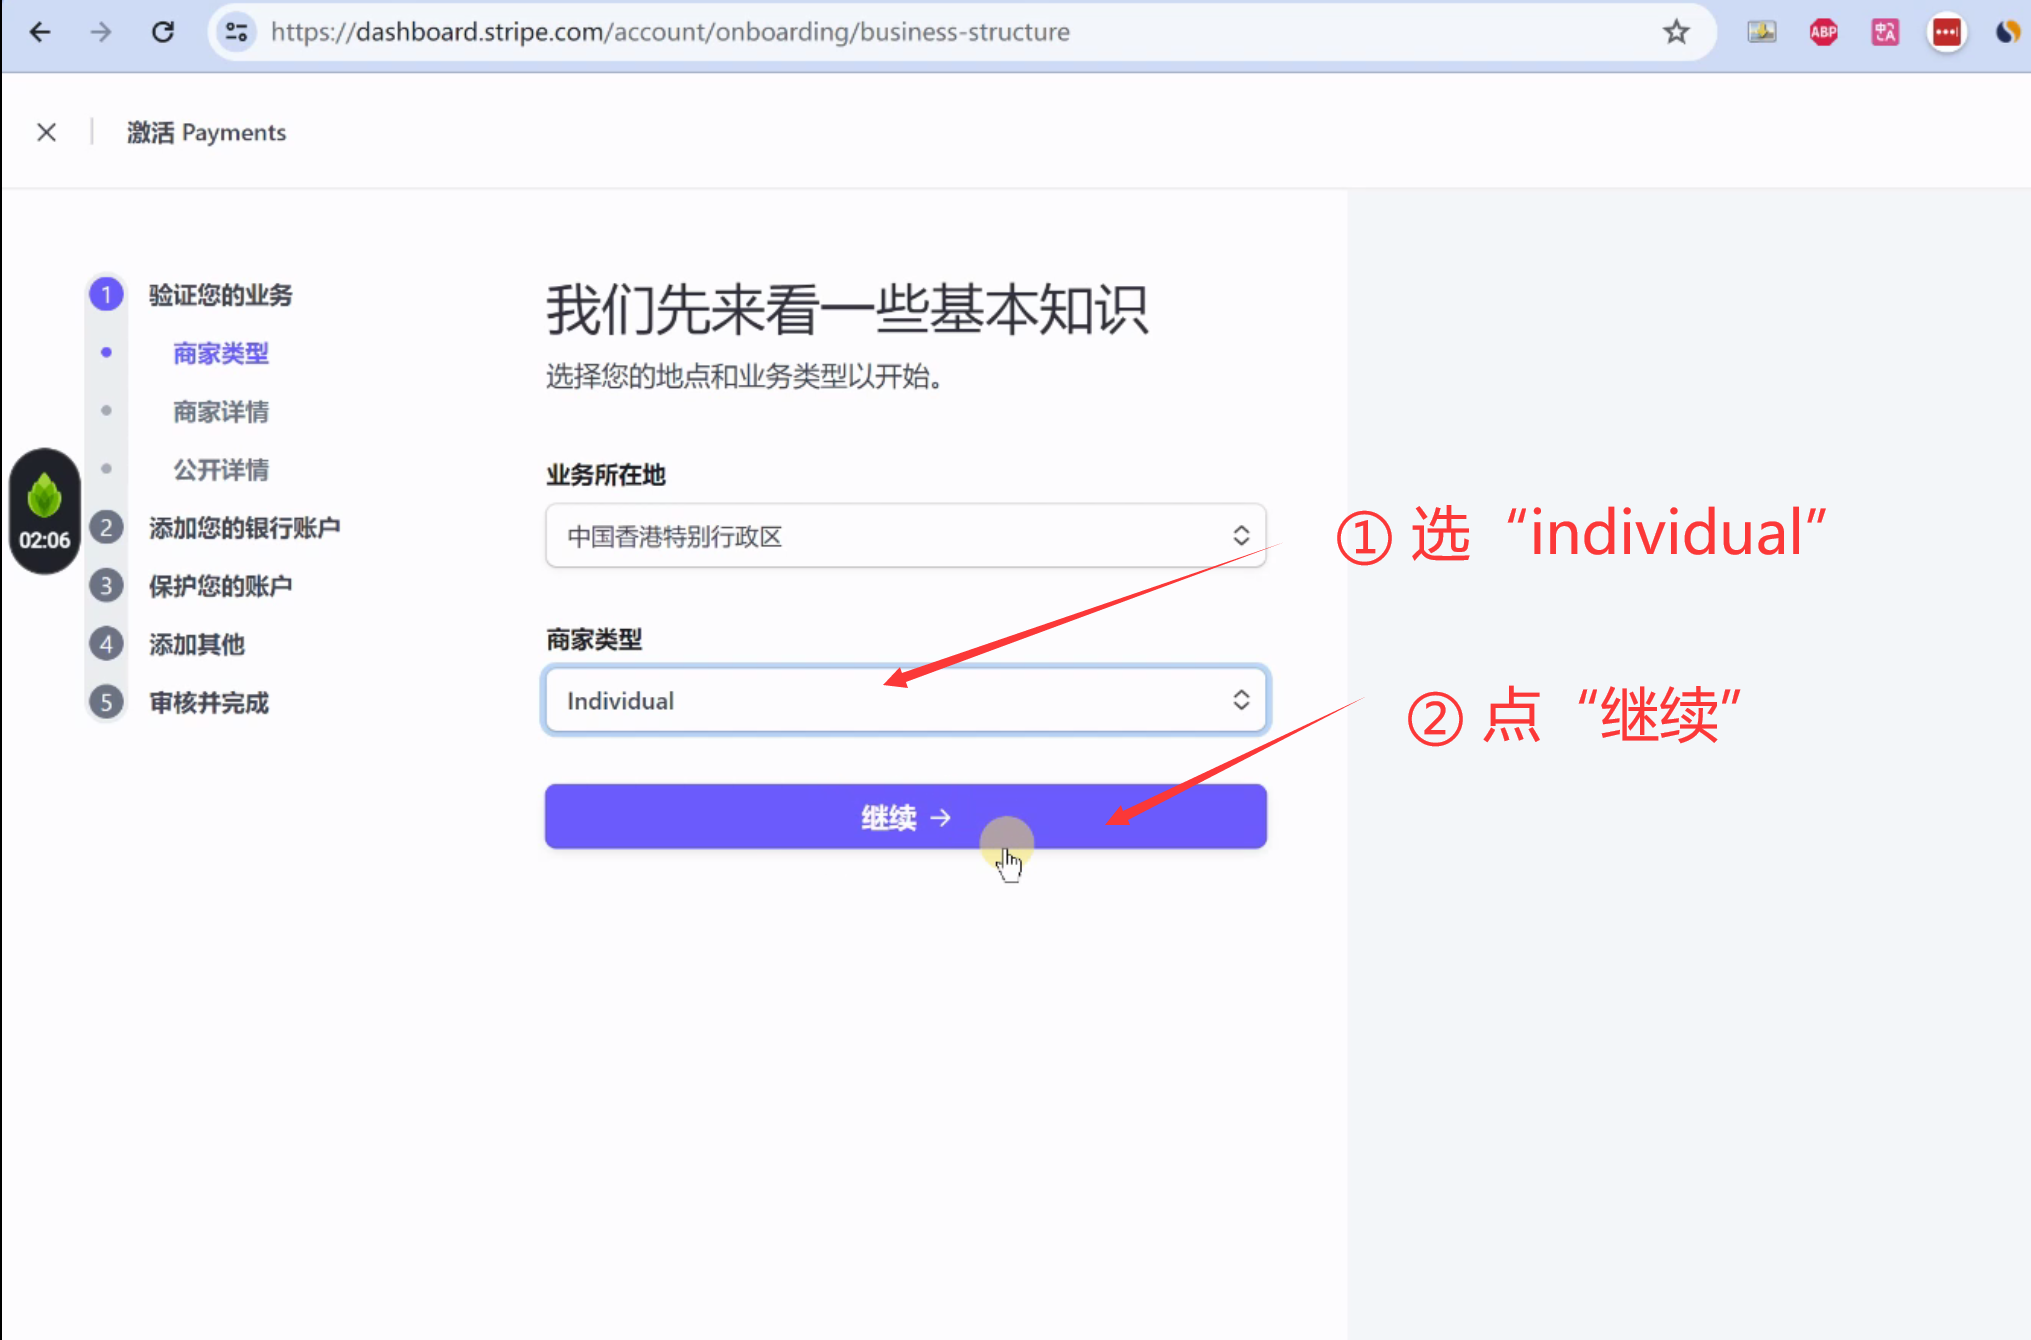
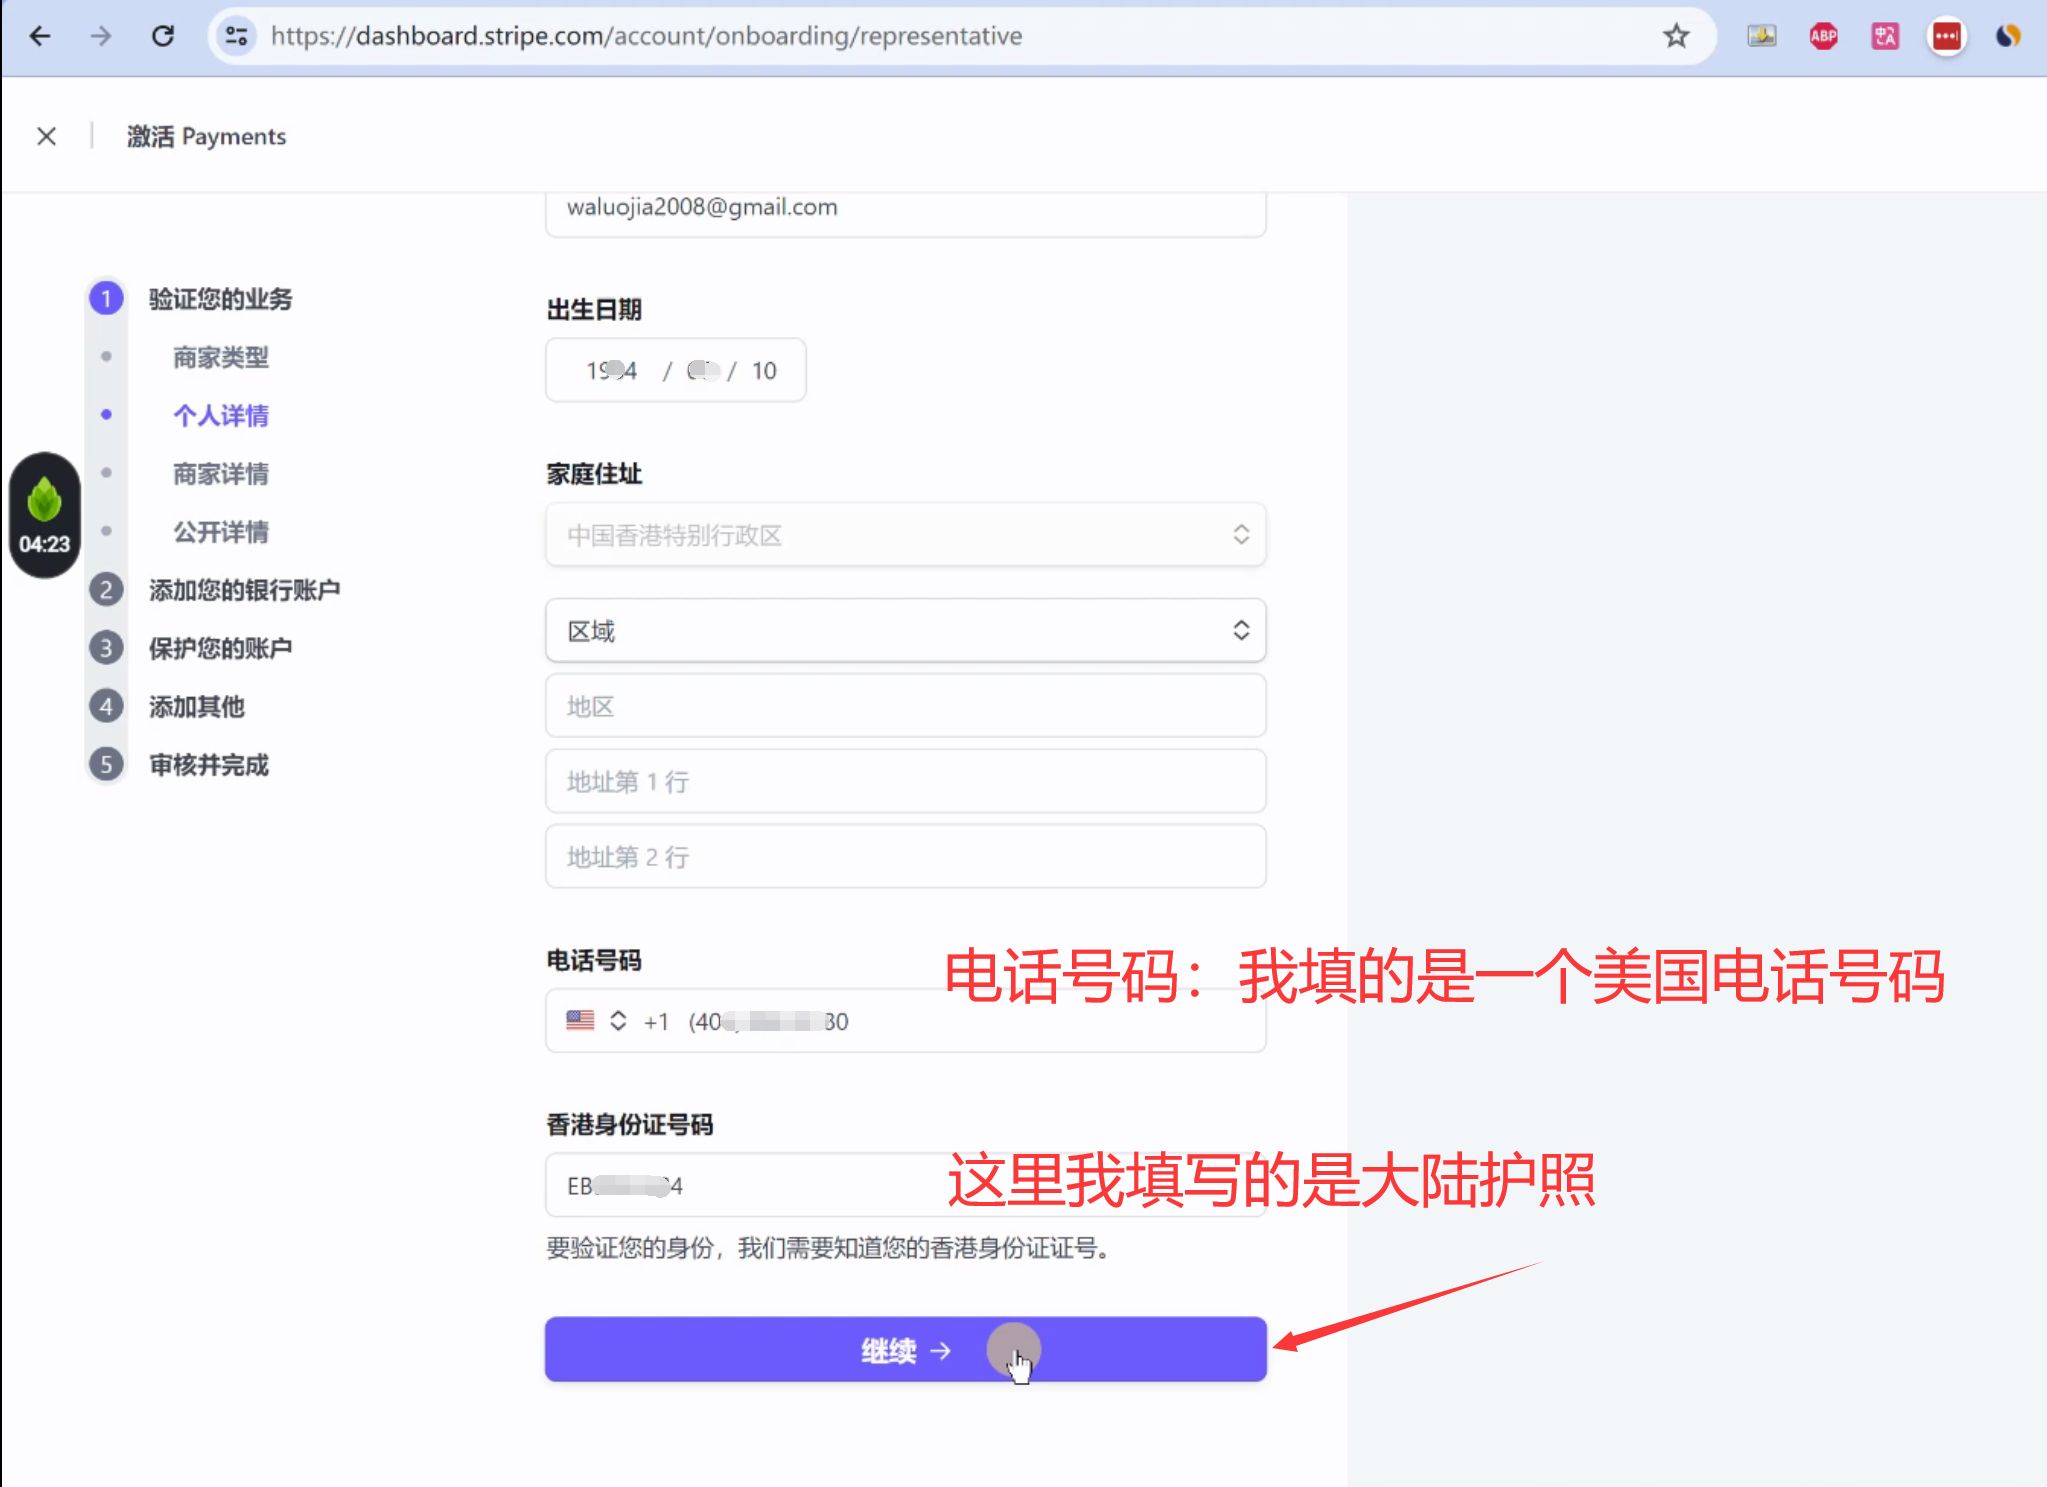
其它根据自己的信息填写。
第四步的时候,地址写 1.4小节的万里汇提供的银行地址。
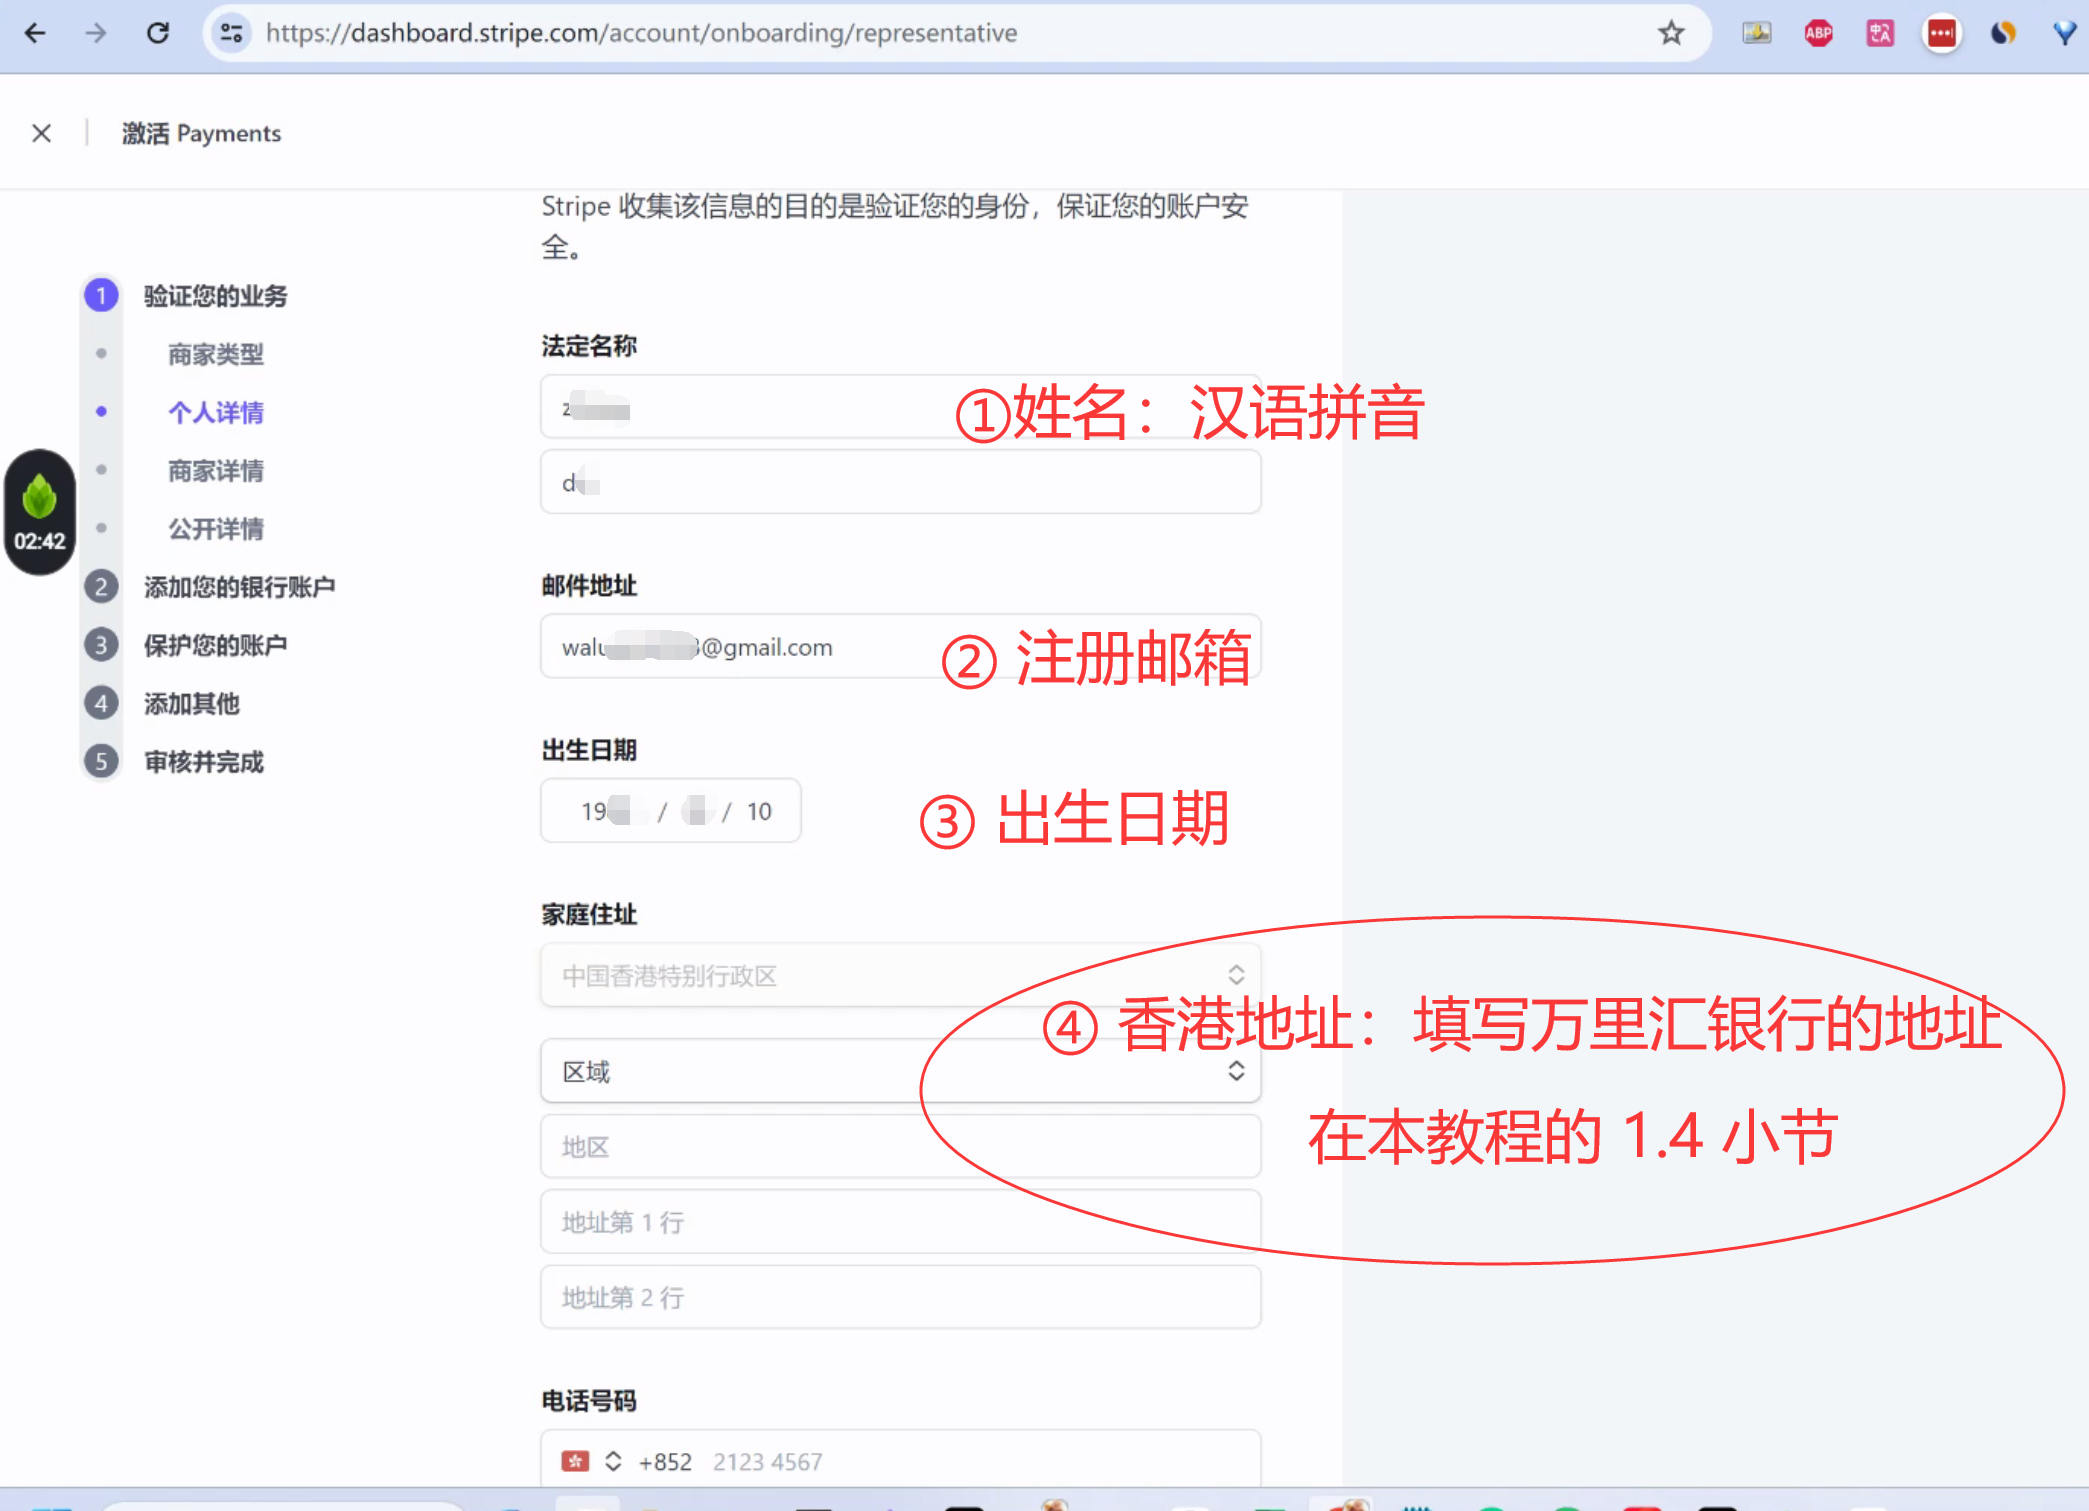
一般是区域选择:香港岛, 地区填写:Three Garden Road Central(中环花园道), 地址写:Champion Tower(冠军大厦)。
(根据实际万里汇提供的银行信息,填写)
电话号码:我填写的是一个美国实体电话号码Paygo,月租3美元。
相关美国电话卡教程: http://yesaiwen.com/introduce-ultramobile-paygo-iphone7/
看教程上说,用Google voice也可以。 但是我自己没有试。
香港身份证号码: 我填写的是大陆的护照号。
商家详情:
行业:我写的是咨询行业 公司网站:我写的是我的博客。 如果没有网站,可以输入社媒的页面。 产品描述:我写的是:提供软件产品的培训服务,结账过程中扣款。

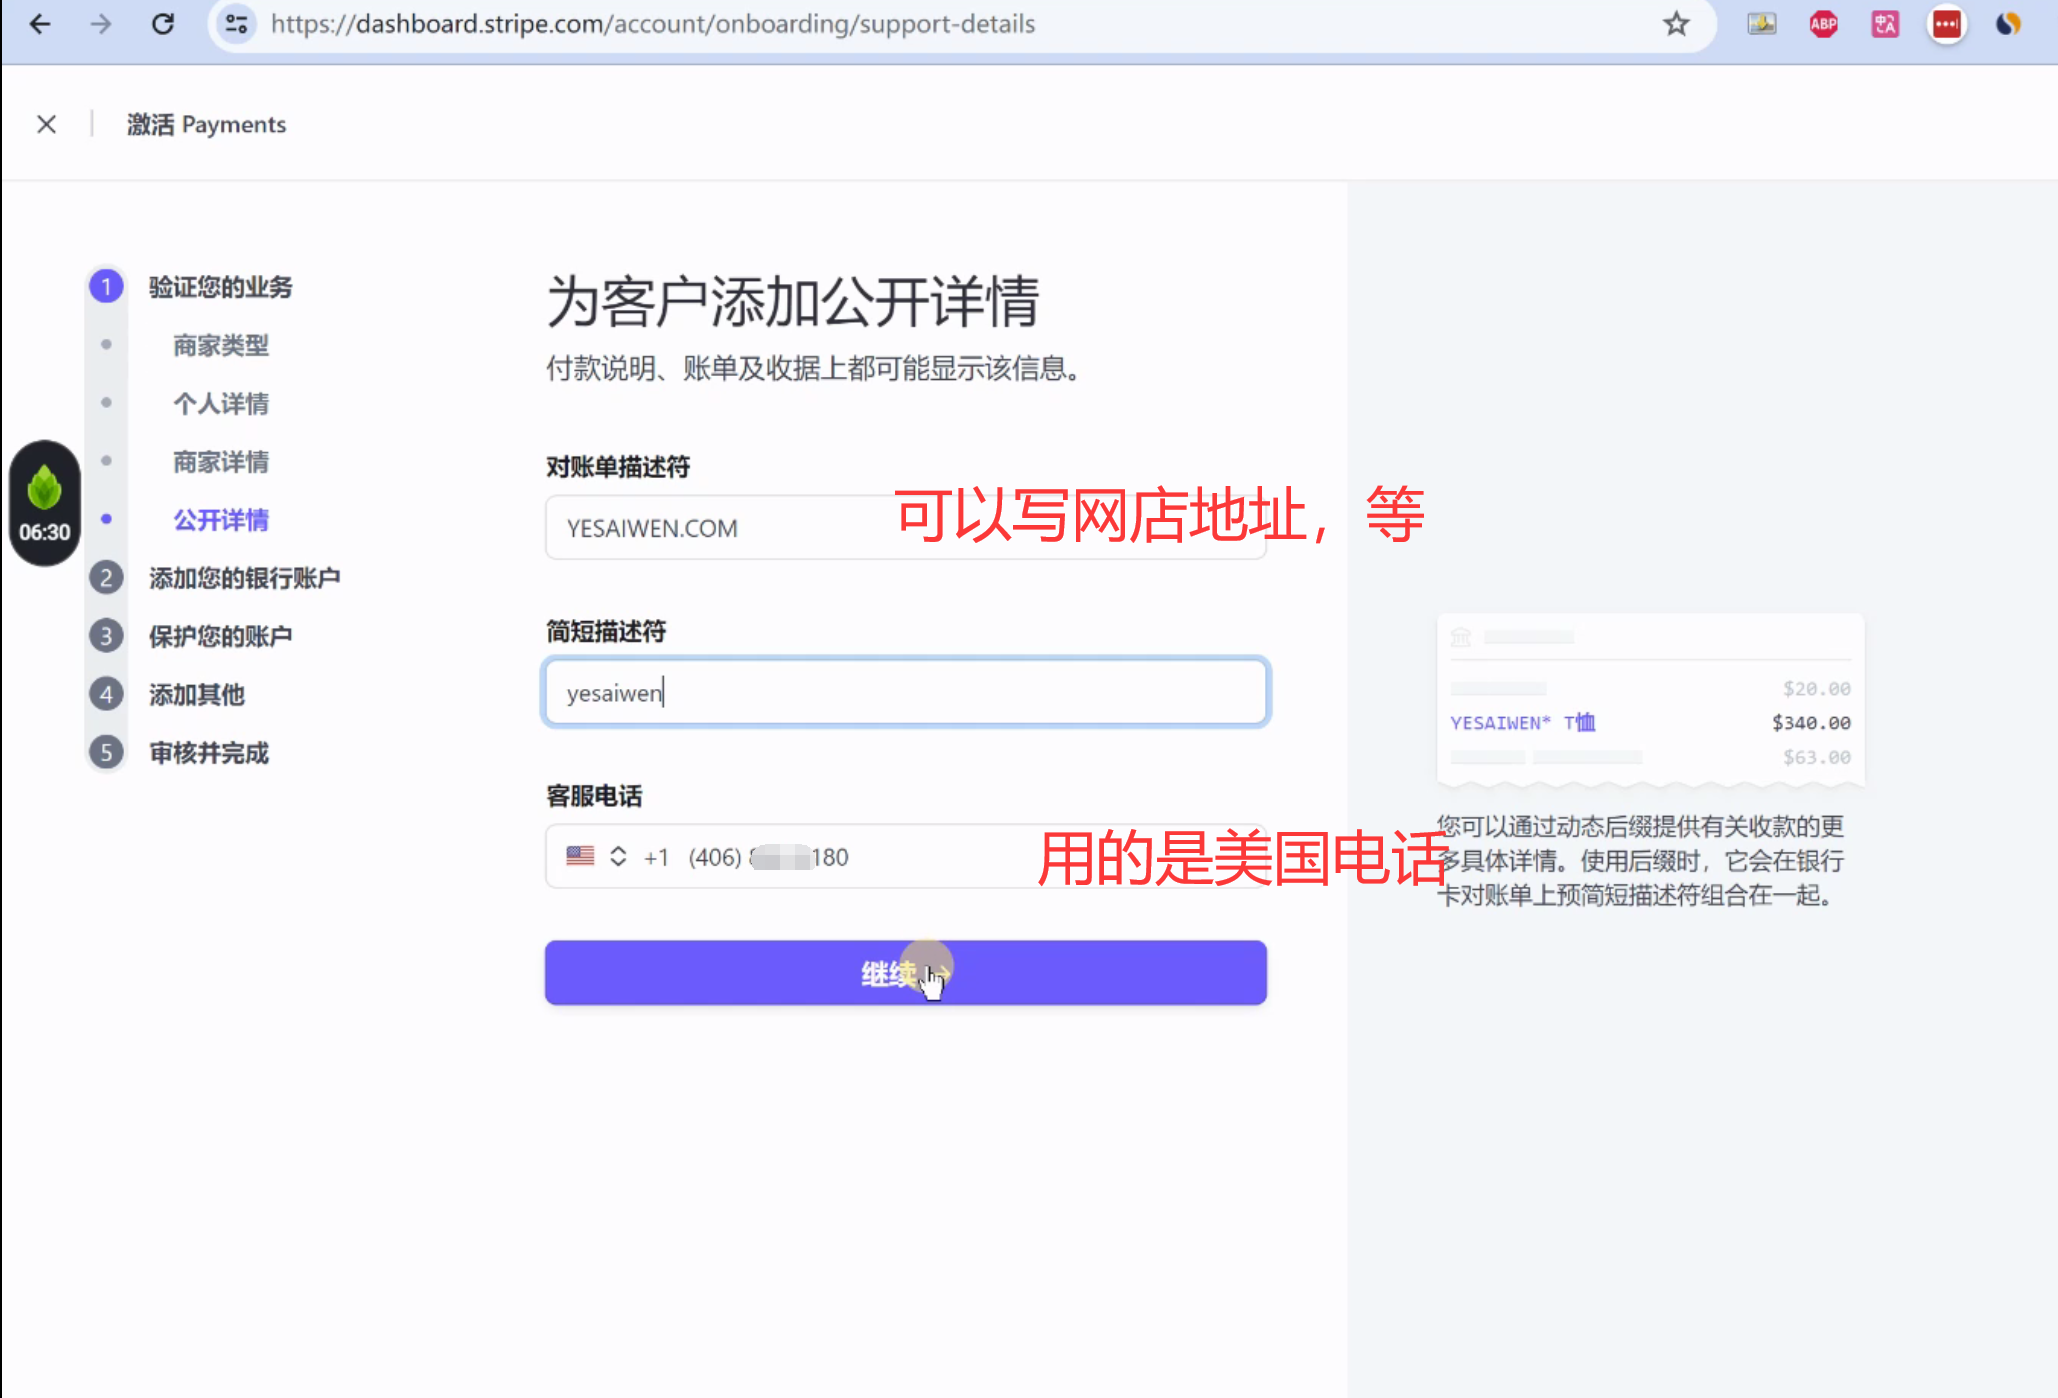
公开详情:我写的是我的博客网址。
客服电话:写的是一个美国电话。
3.2 添加银行信息
银行信息:填写万里汇的银行信息,(本教程的1.4节)

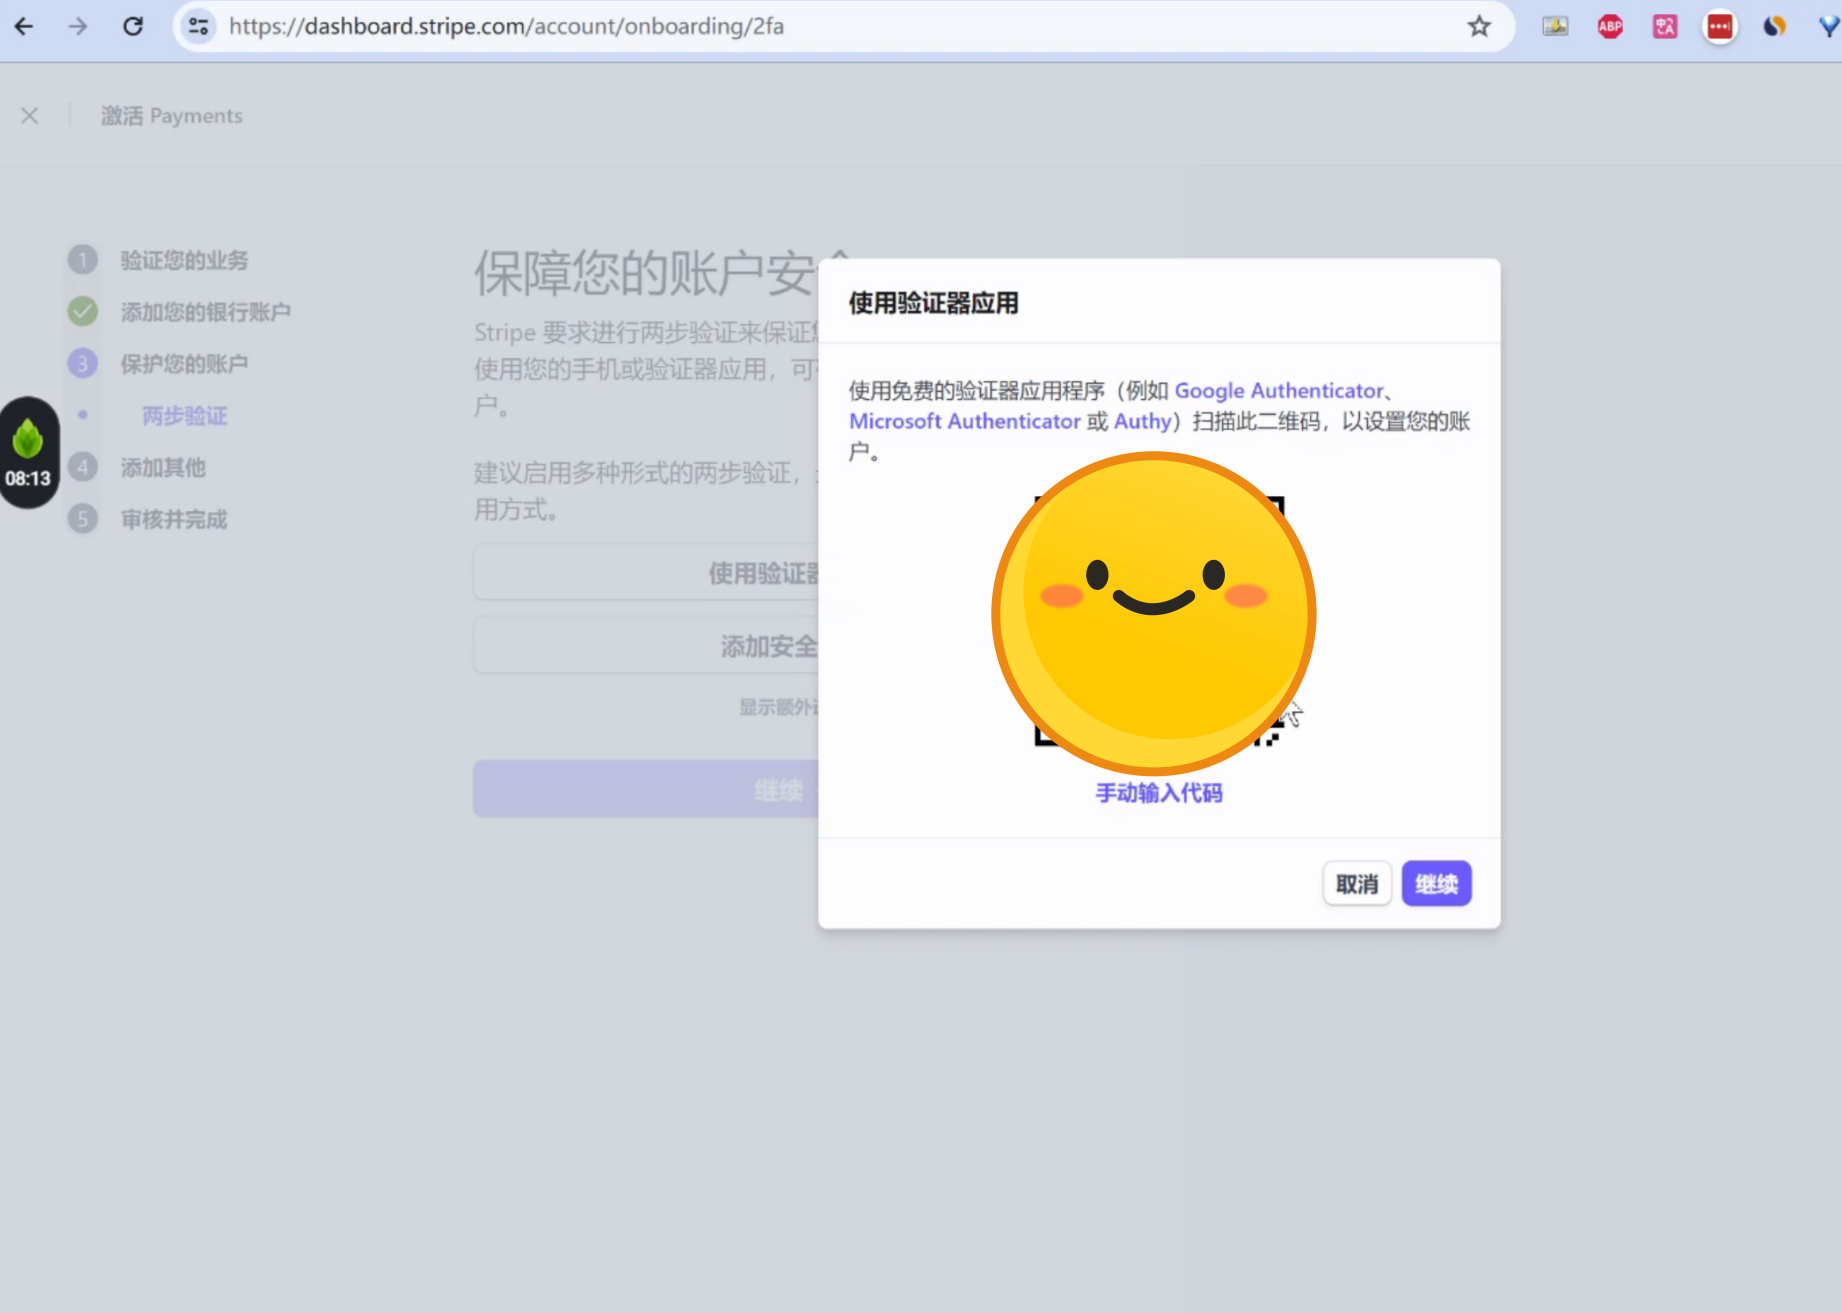
3.3 设置两步验证
二步验证: 选择“使用验证器应用”。
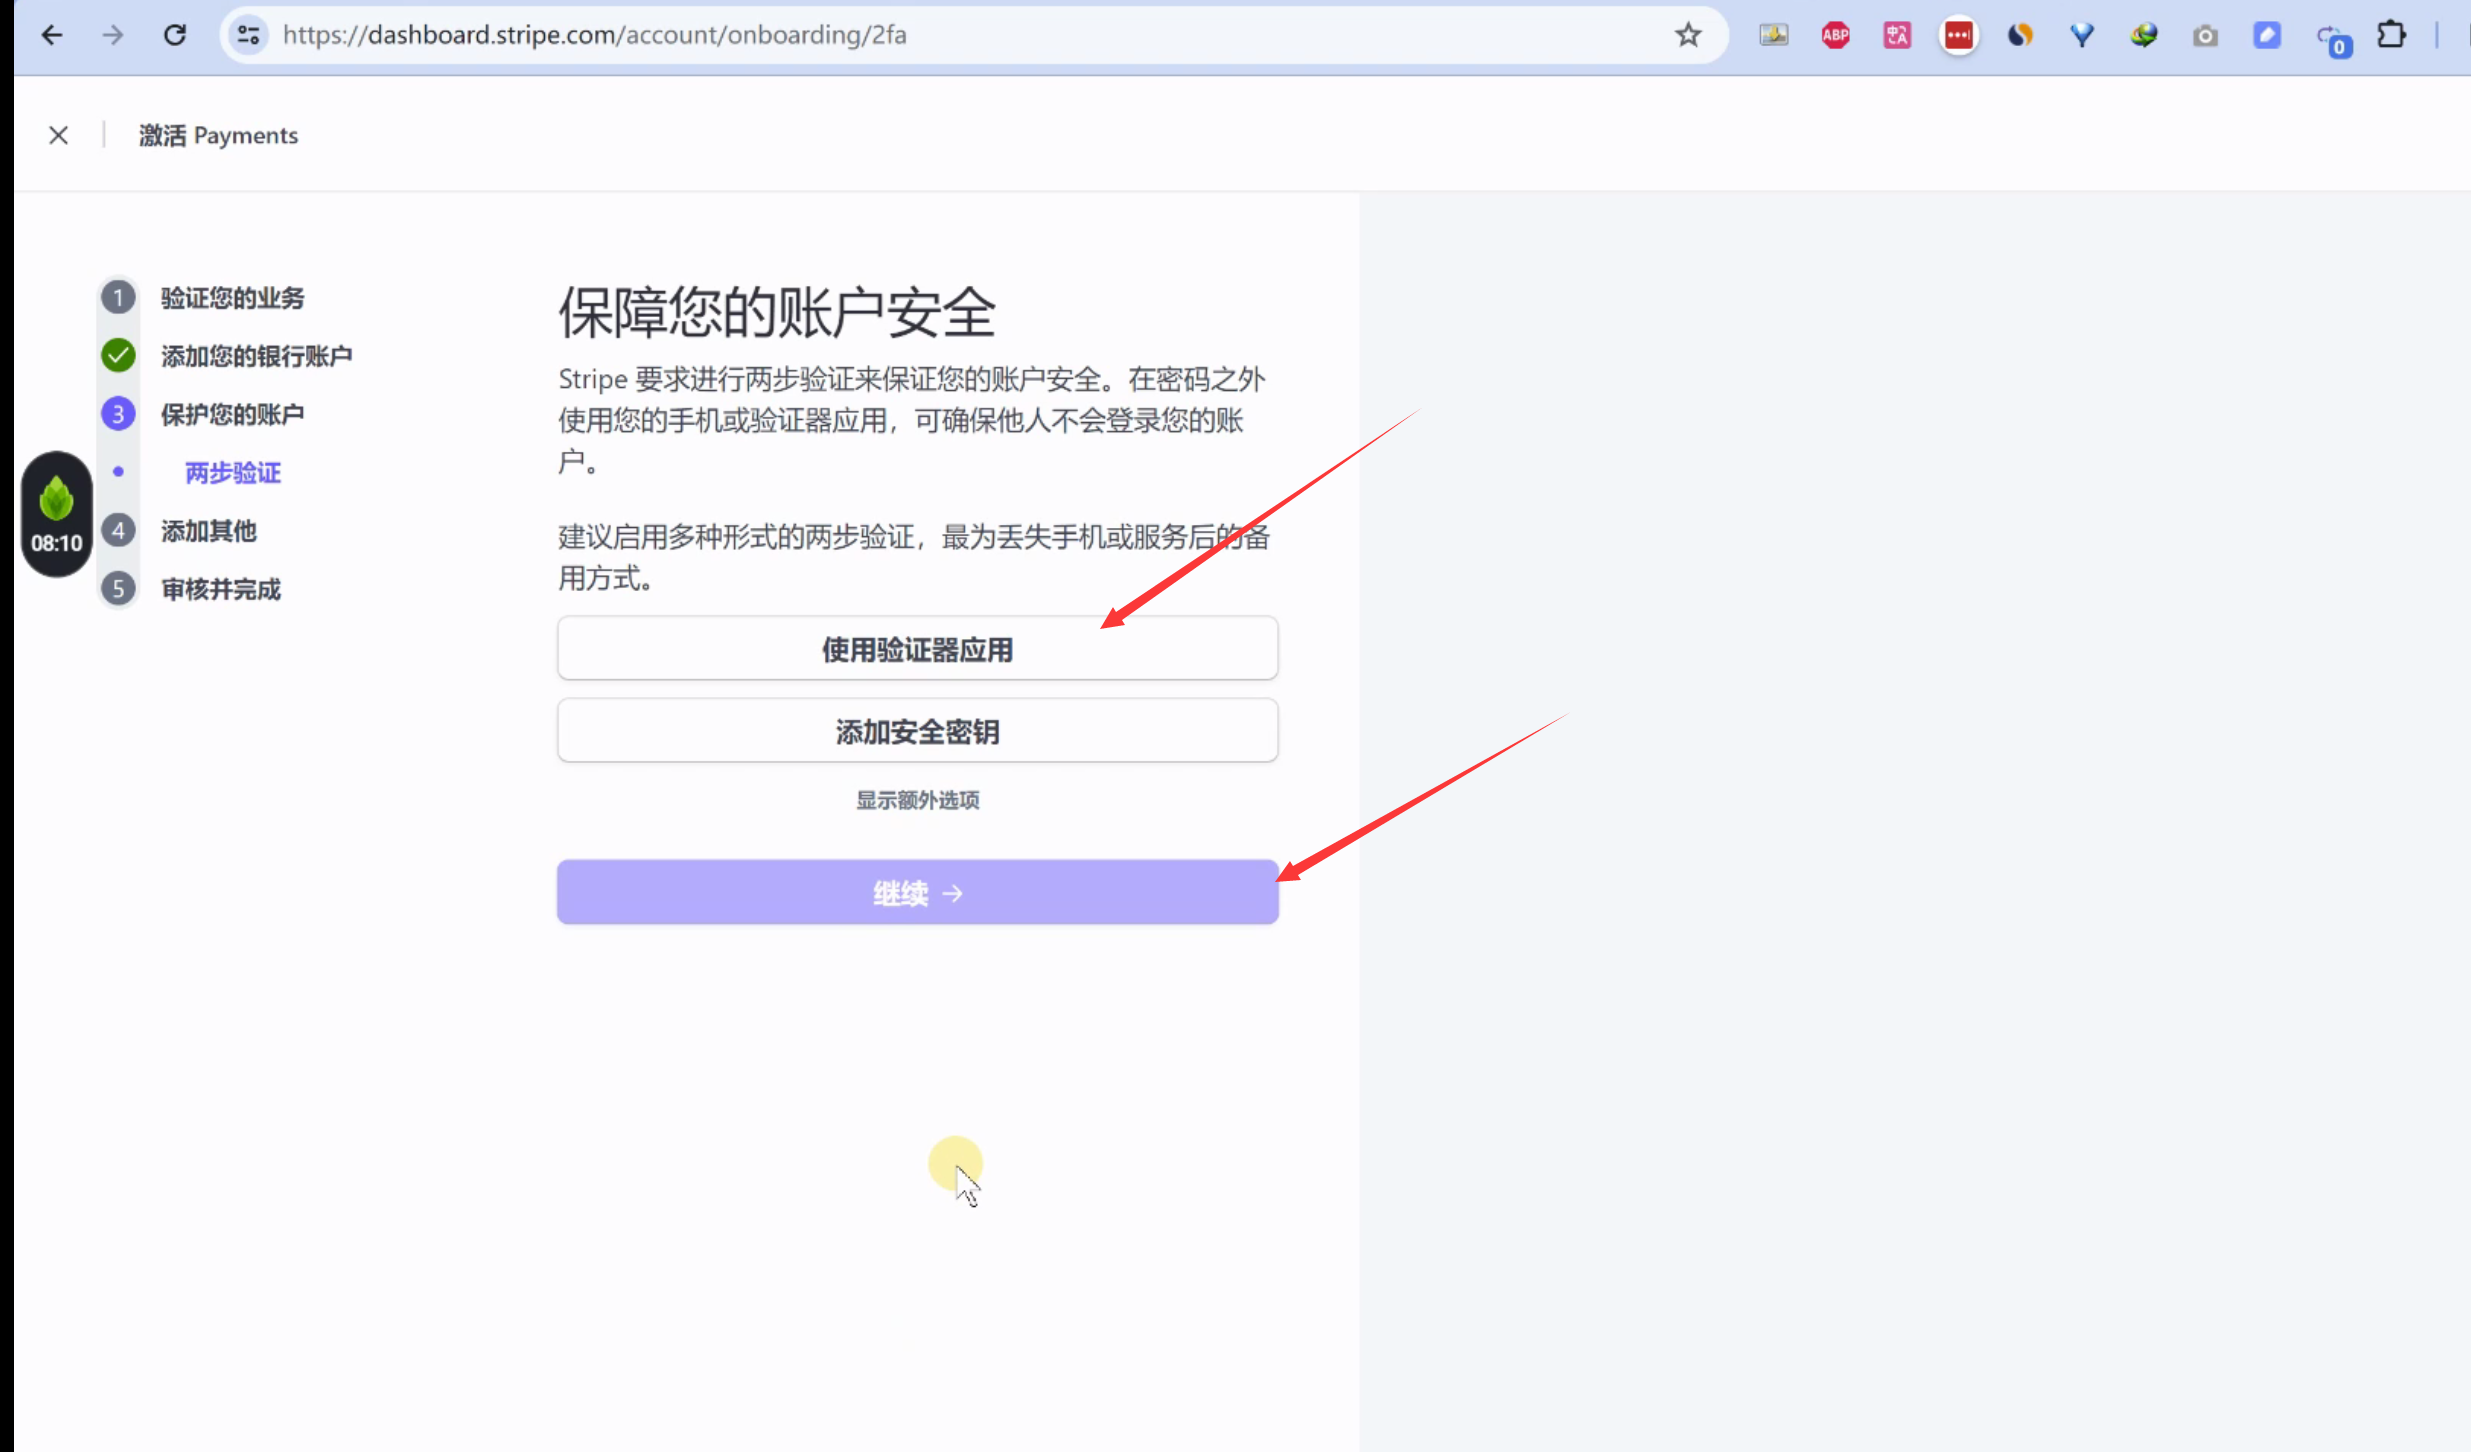
打开手机上的谷歌两步验证器,扫一下
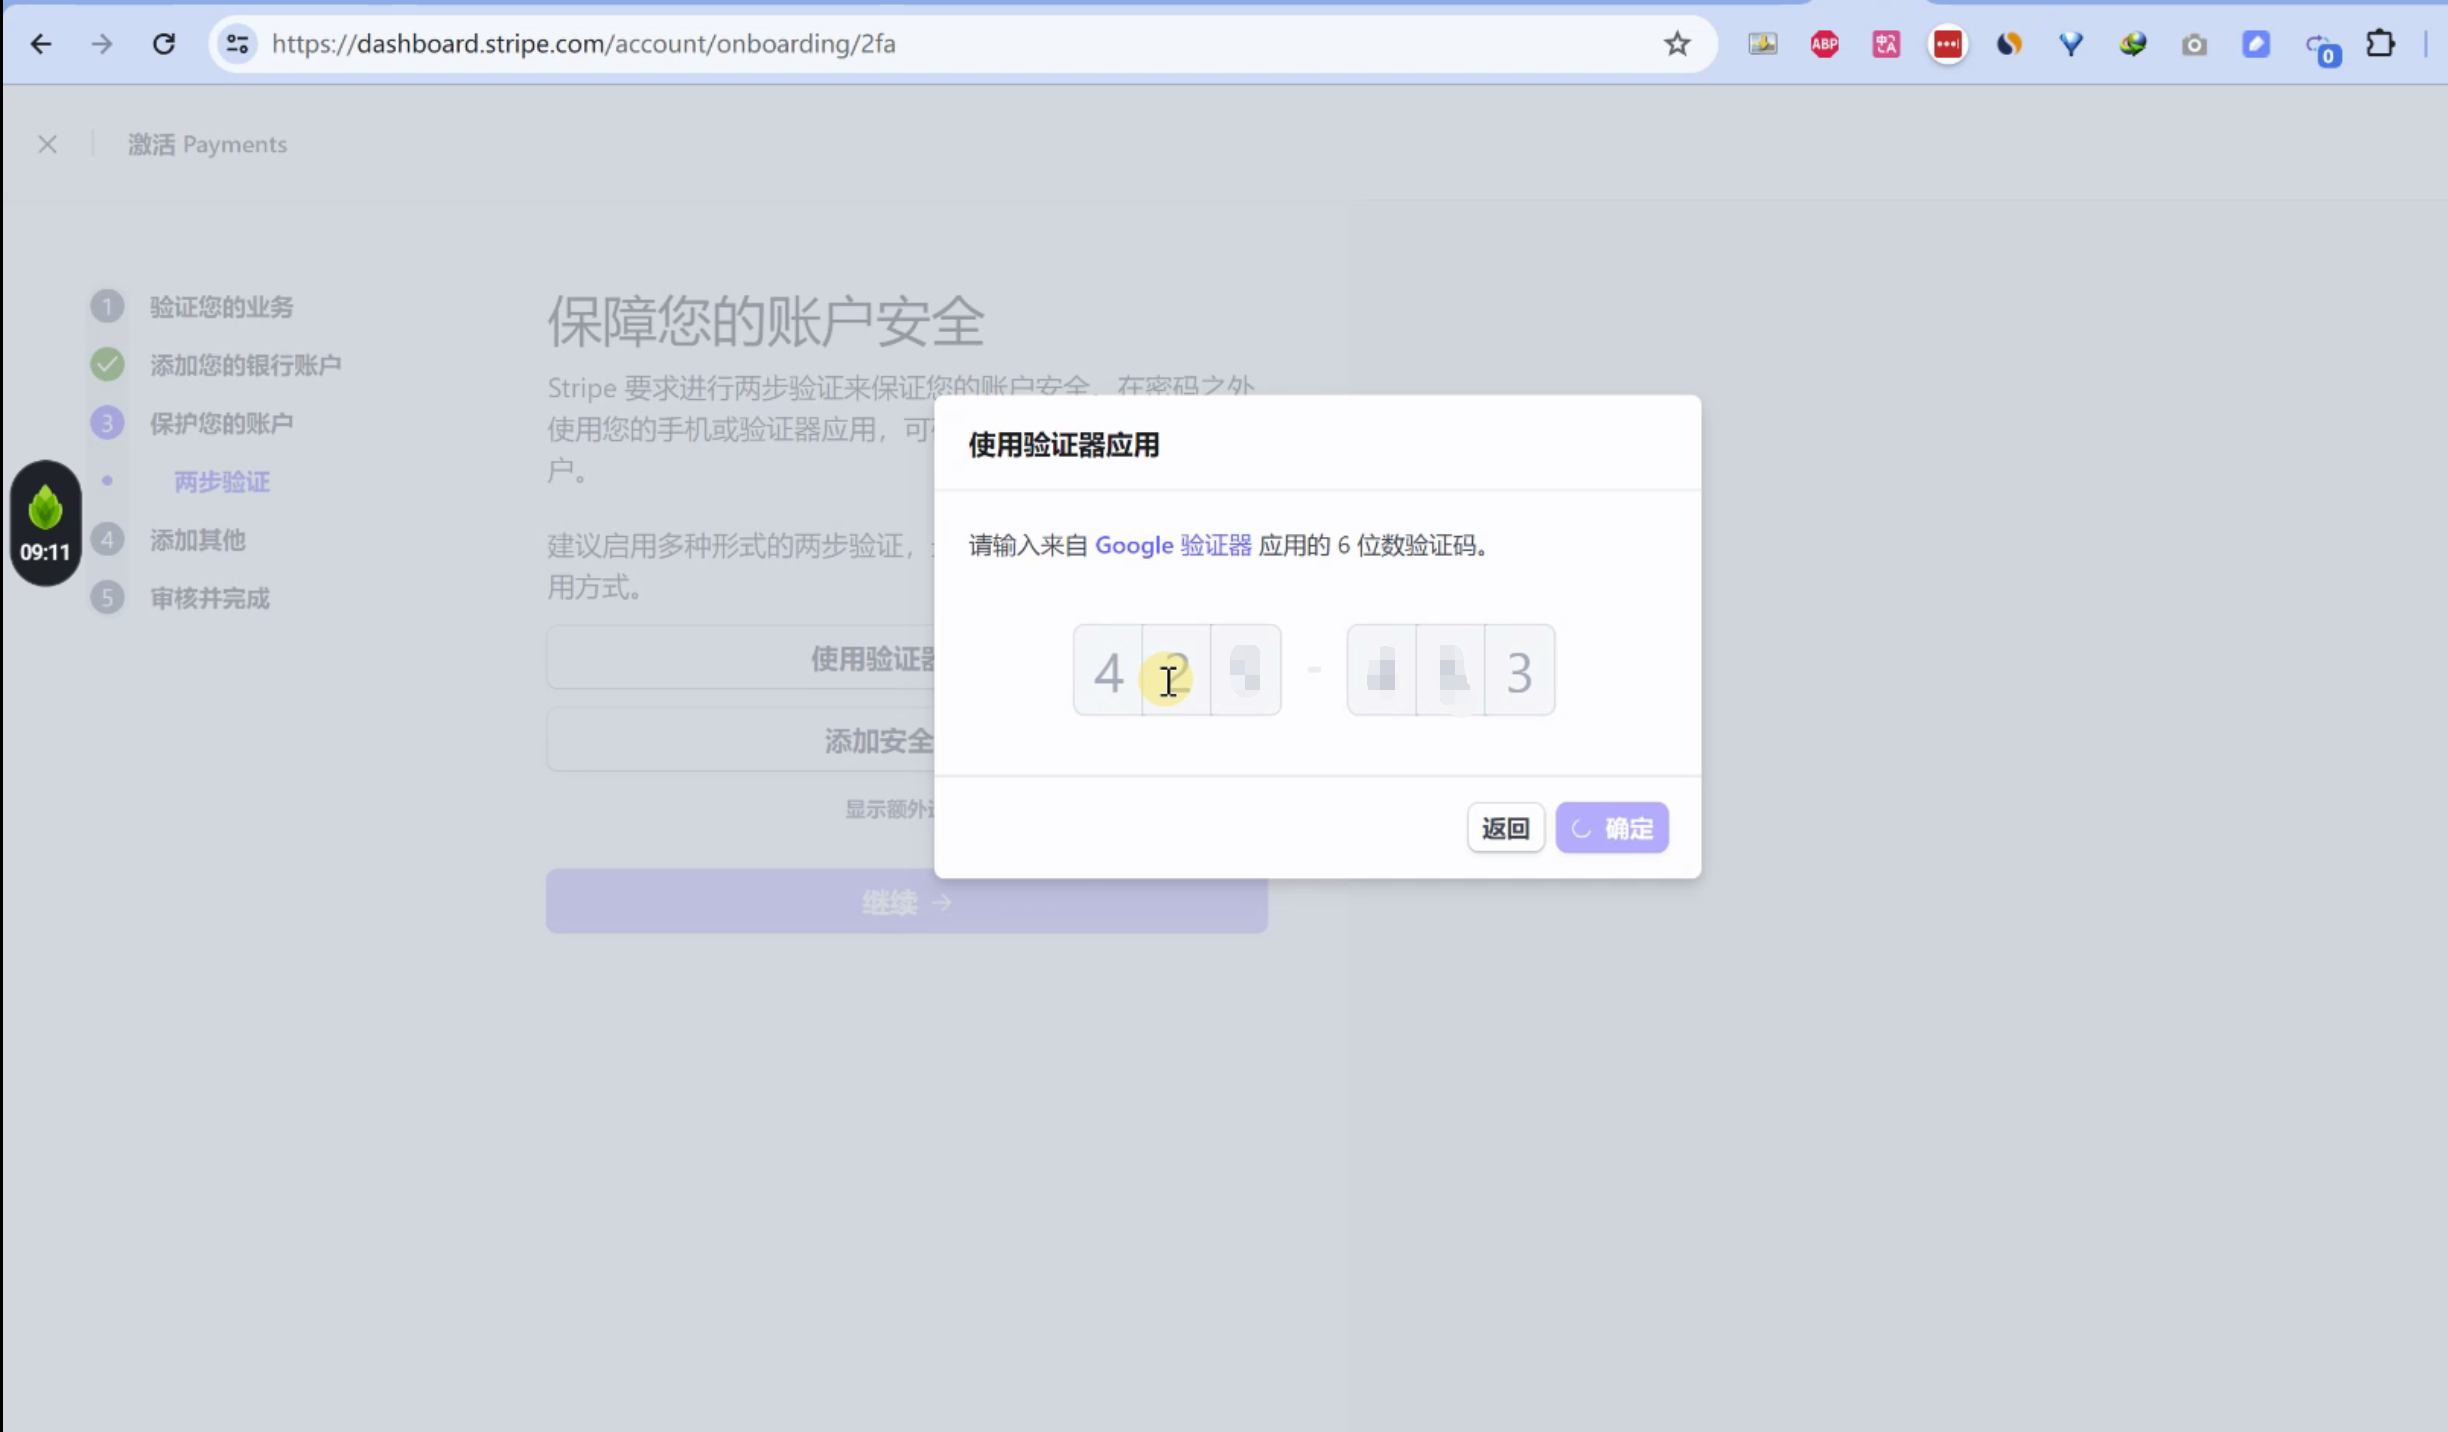
手机上的谷歌二次验证器,会给你一个6位数的验证码,填到这里。 之后还有一个备份码,要保存好。
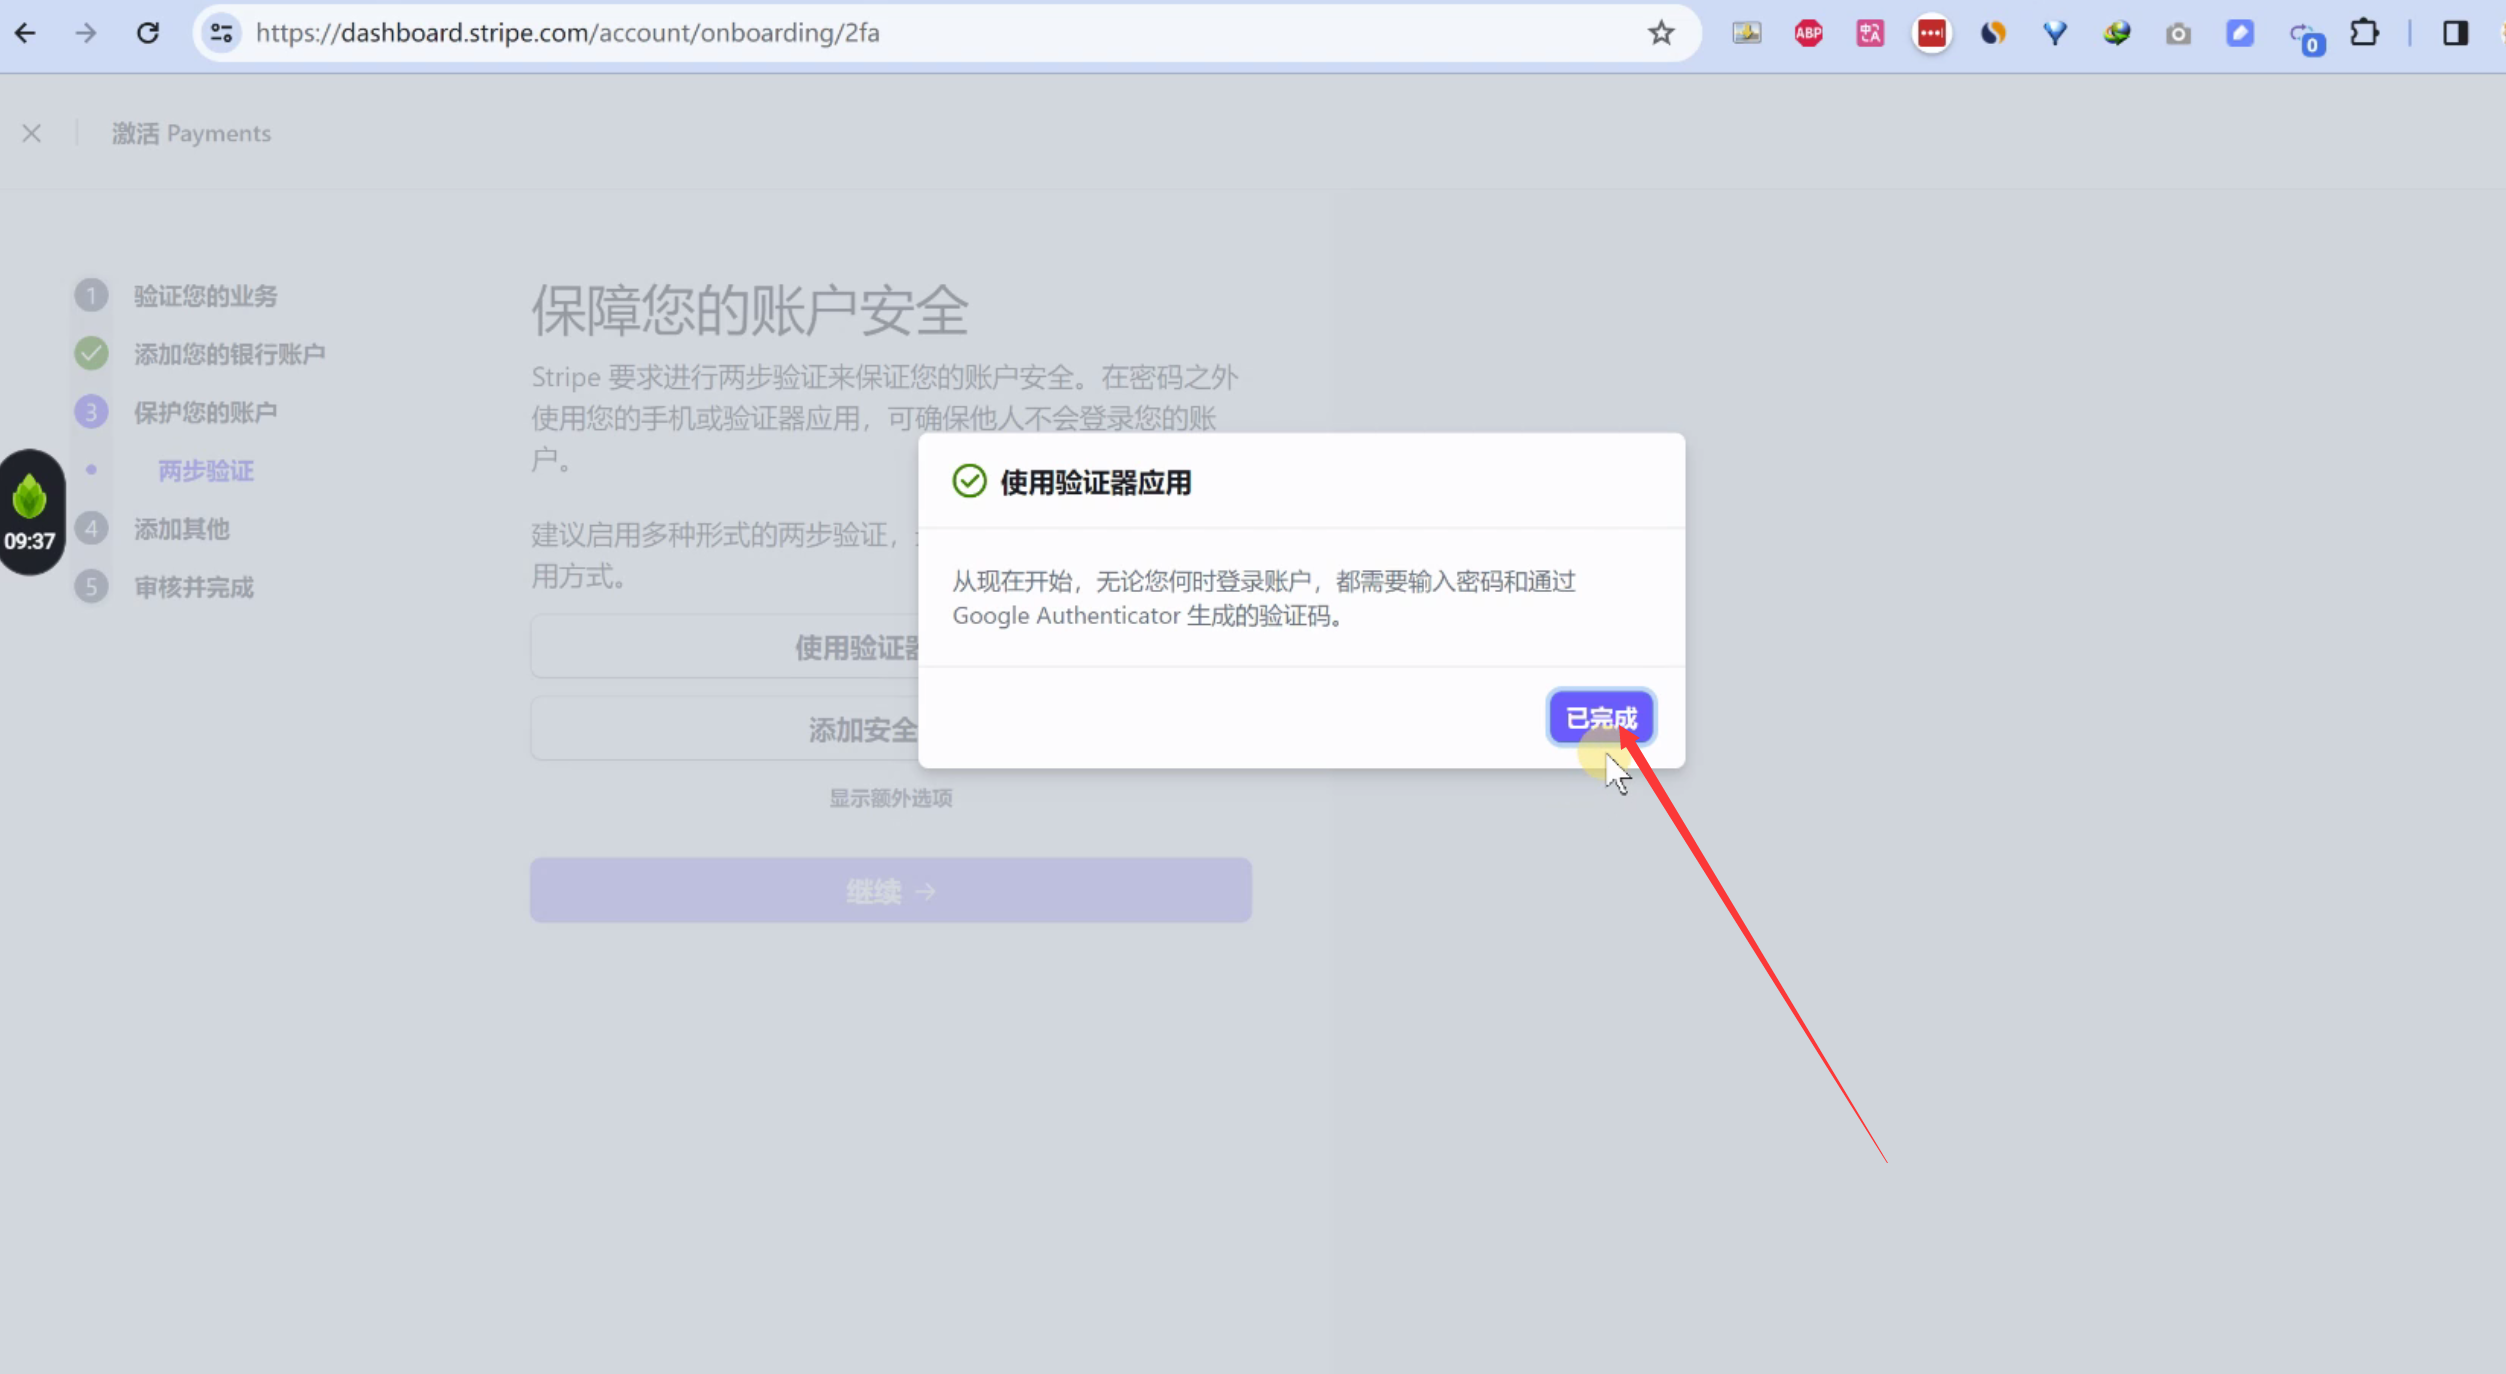
然后点击“完成”。
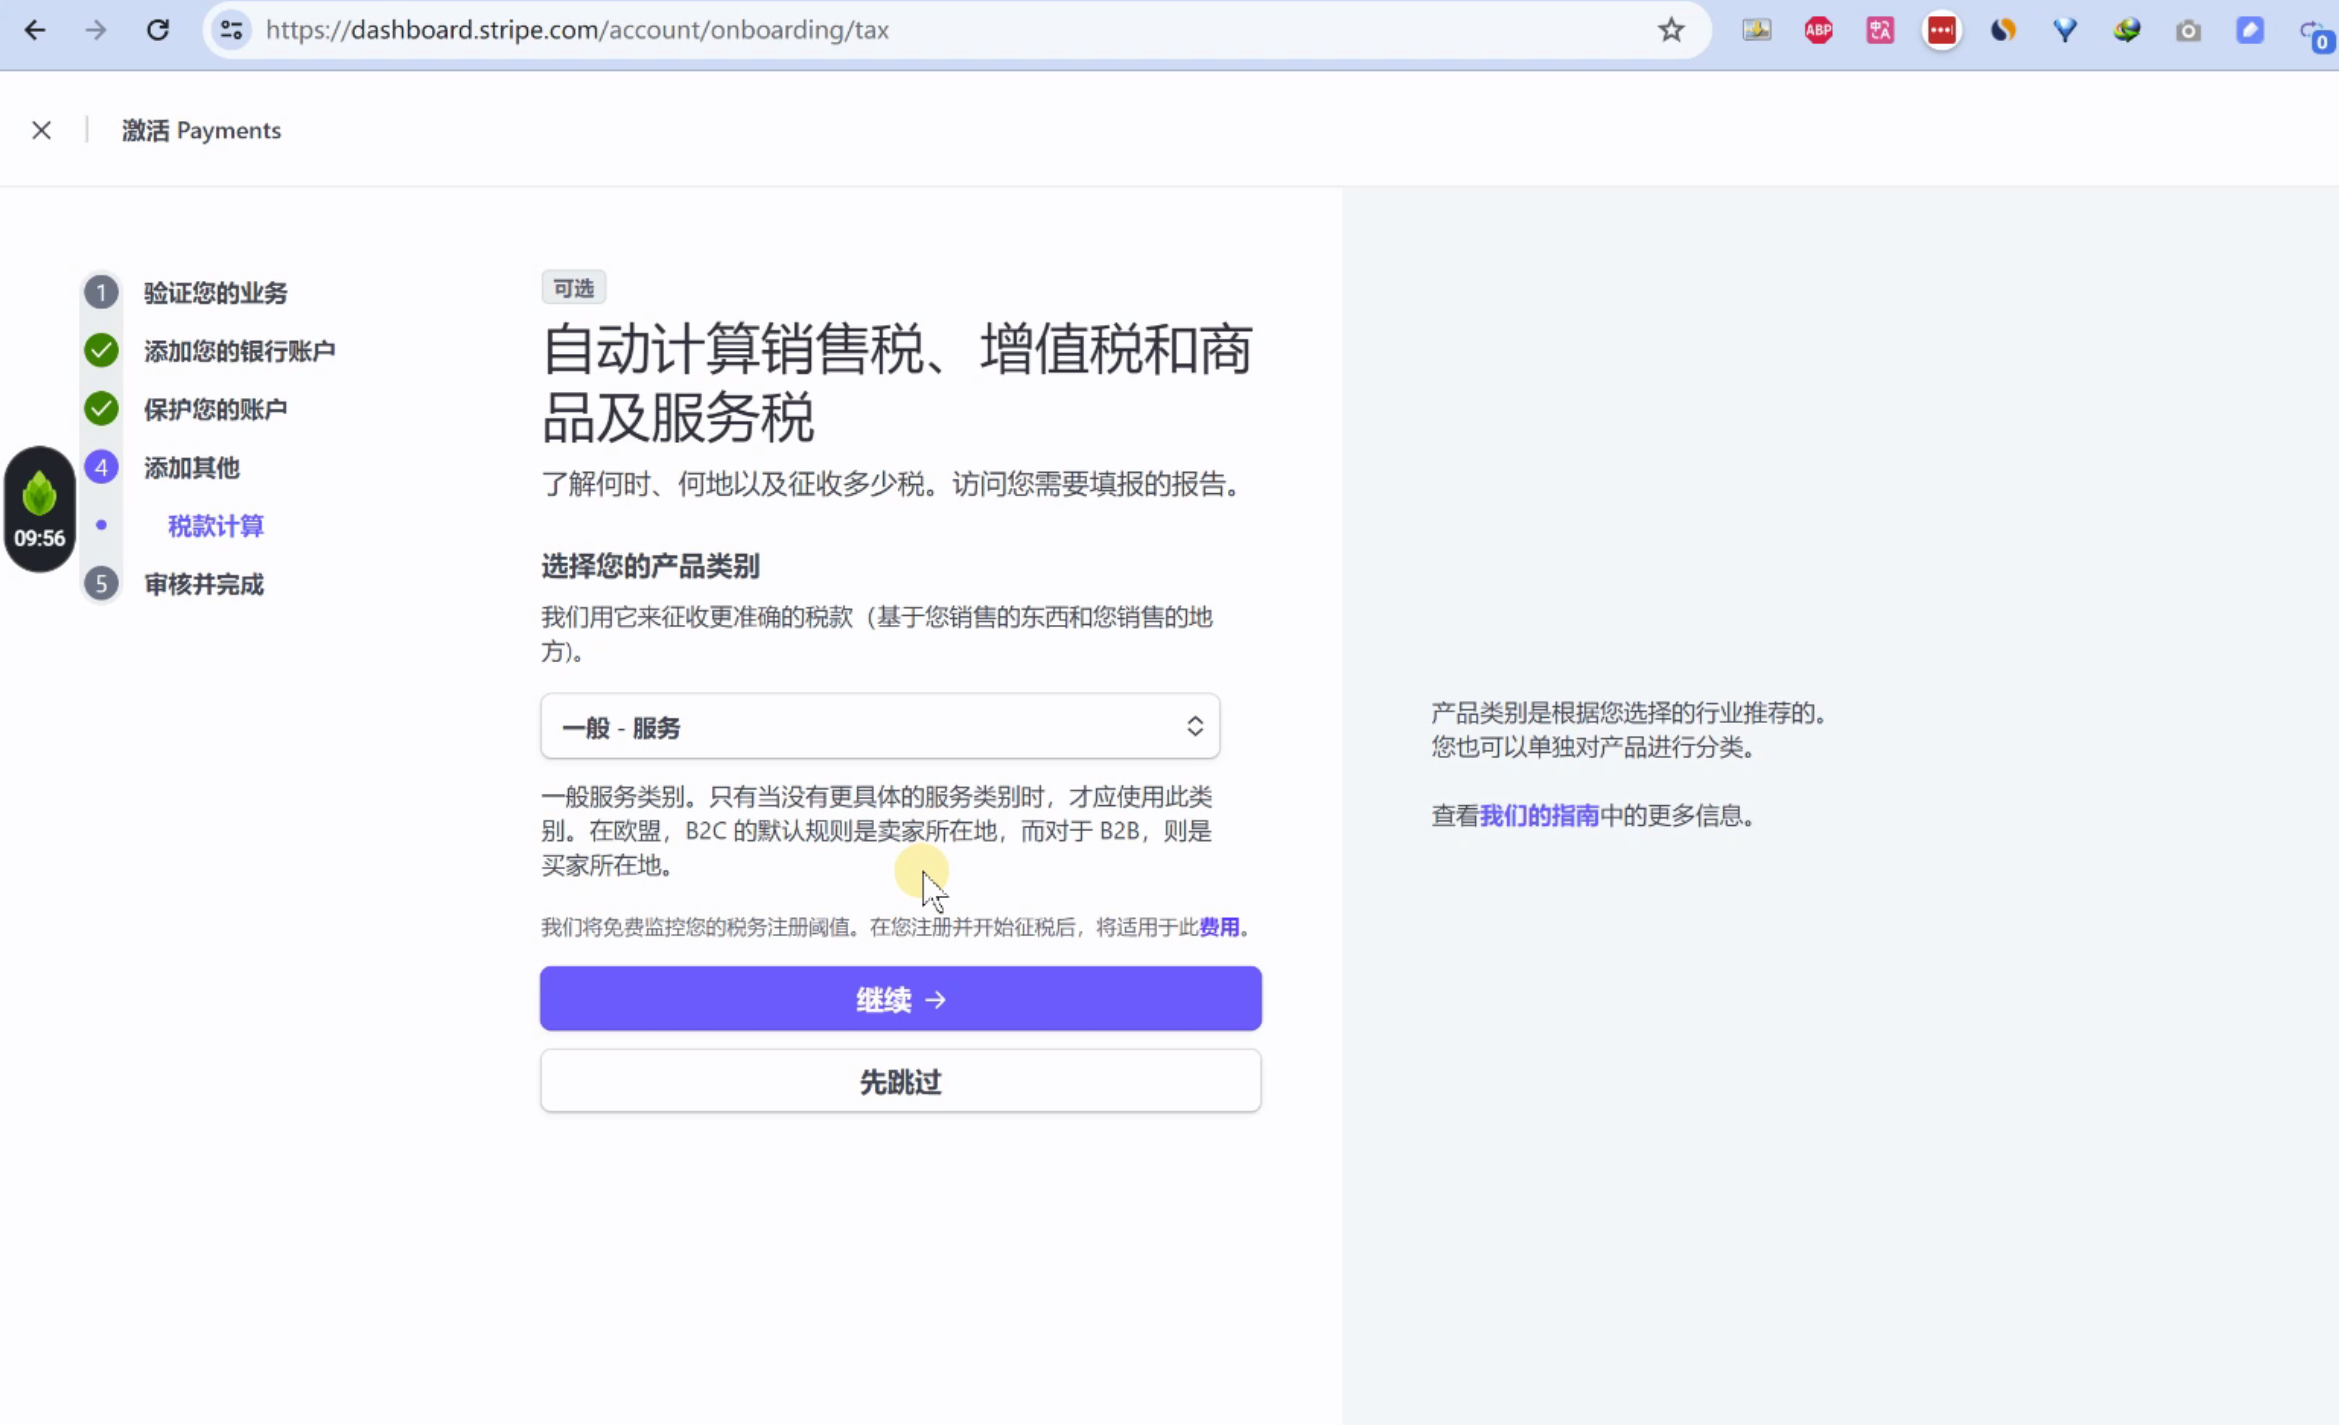
3.4 其它信息
我选择的是“一般服务”
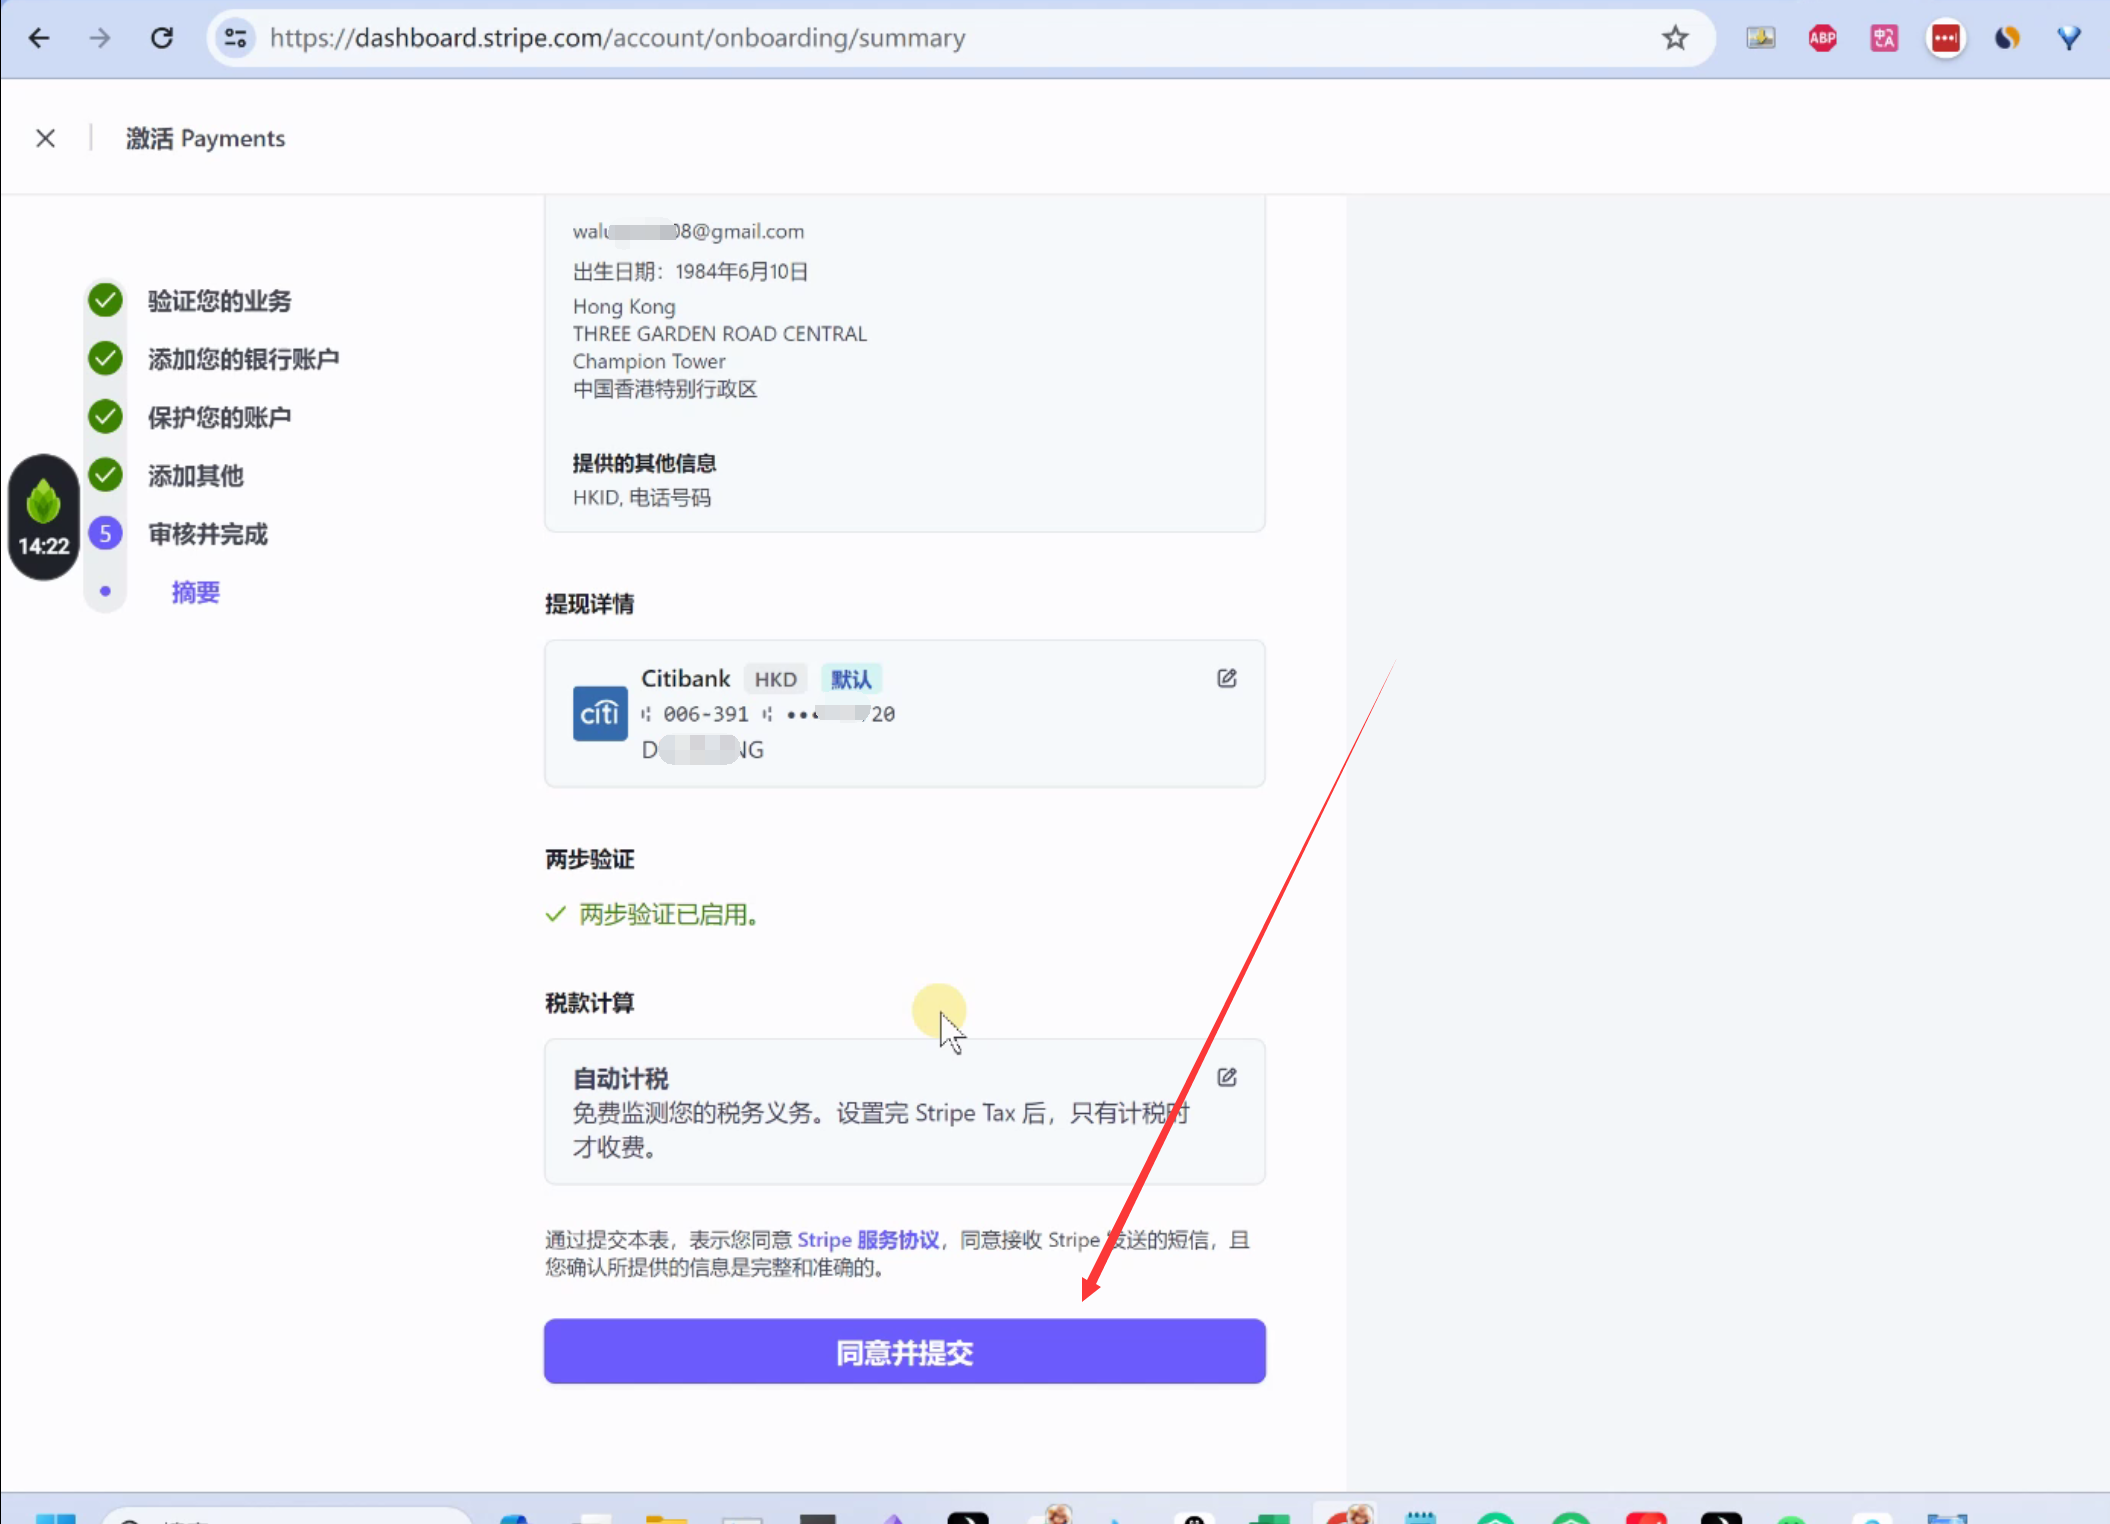
3.5 审核并提交
检查没问题,就点击提交
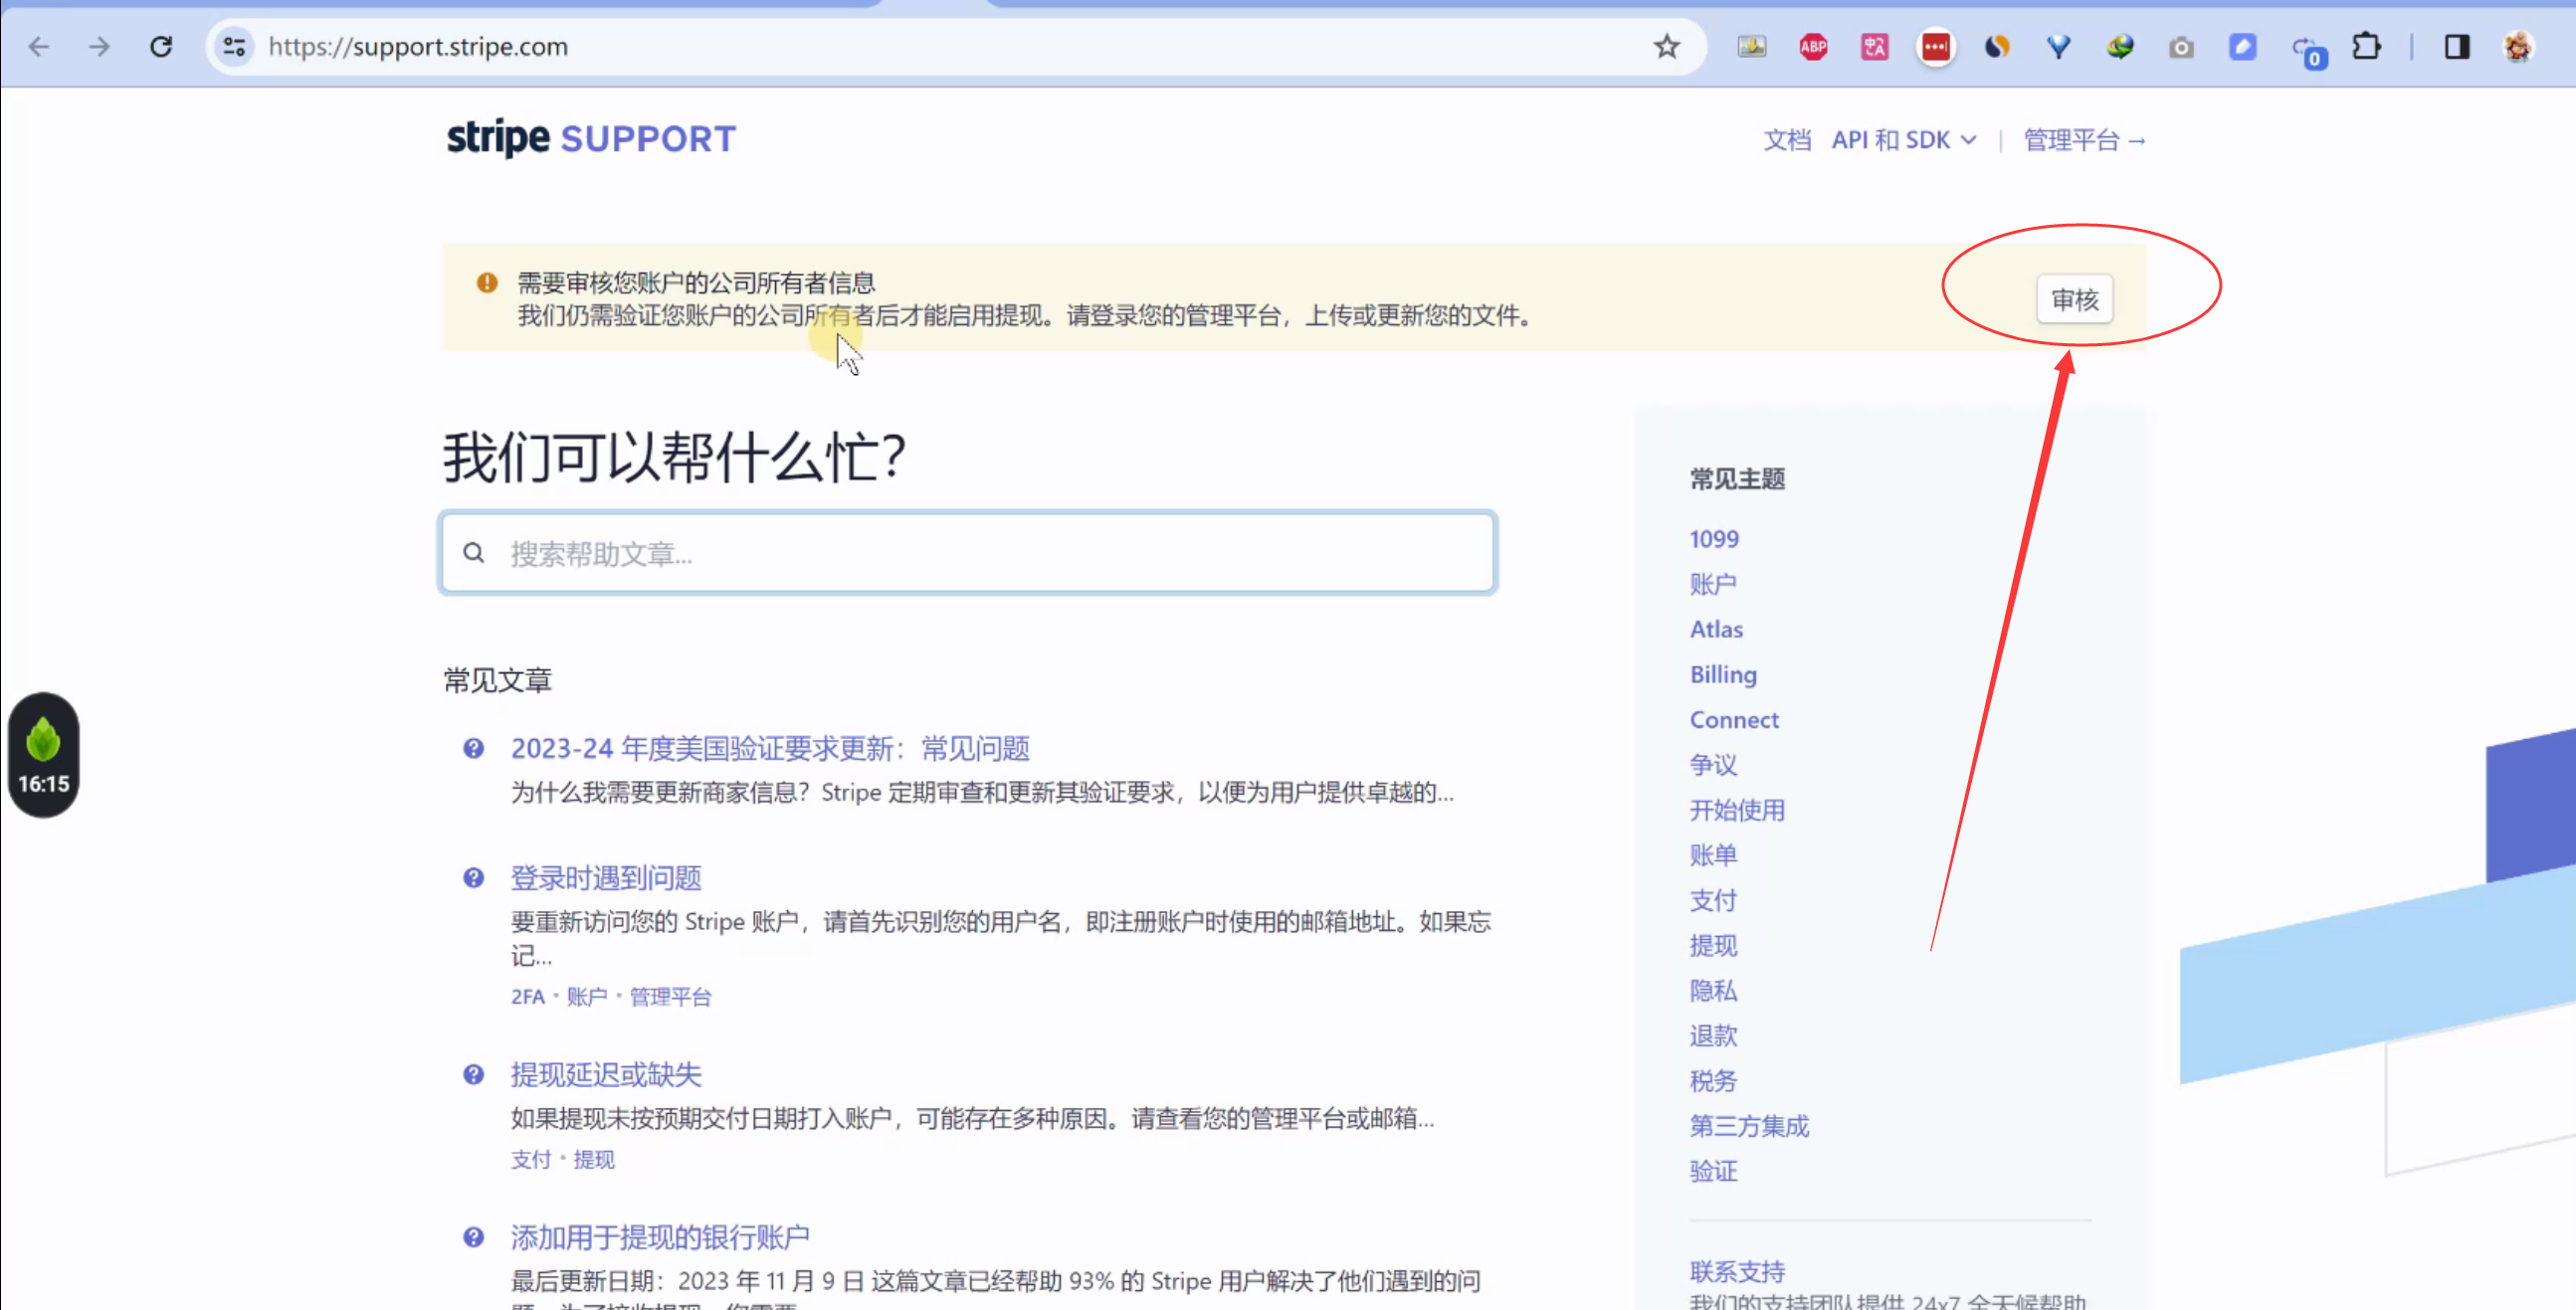
4.提交护照
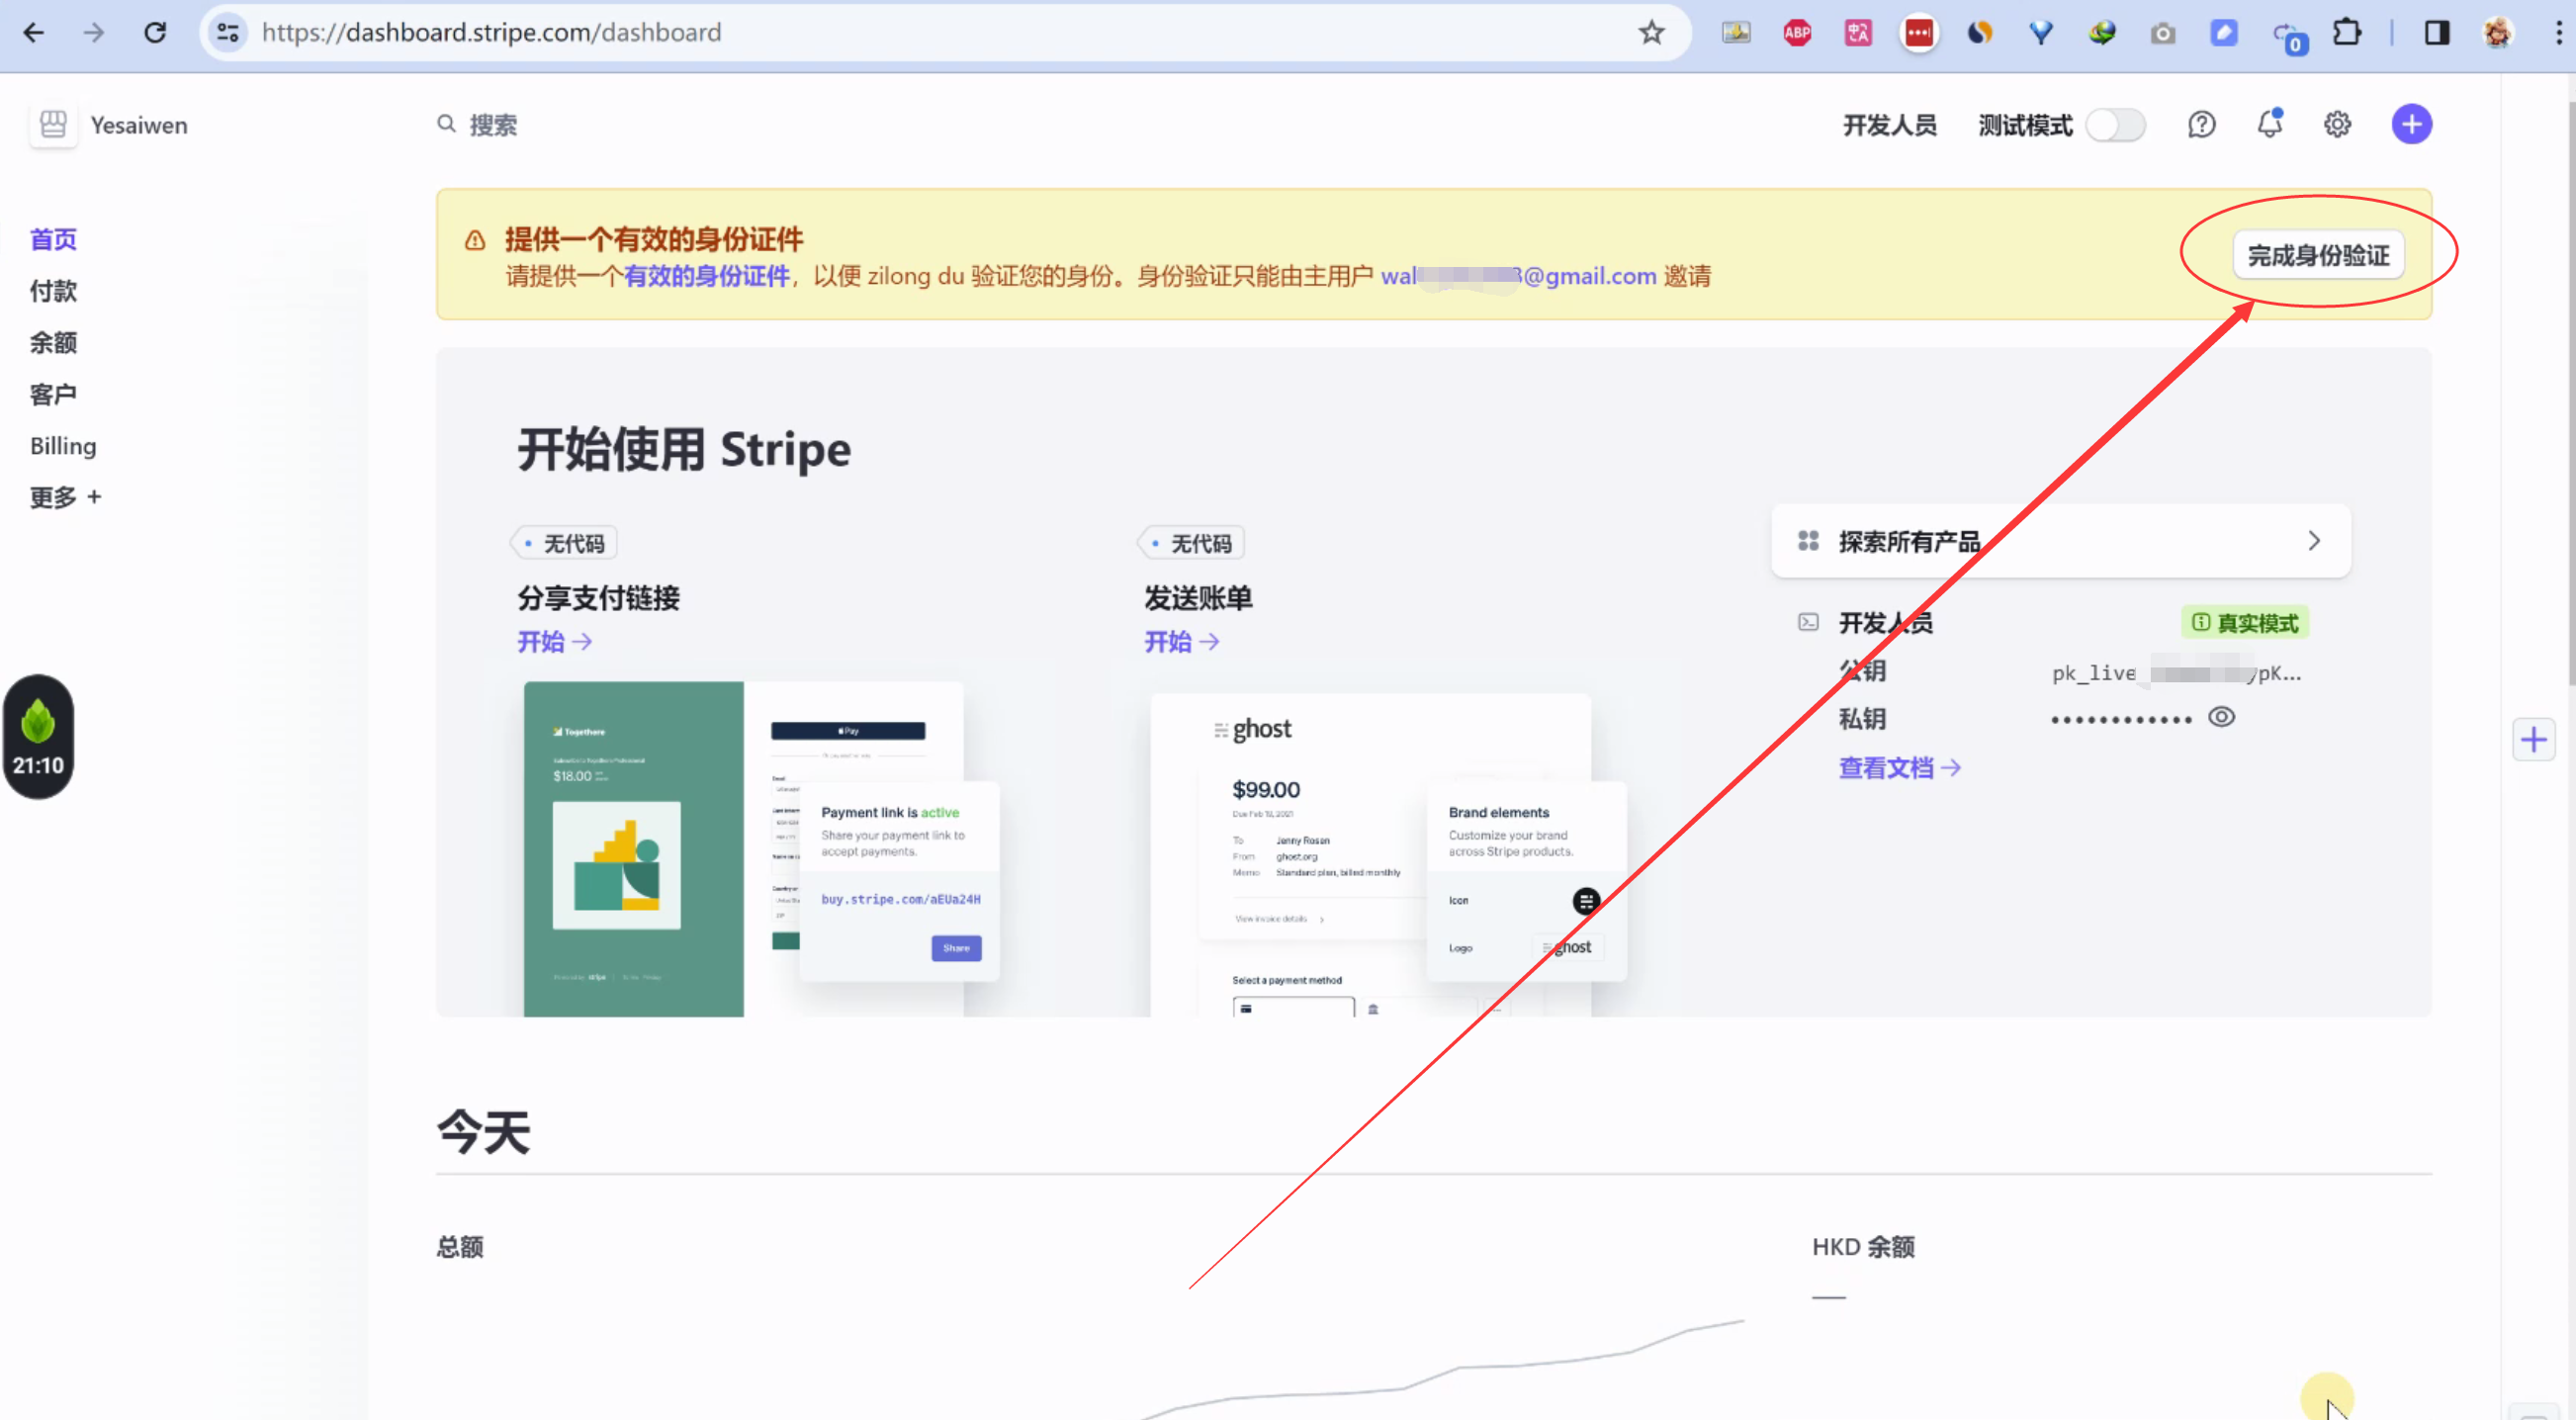
去帮助中心,开始进行认证。 点击下方的网址,然后点击右上角的“审核”
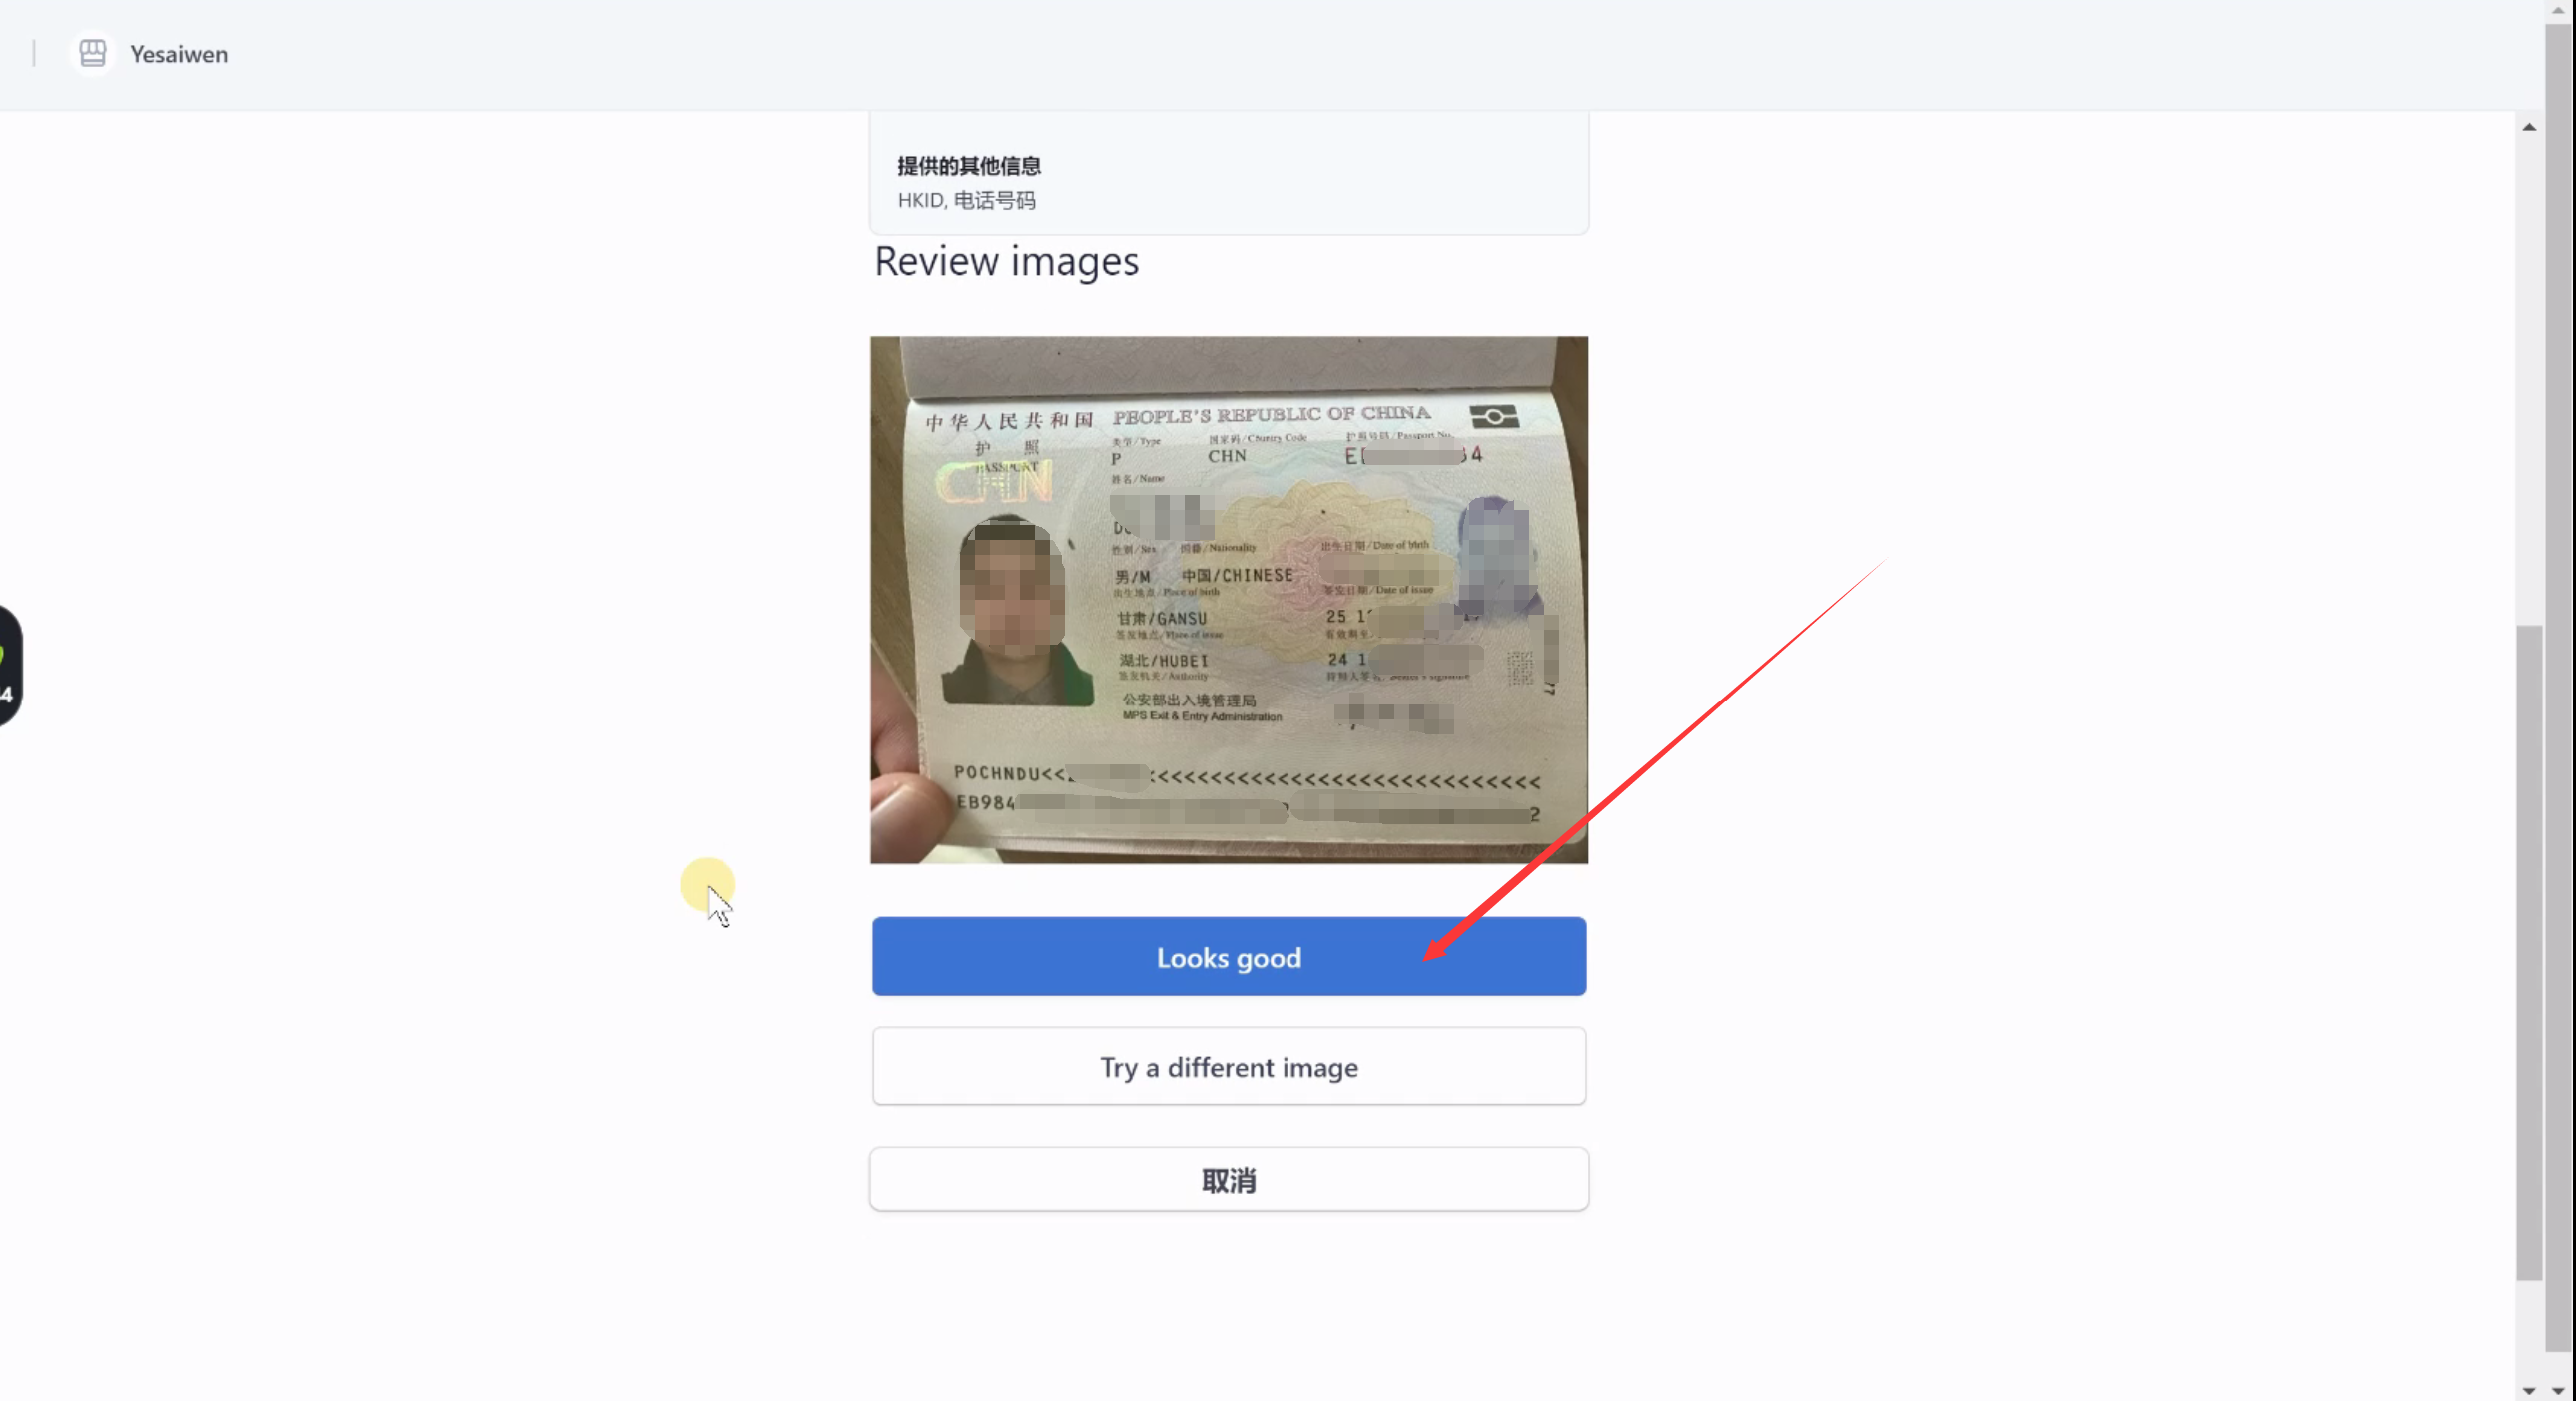
上传护照照片

点击“看起来不错(looks good)”
5.身份验证
最后一步了。 这里需要用到手机进行人脸检测。
提交完护照后,就需要进行身份验证。
点击“完成身份验证”。
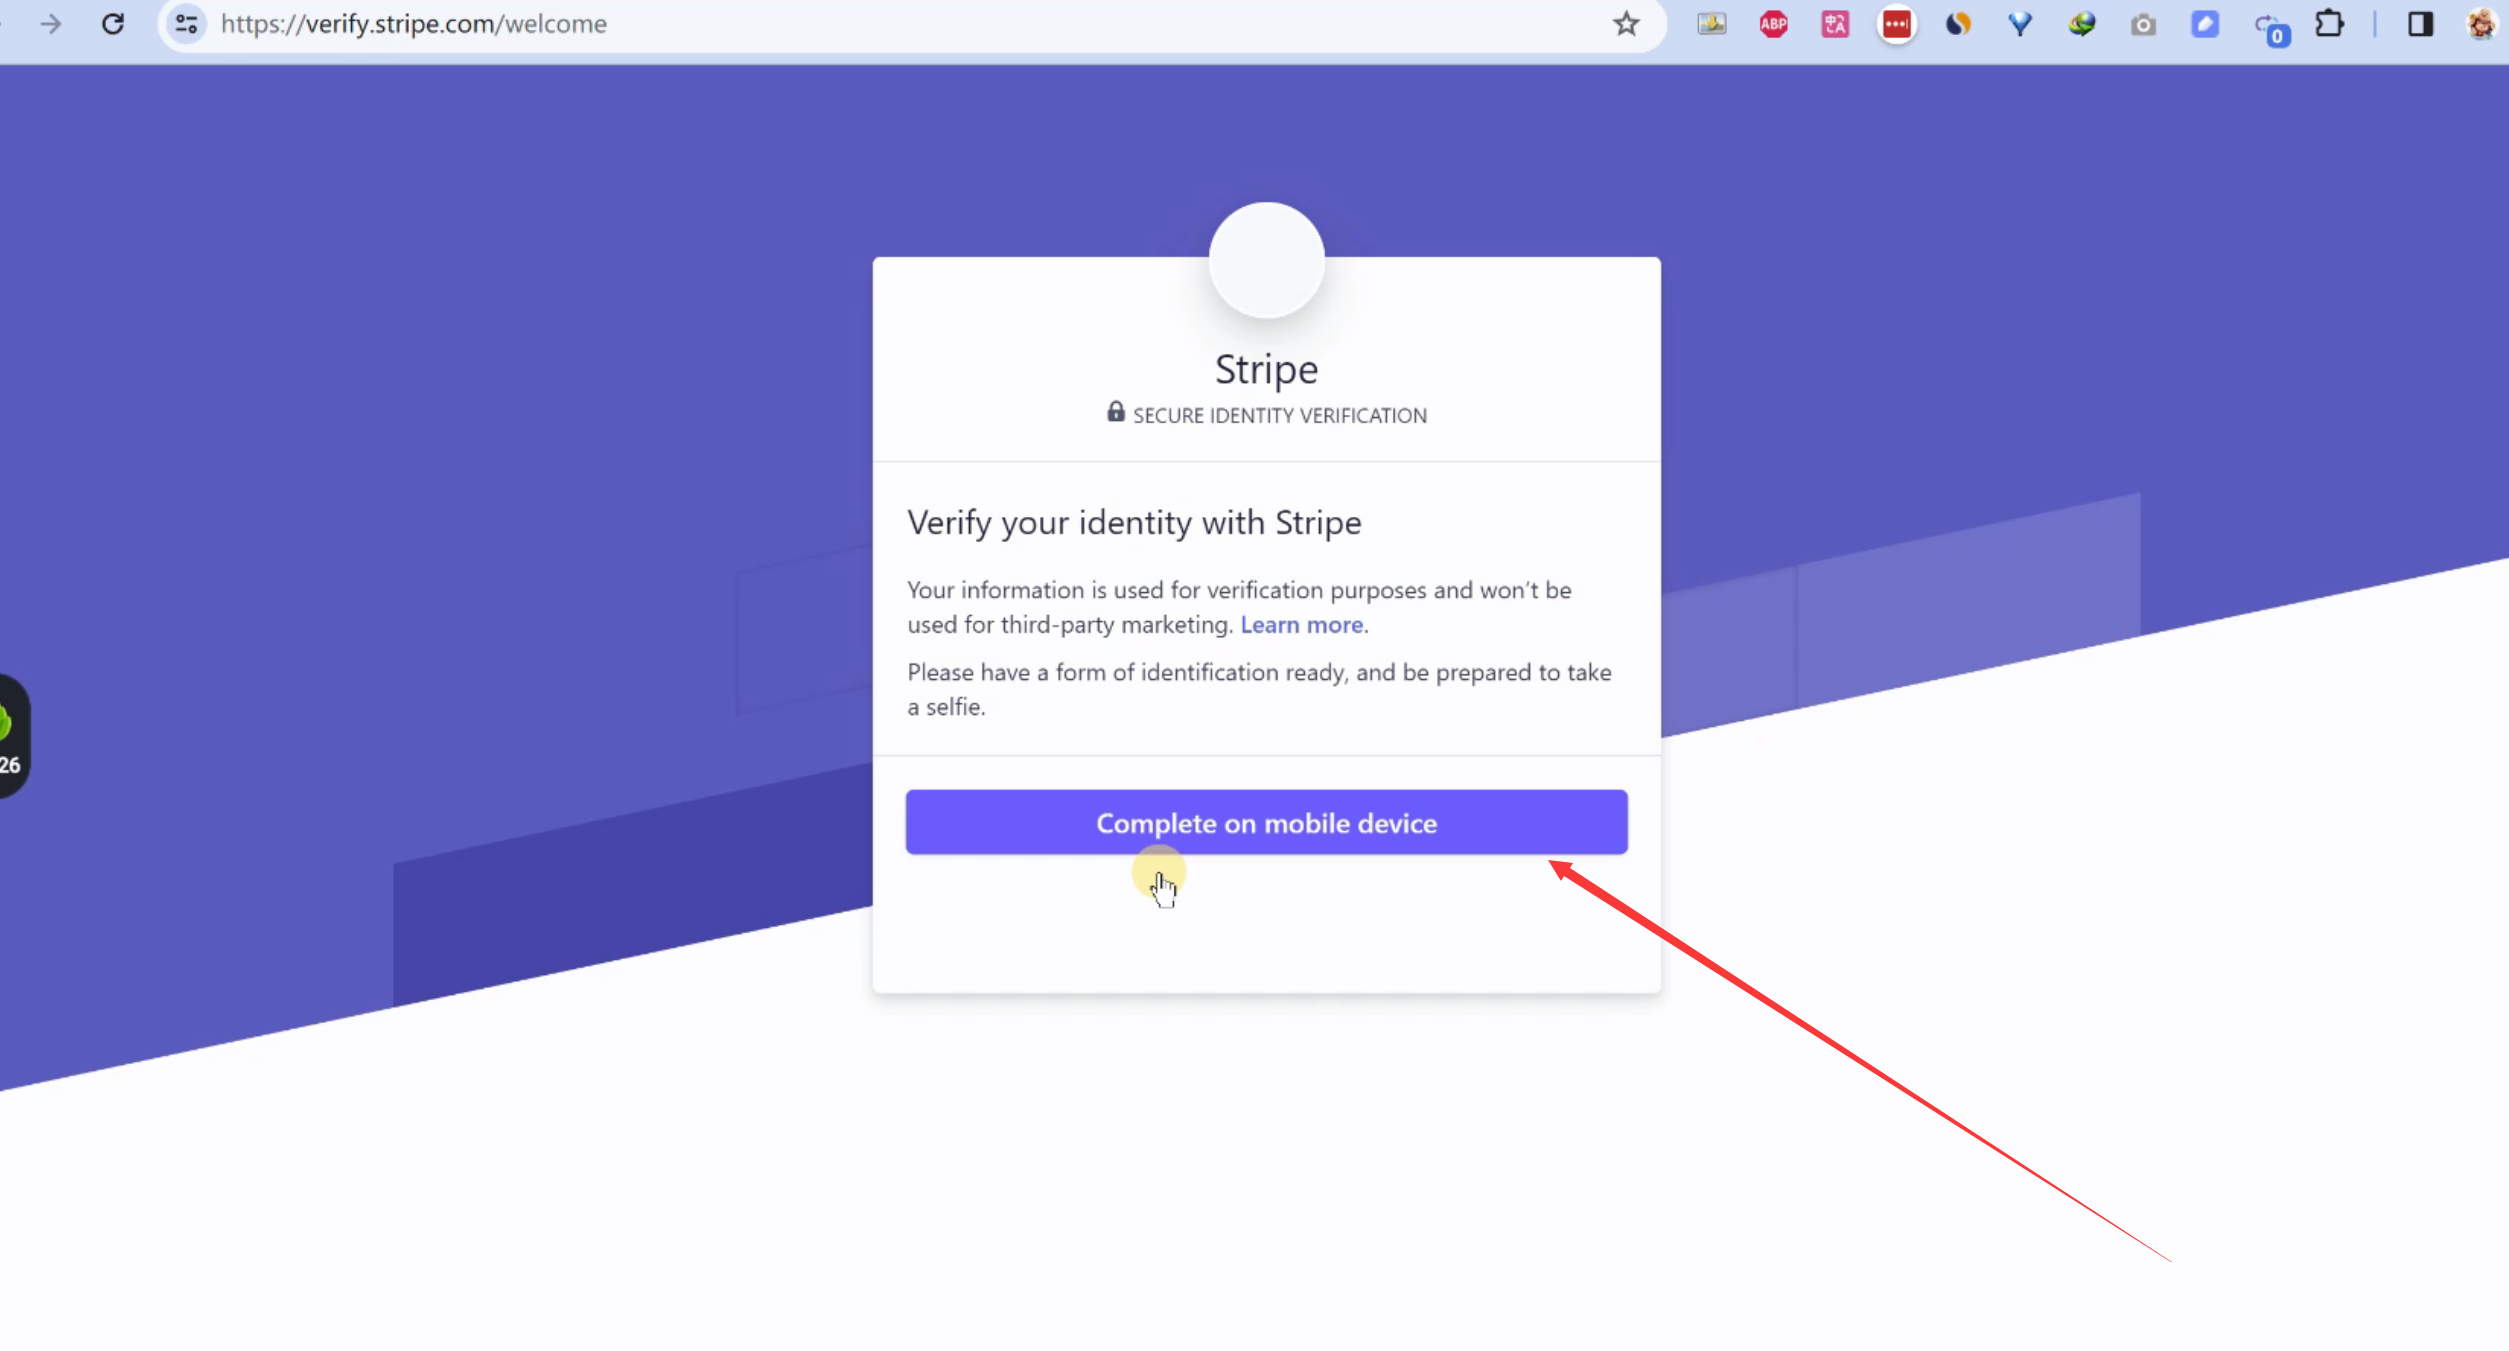
点击“在手机端完成验证(complete on Mobile device)”
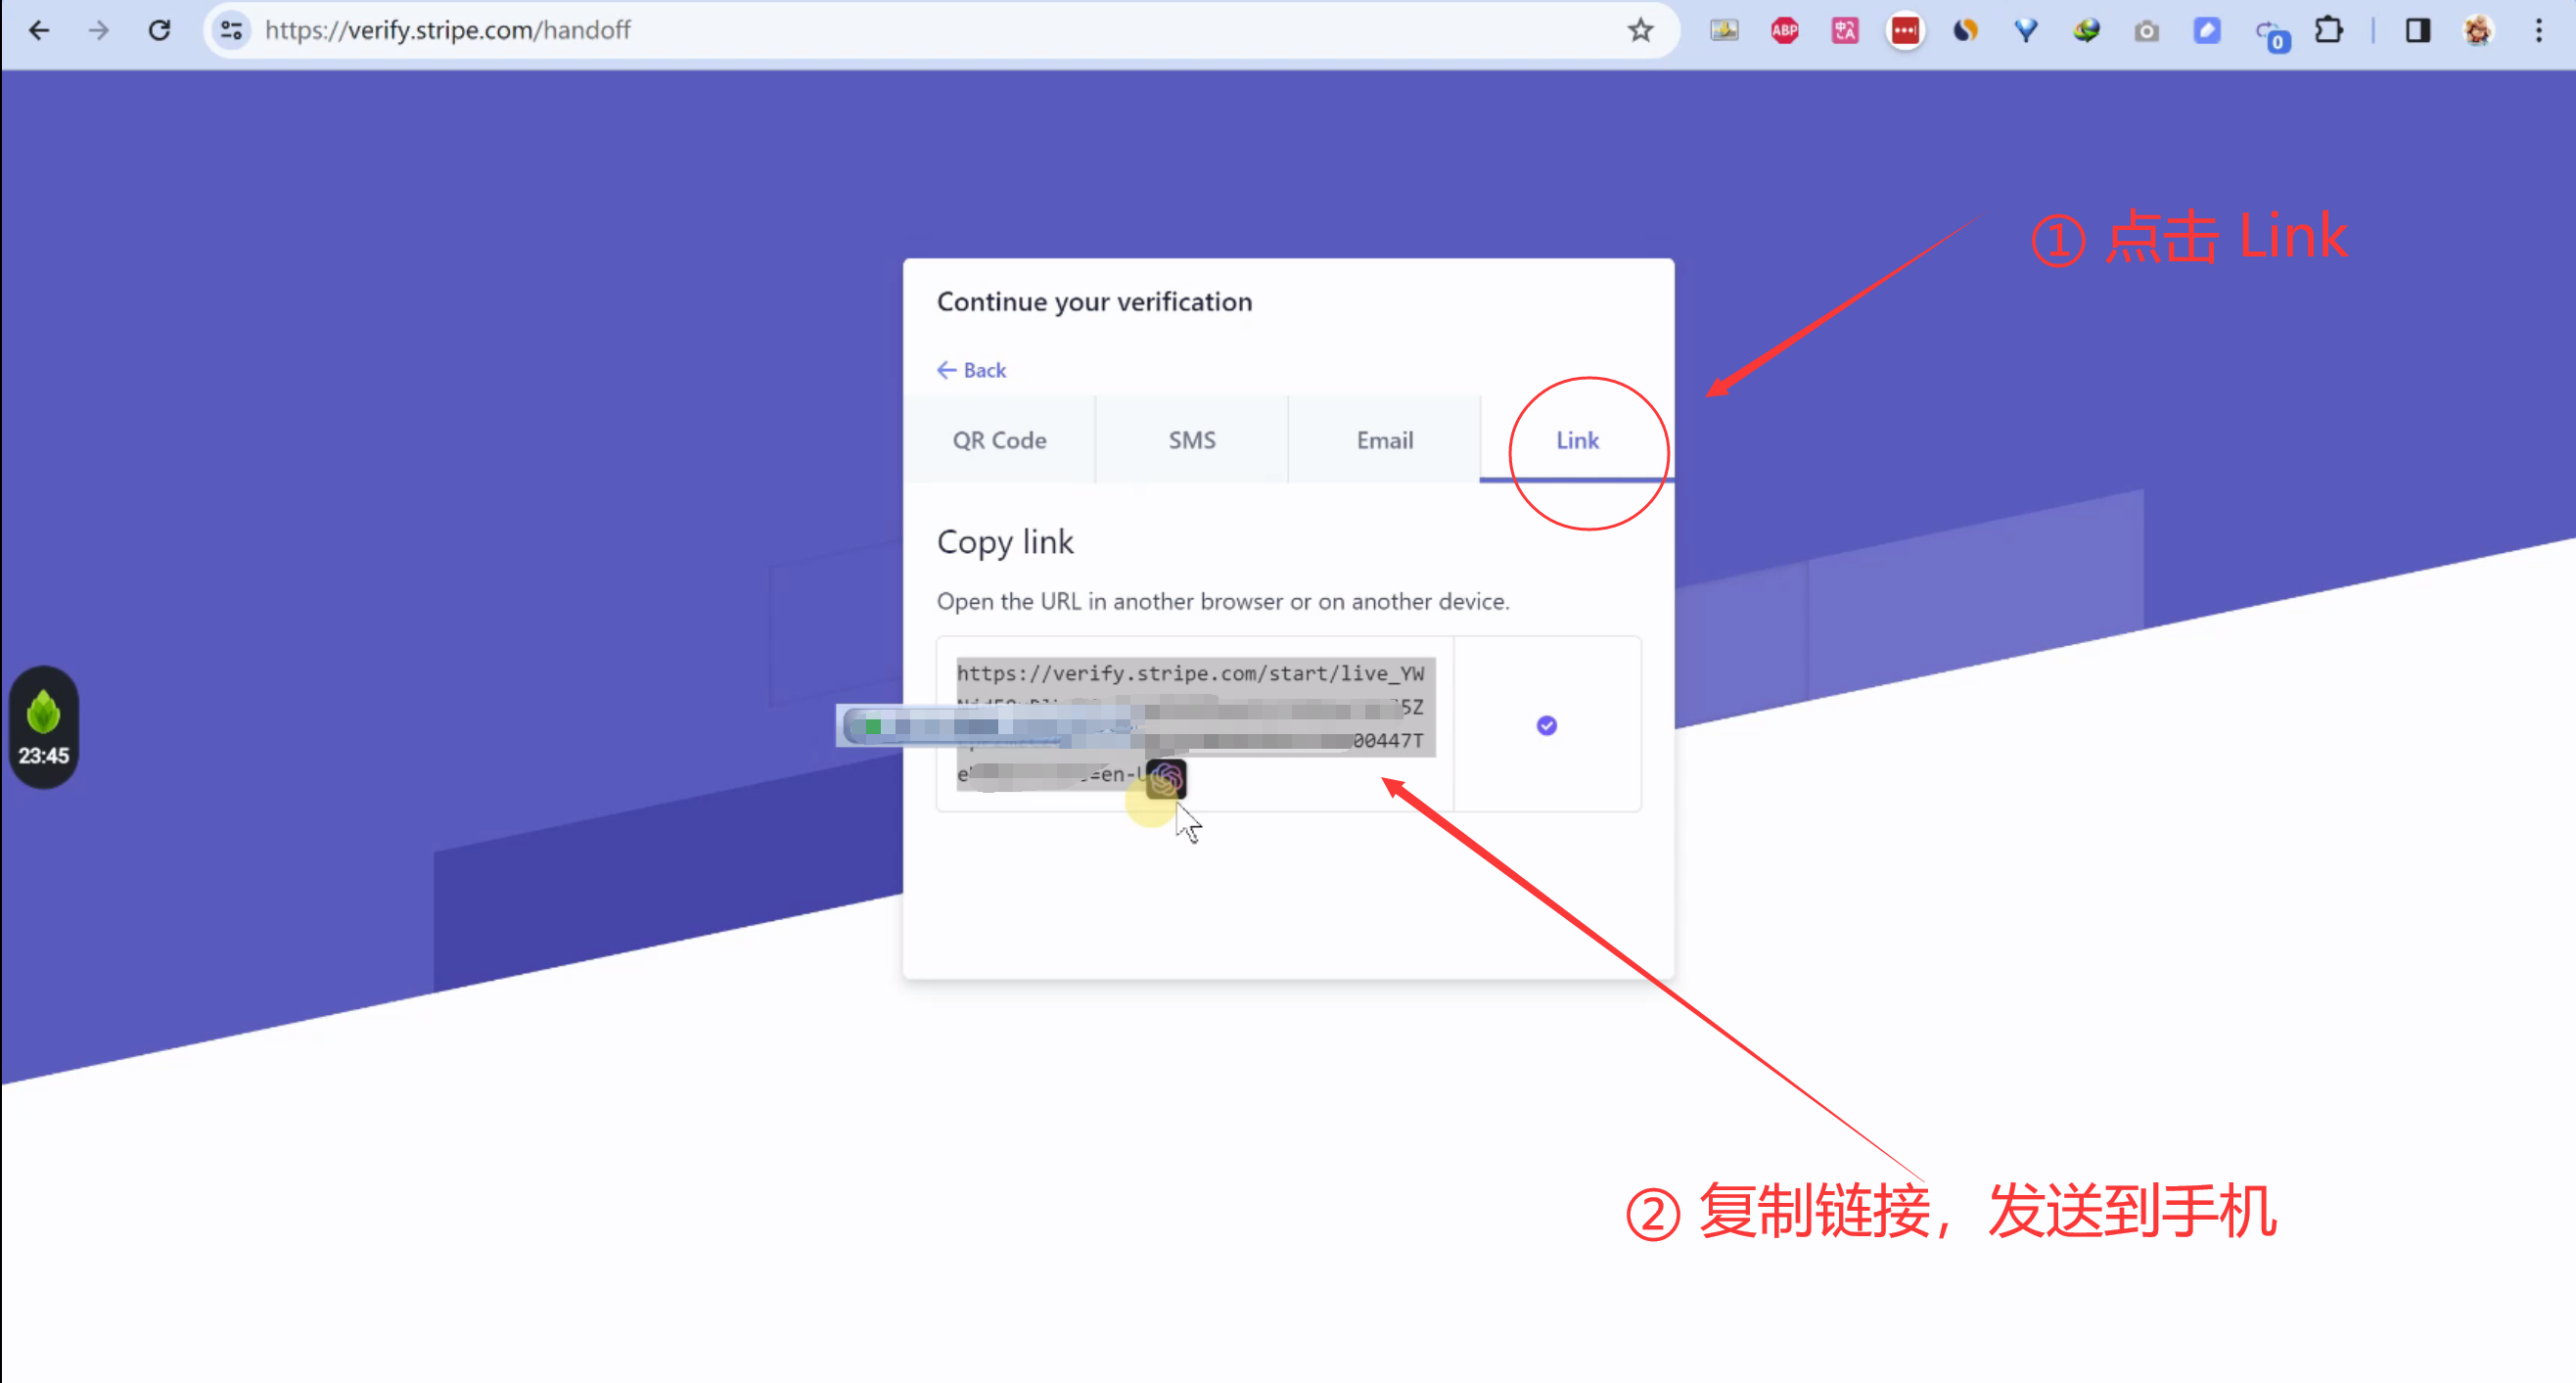
点击“Link”, 然后把链接,发送到手机上, 用谷歌浏览器打开。
注意: 要用谷歌浏览器打开。 别的浏览器,比如小米浏览器,会出错。
5.1 手机端操作
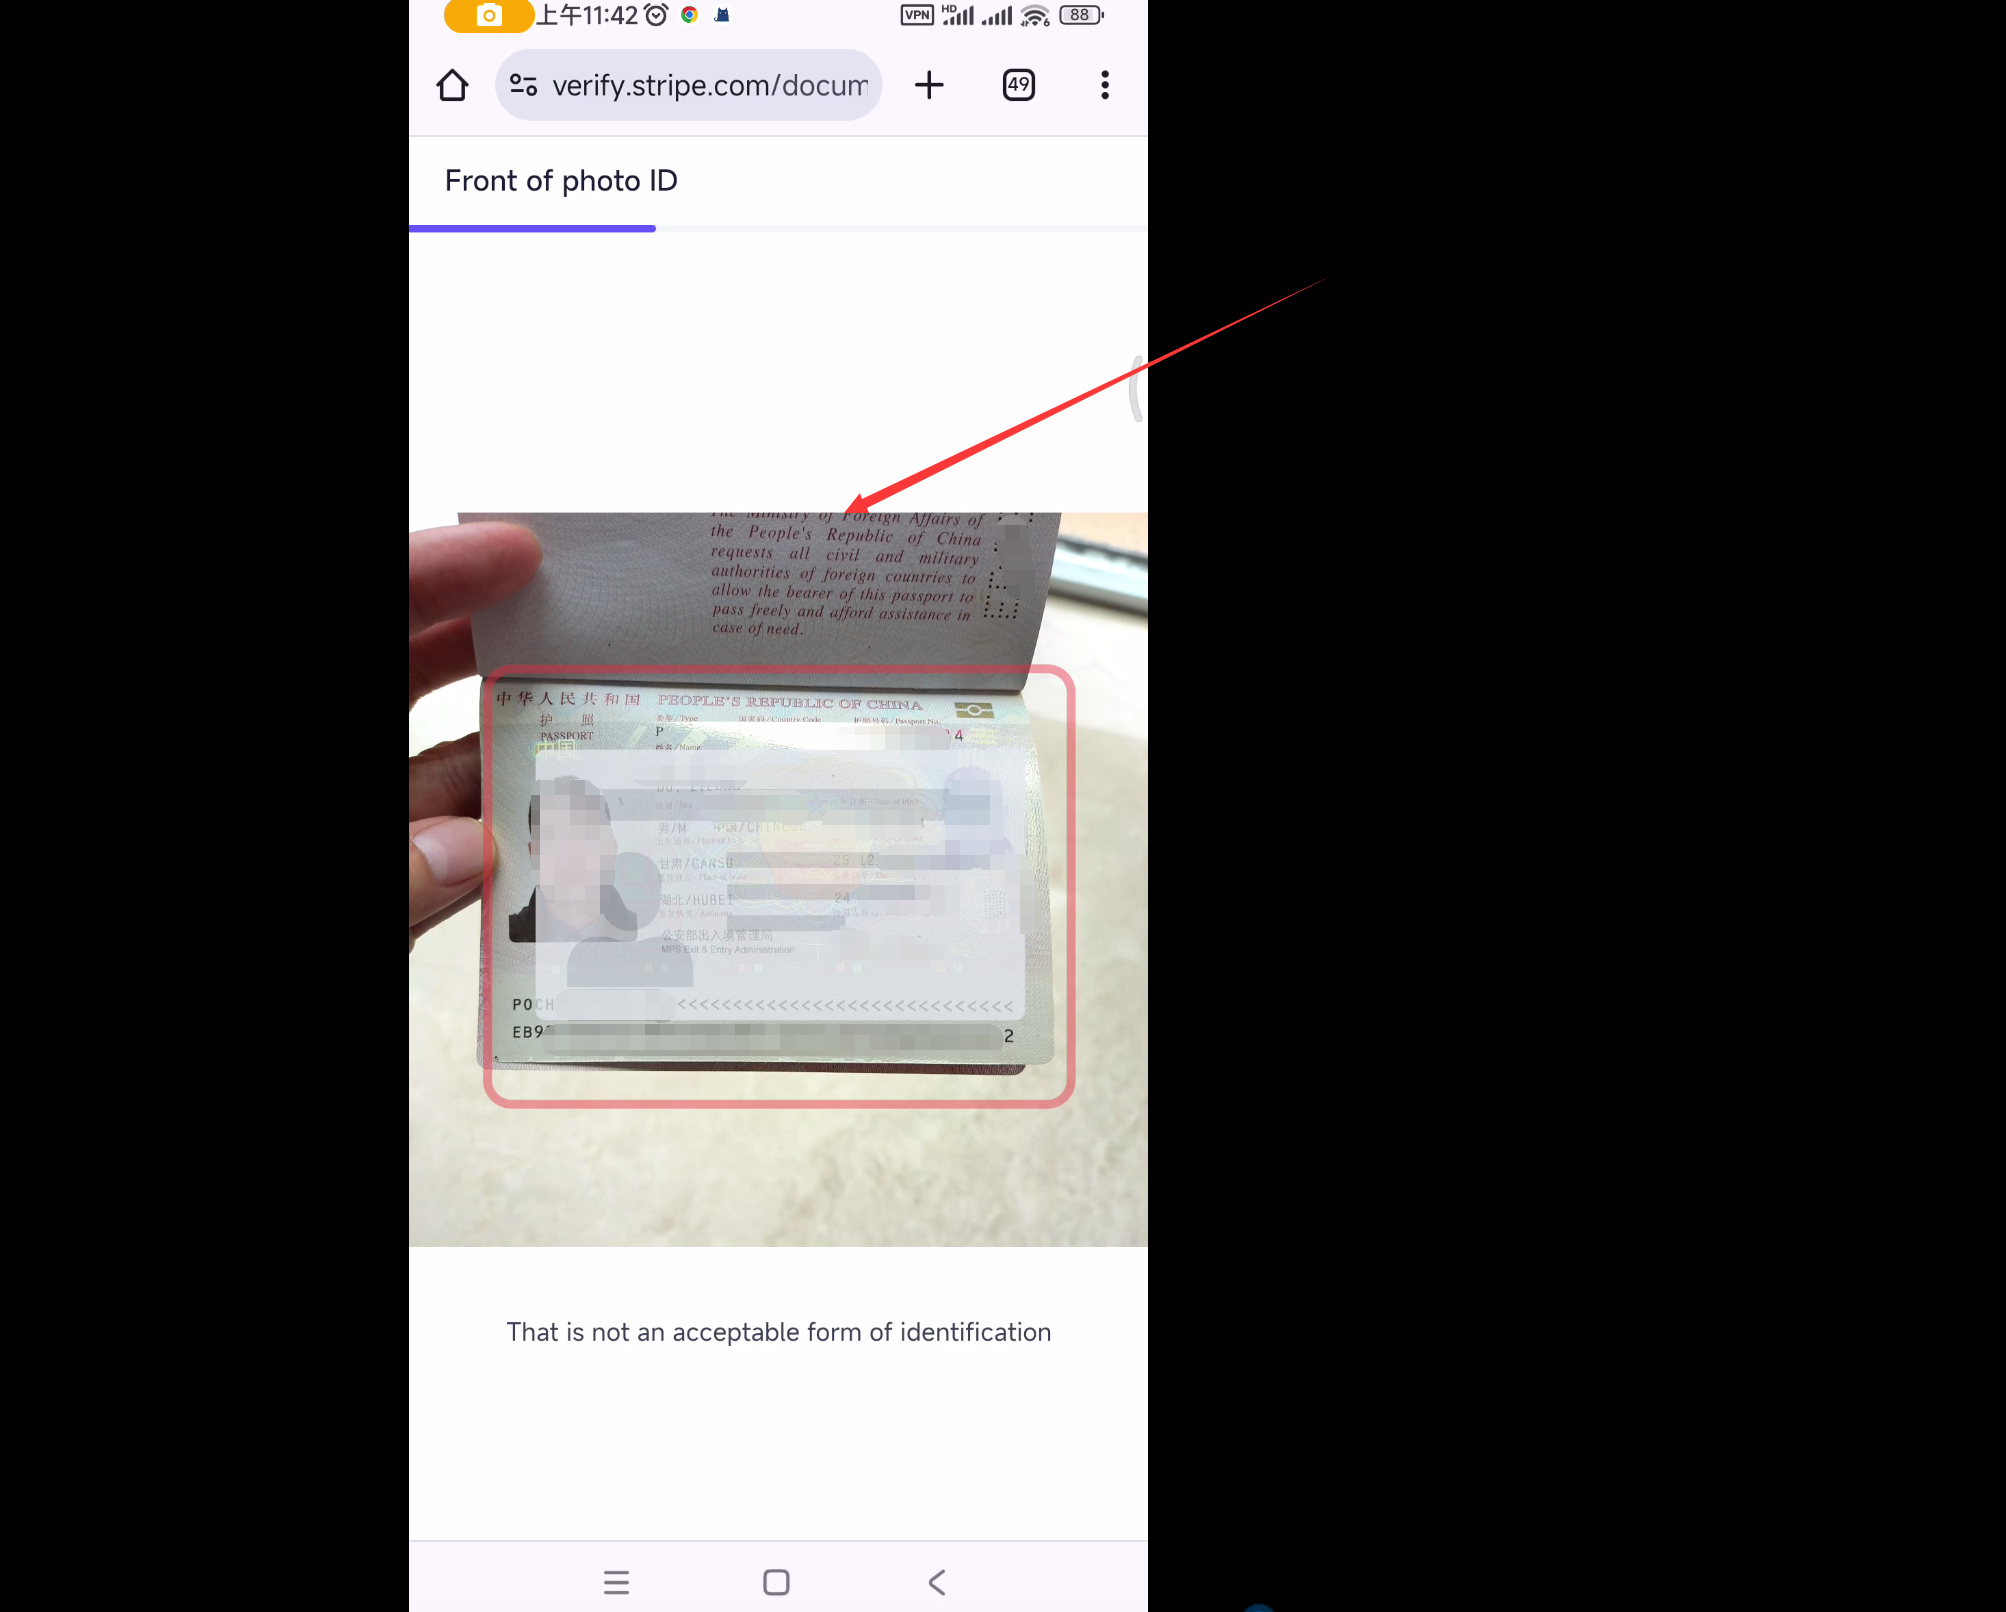
提前准备好护照。这里要用到。
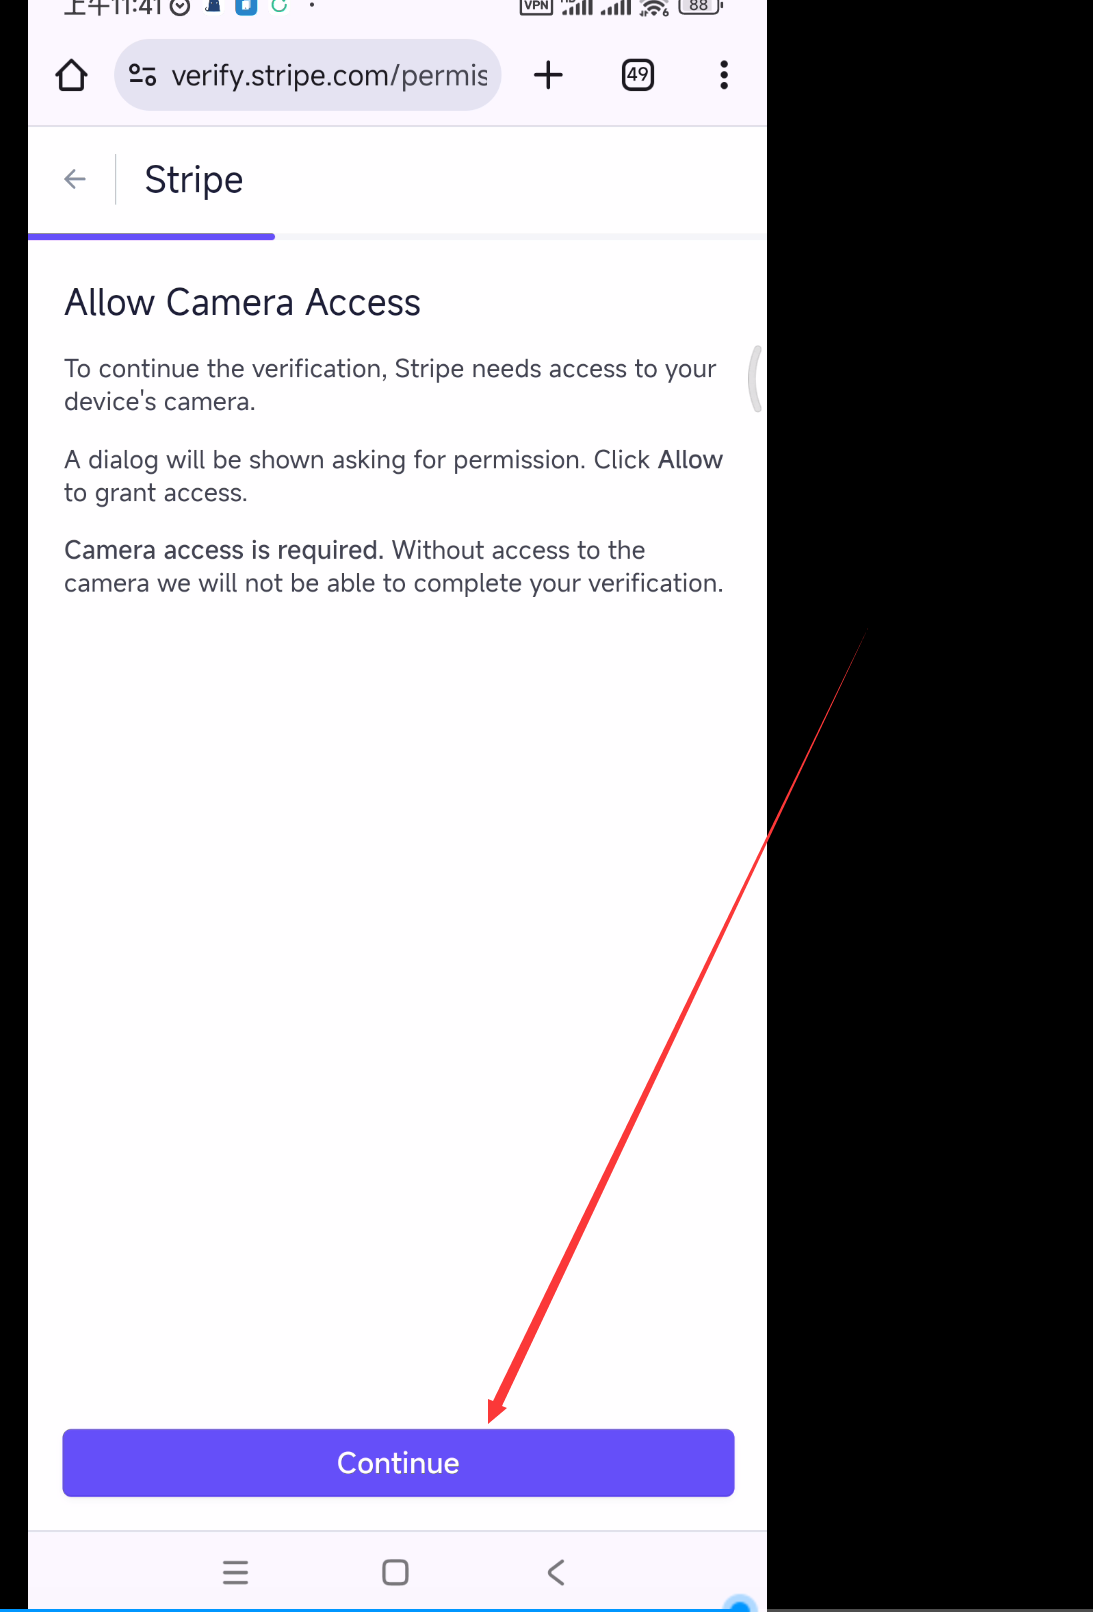
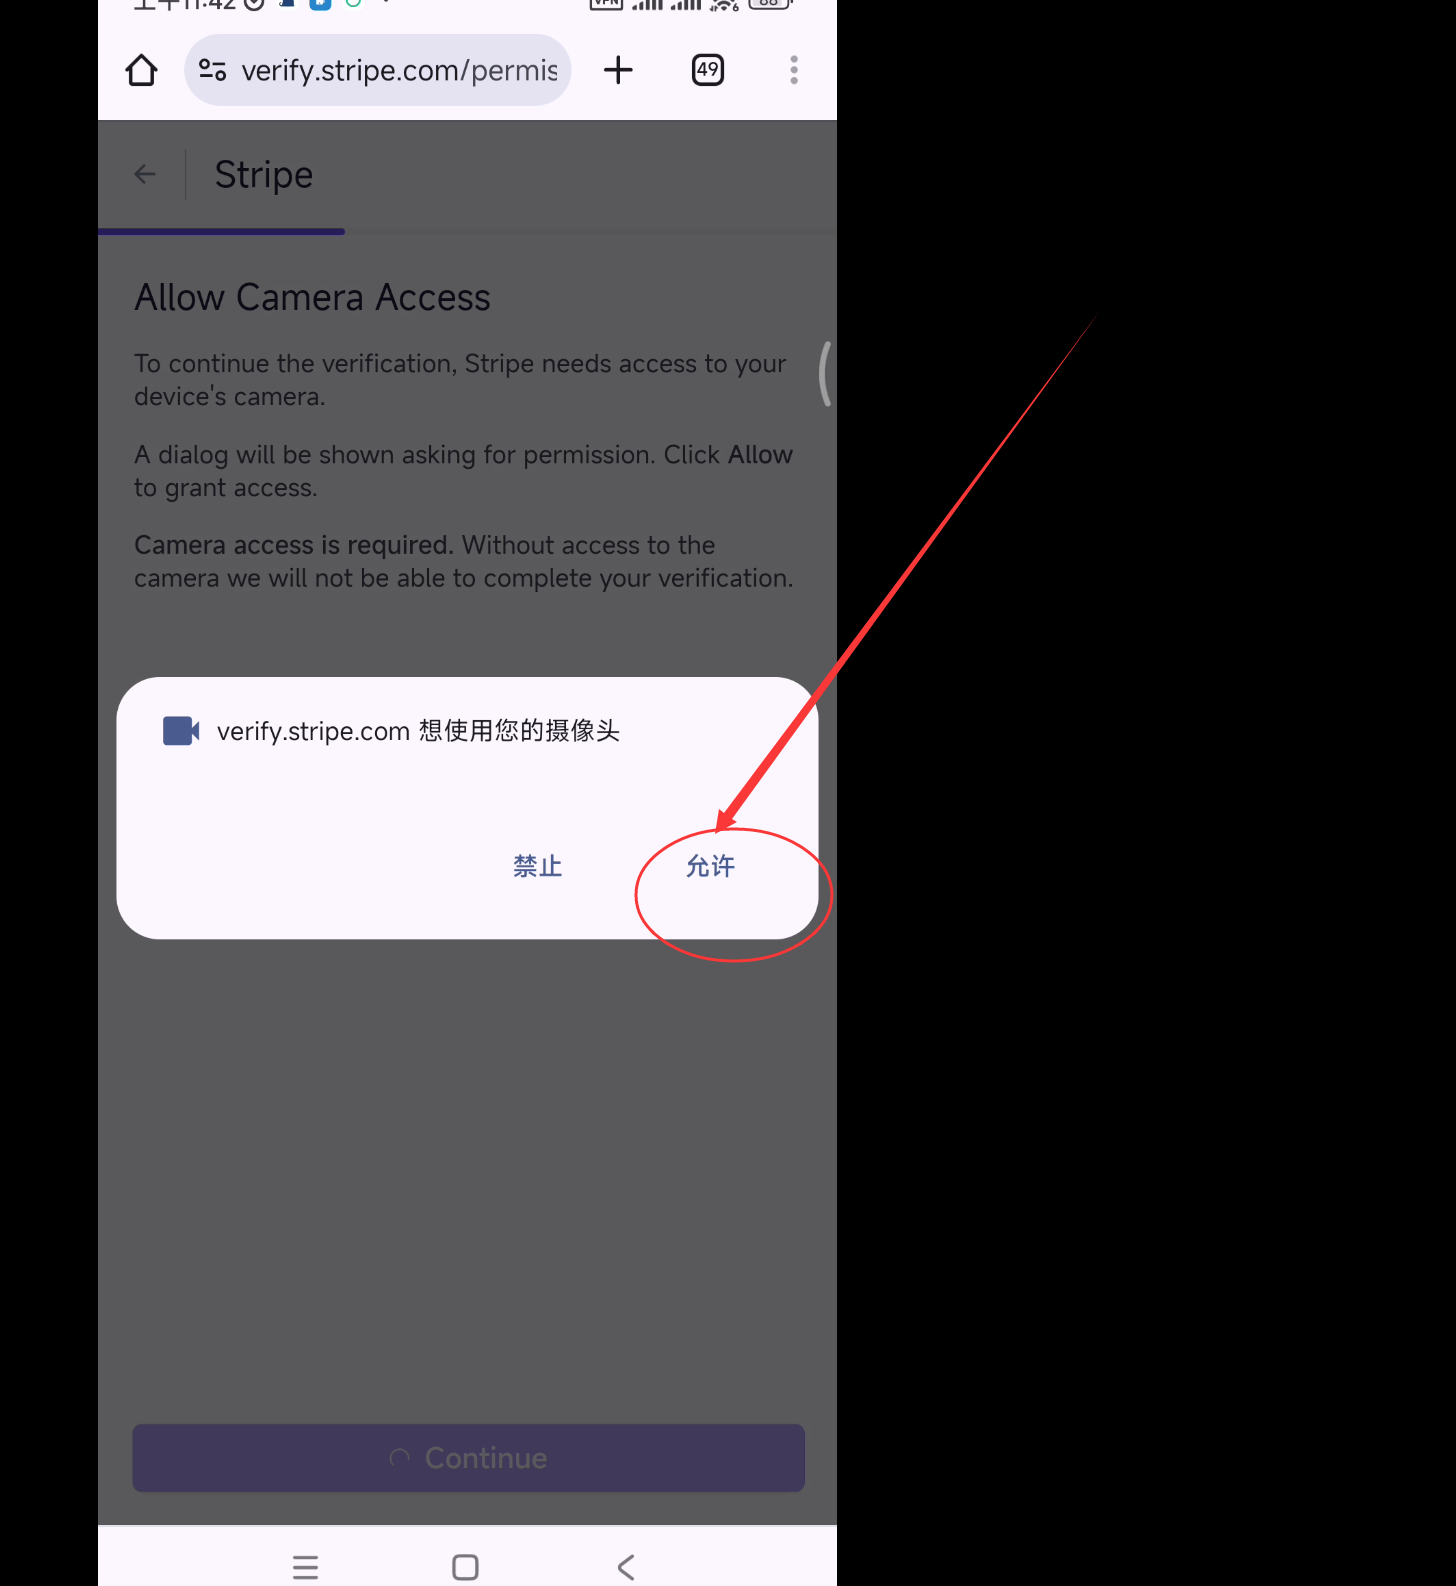
拿出护照
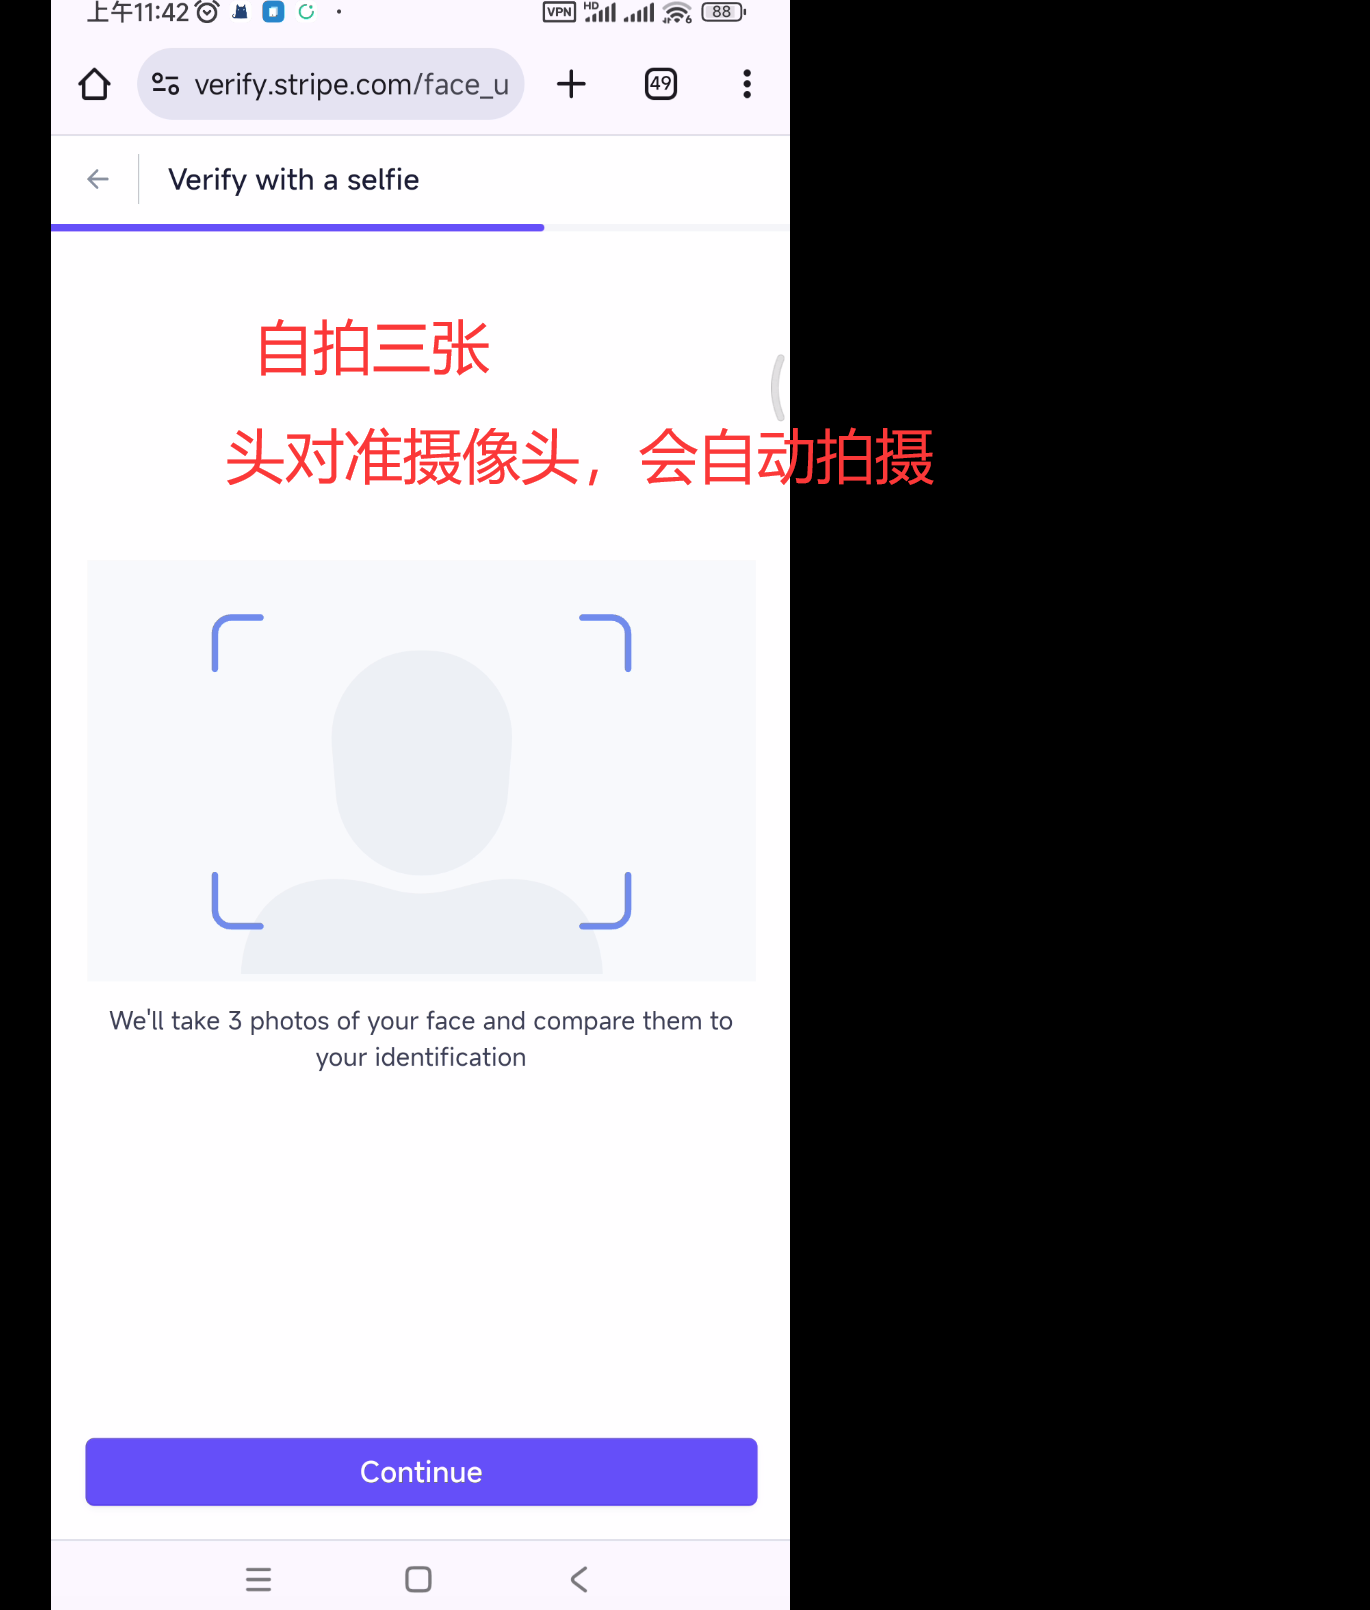
自拍三张
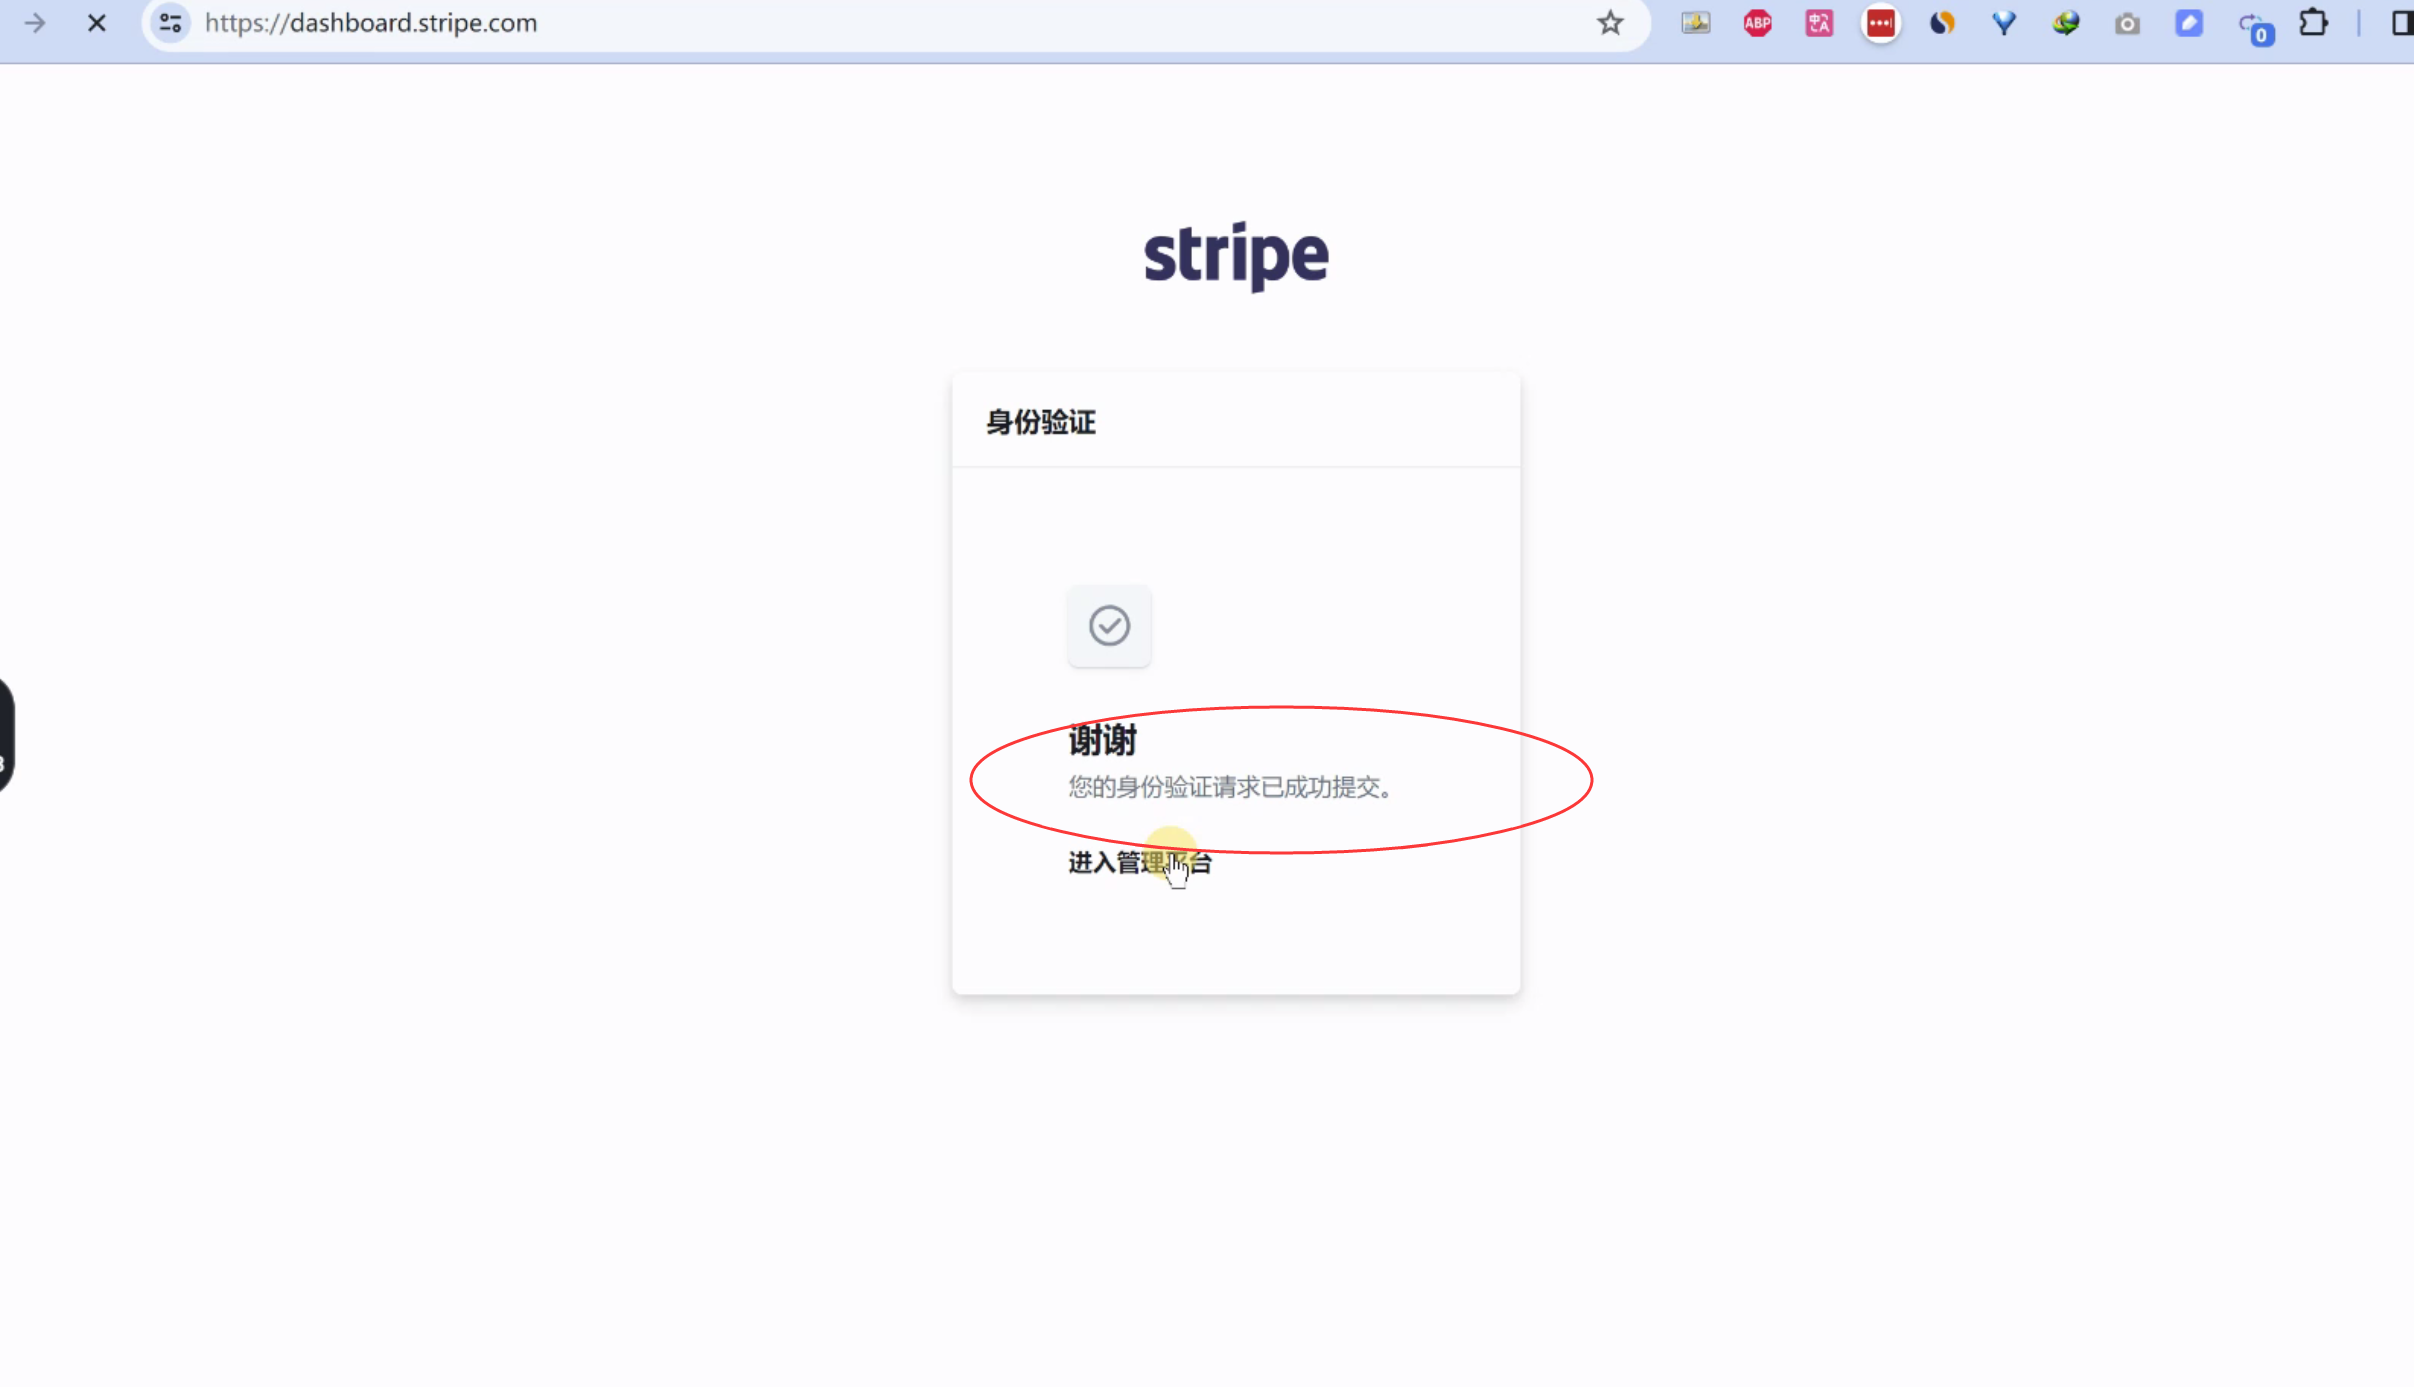
身份验证成功。
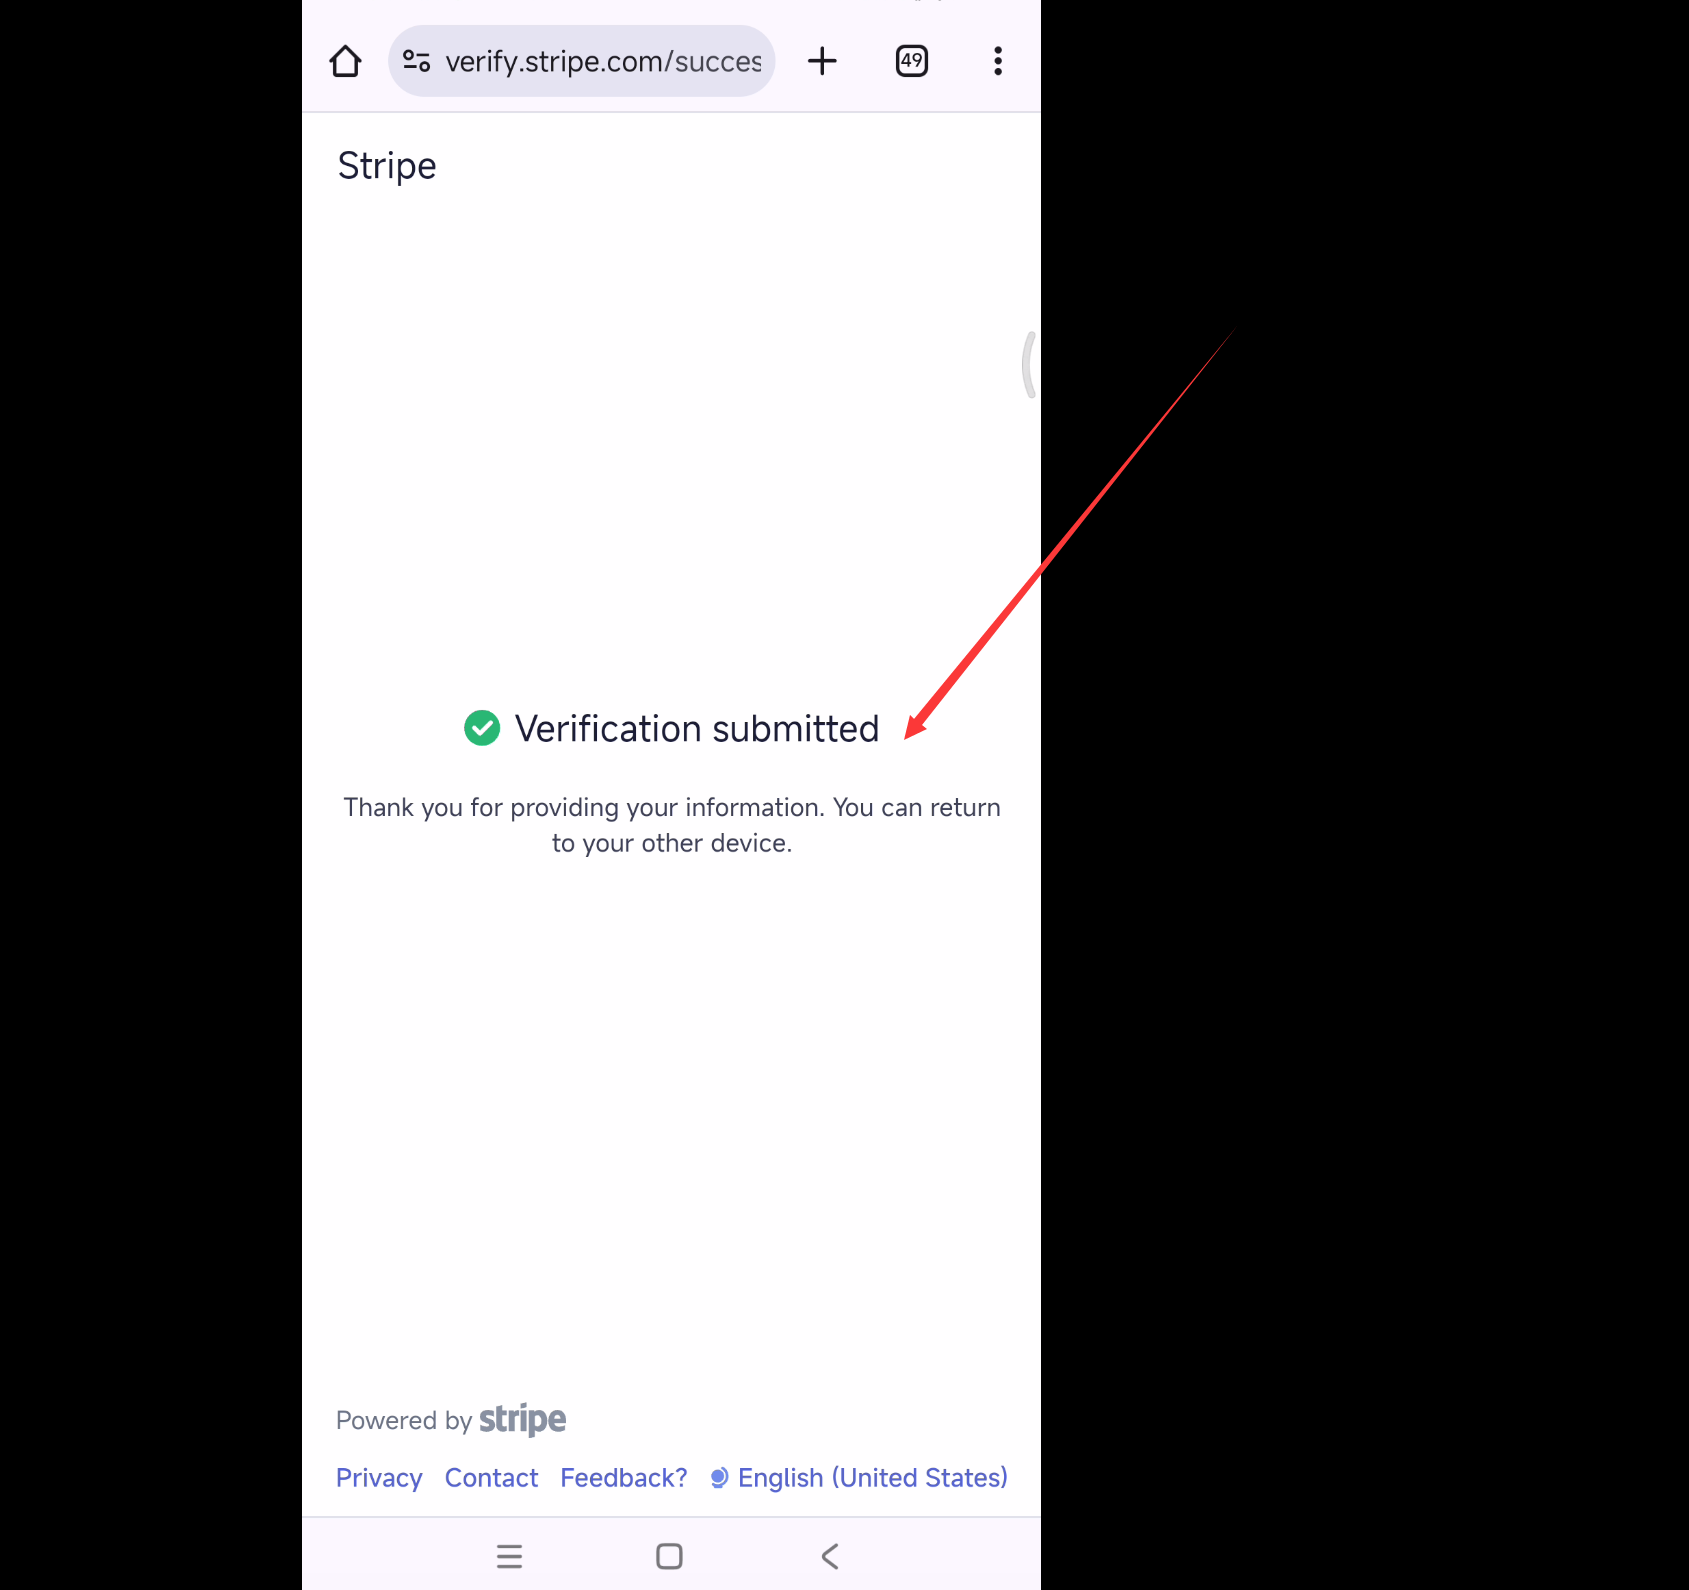
5.2 回到电脑端
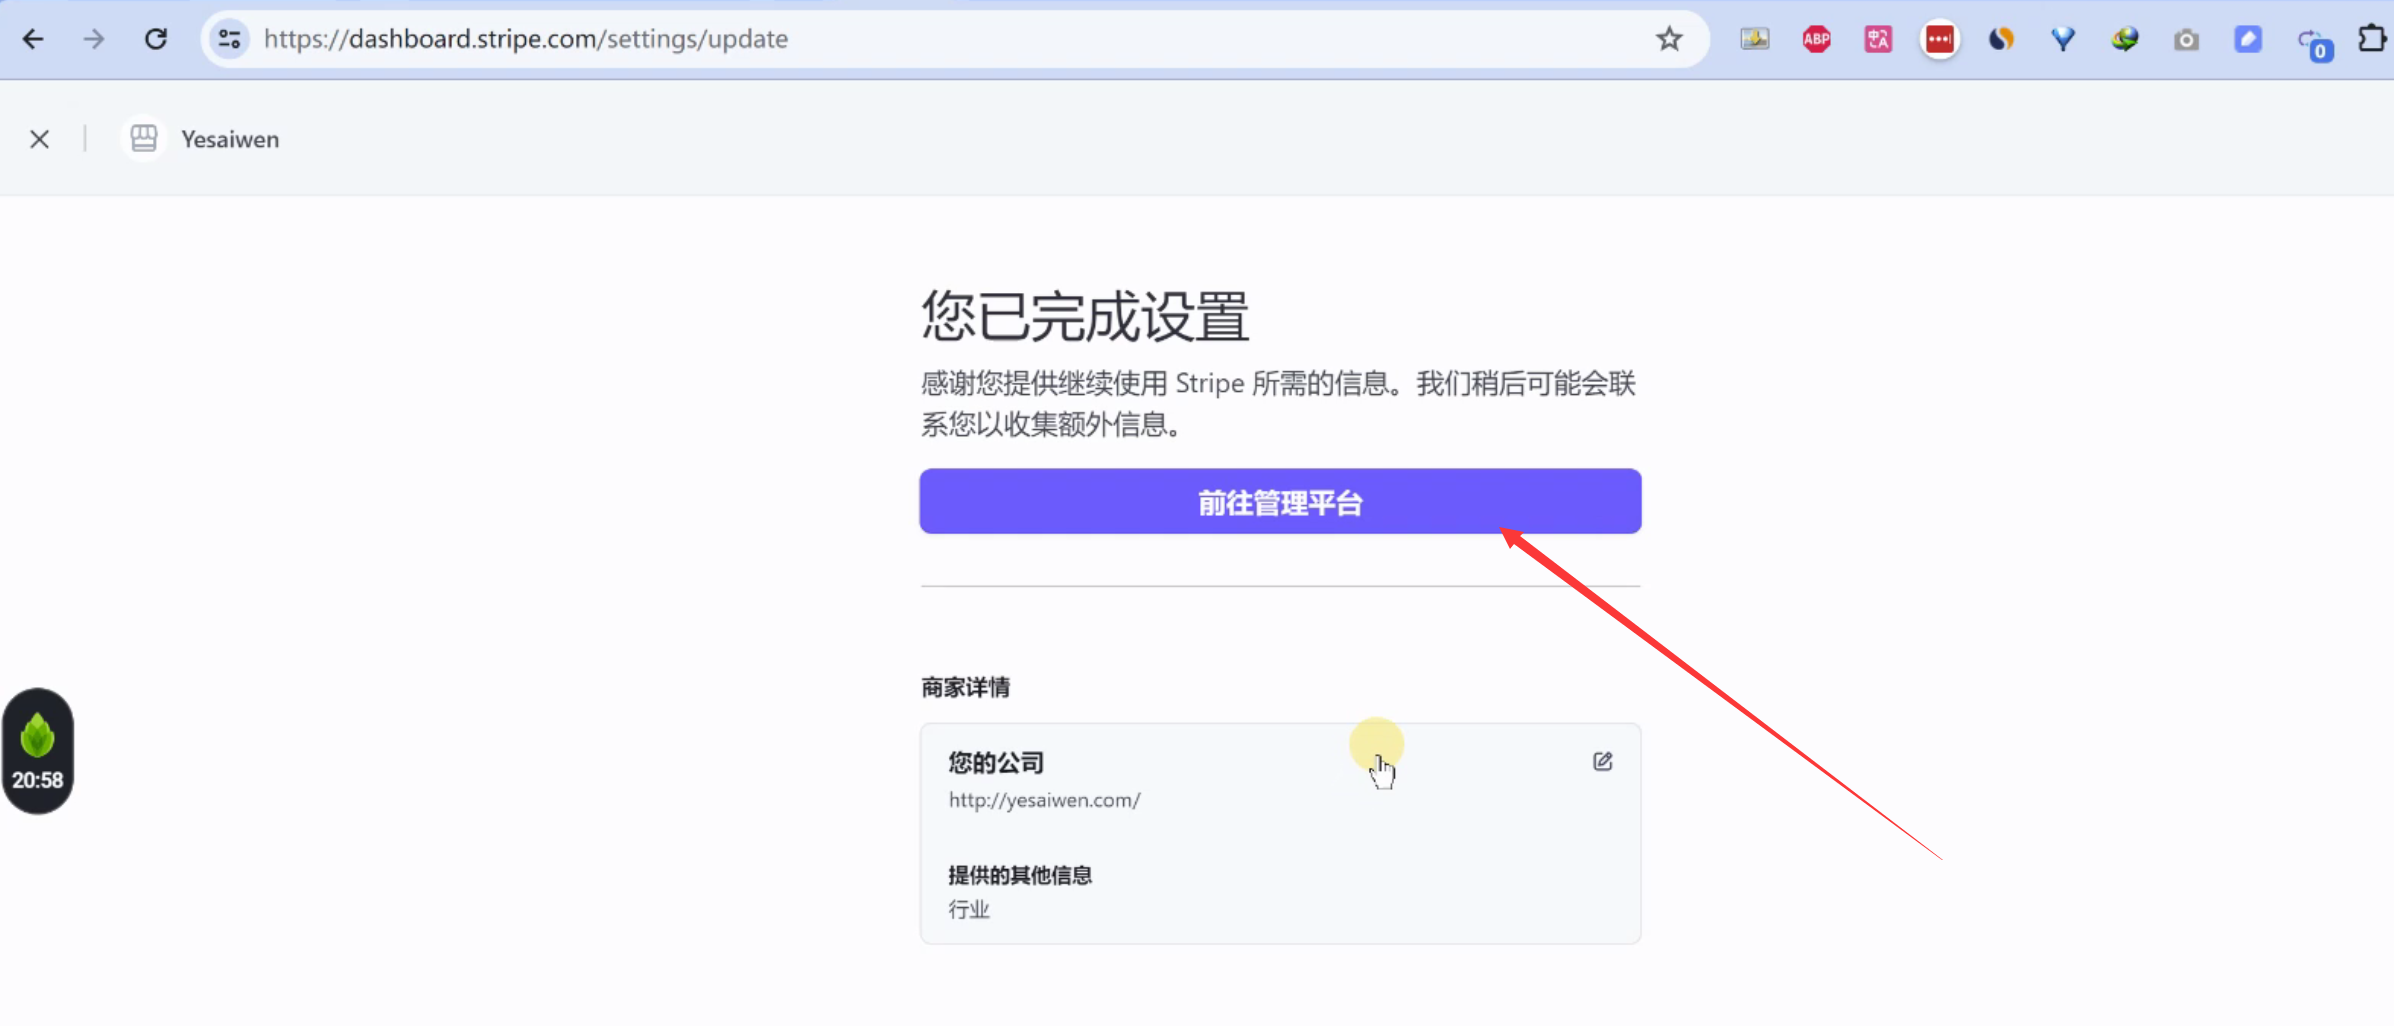
手机端验证后,在电脑上,可以看到身份请求已经提交。
打开注册的电子邮箱,可以看到,stripe发送是邮件:已经可以收款和支付。

整个流程结束。
6.使用
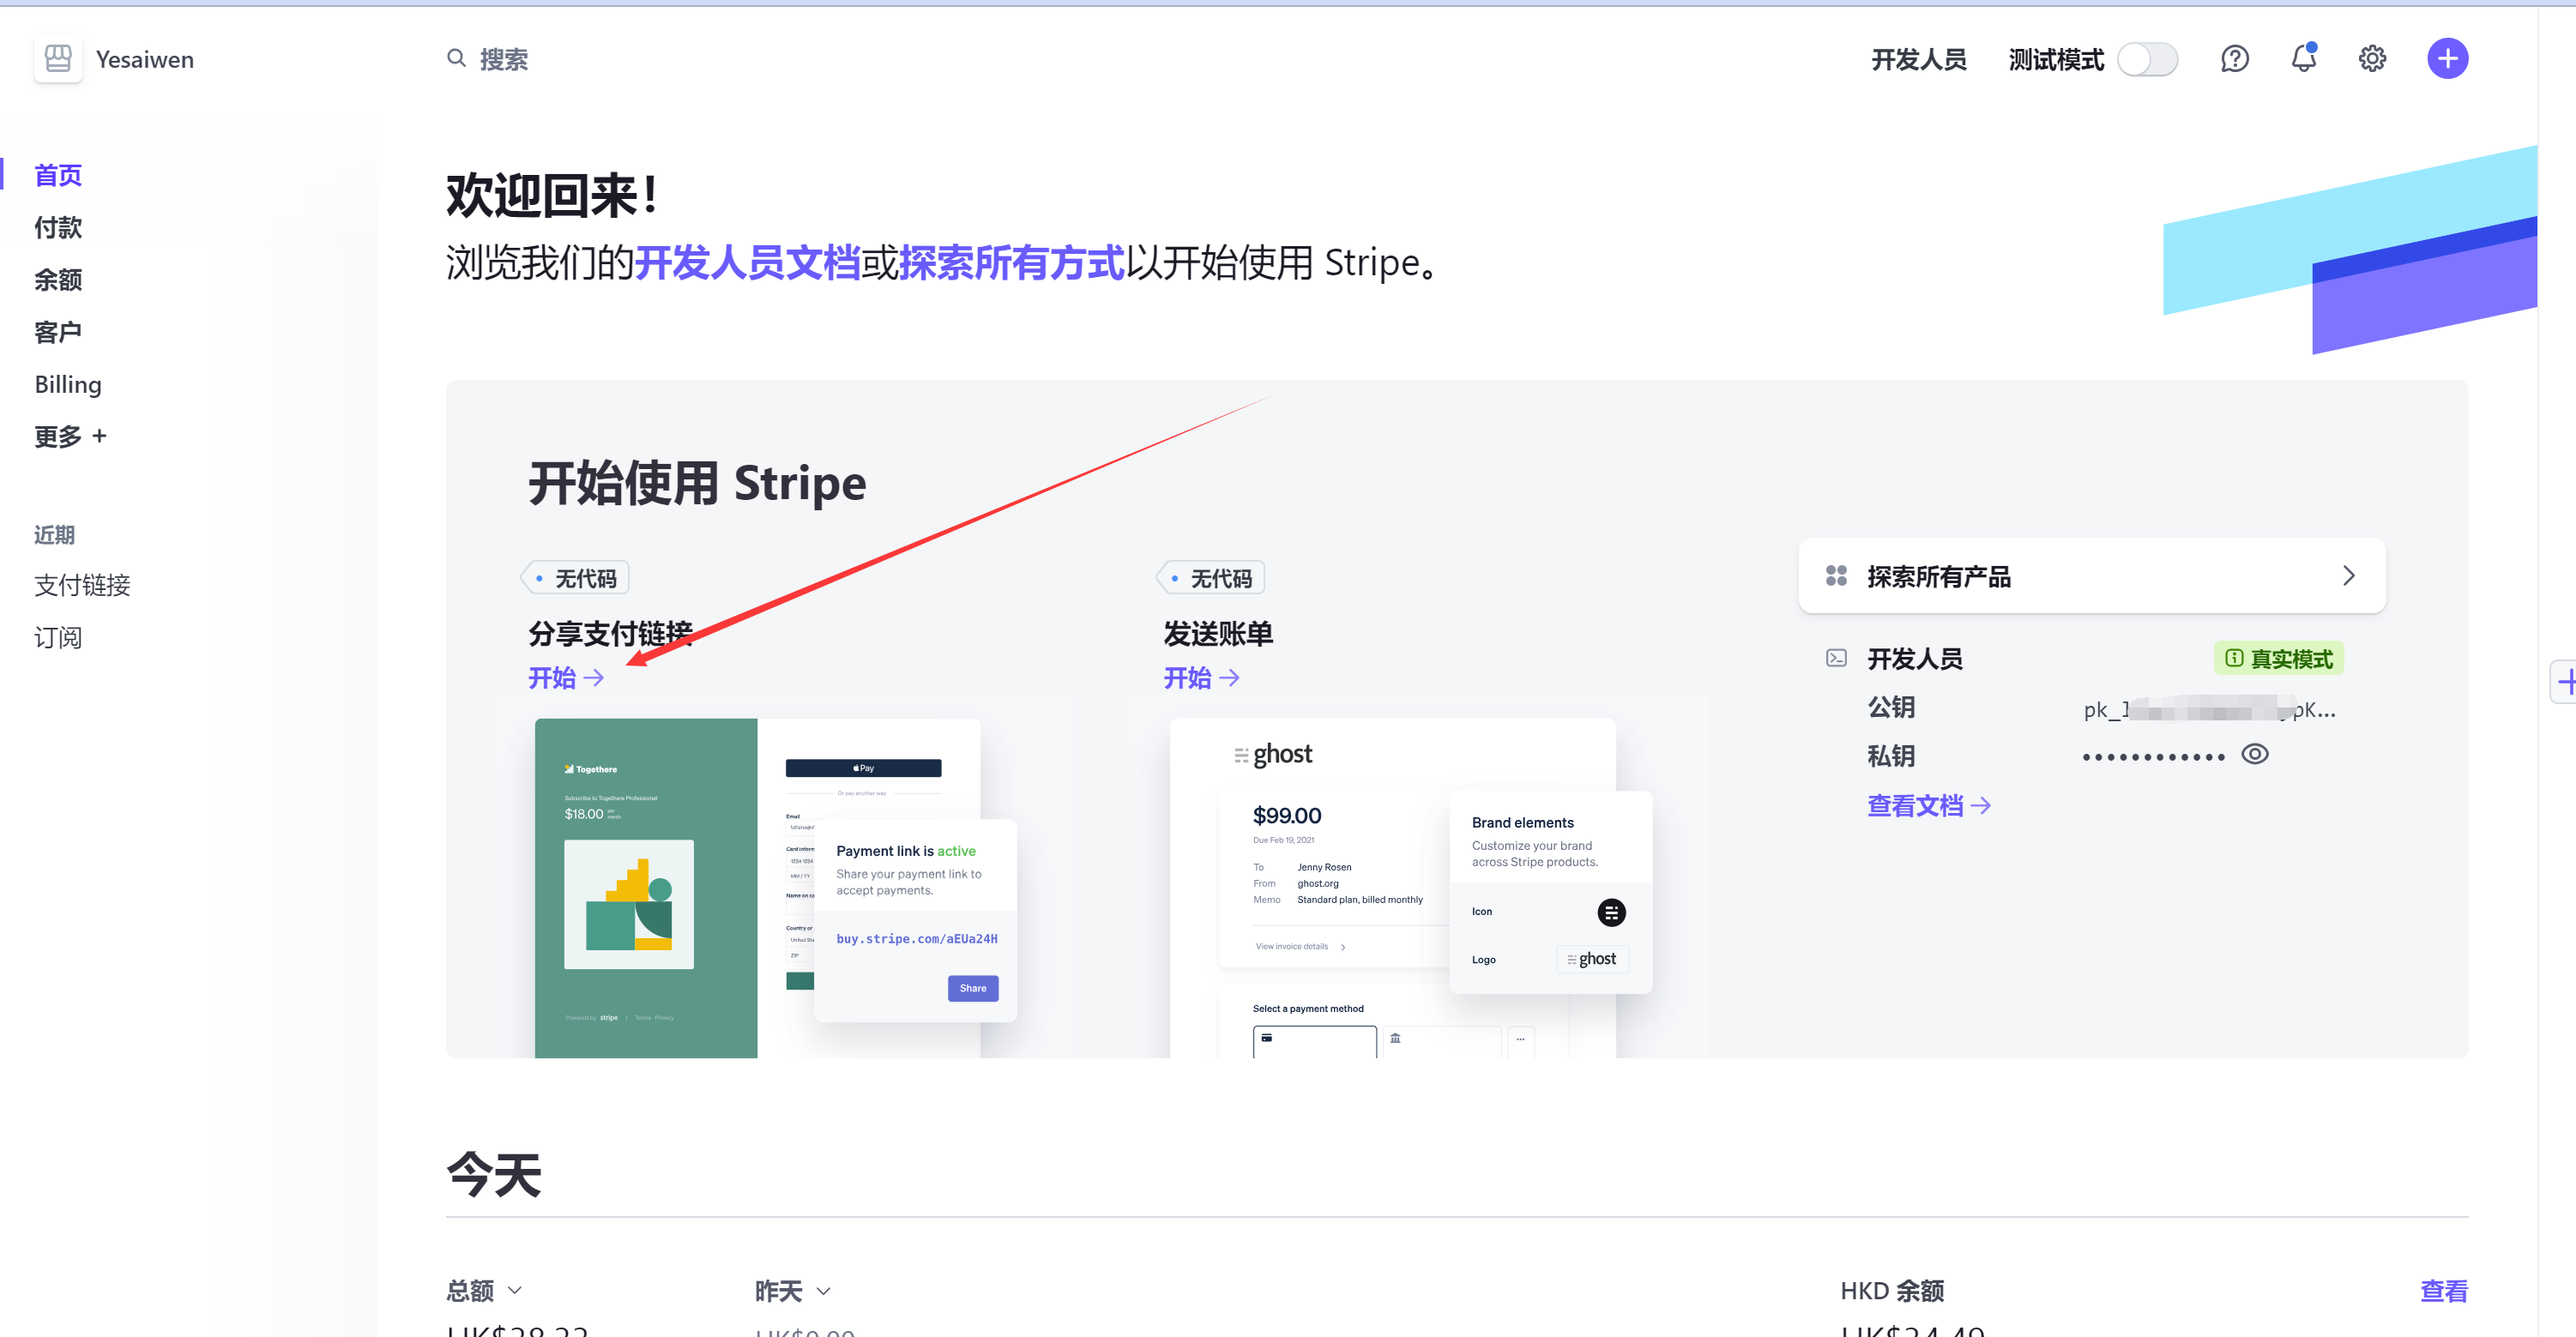
上一步身份验证完成后,就可以开始收款了。
在首页,支付链接那里,点击“开始”,创建一个支付链接。
创建完支付链接后,别人就可以给你付款了。
点击“添加新产品”, 然后设置名称、价格等(可以设置多币种,美元,港元都行。 我设置的是美元)。
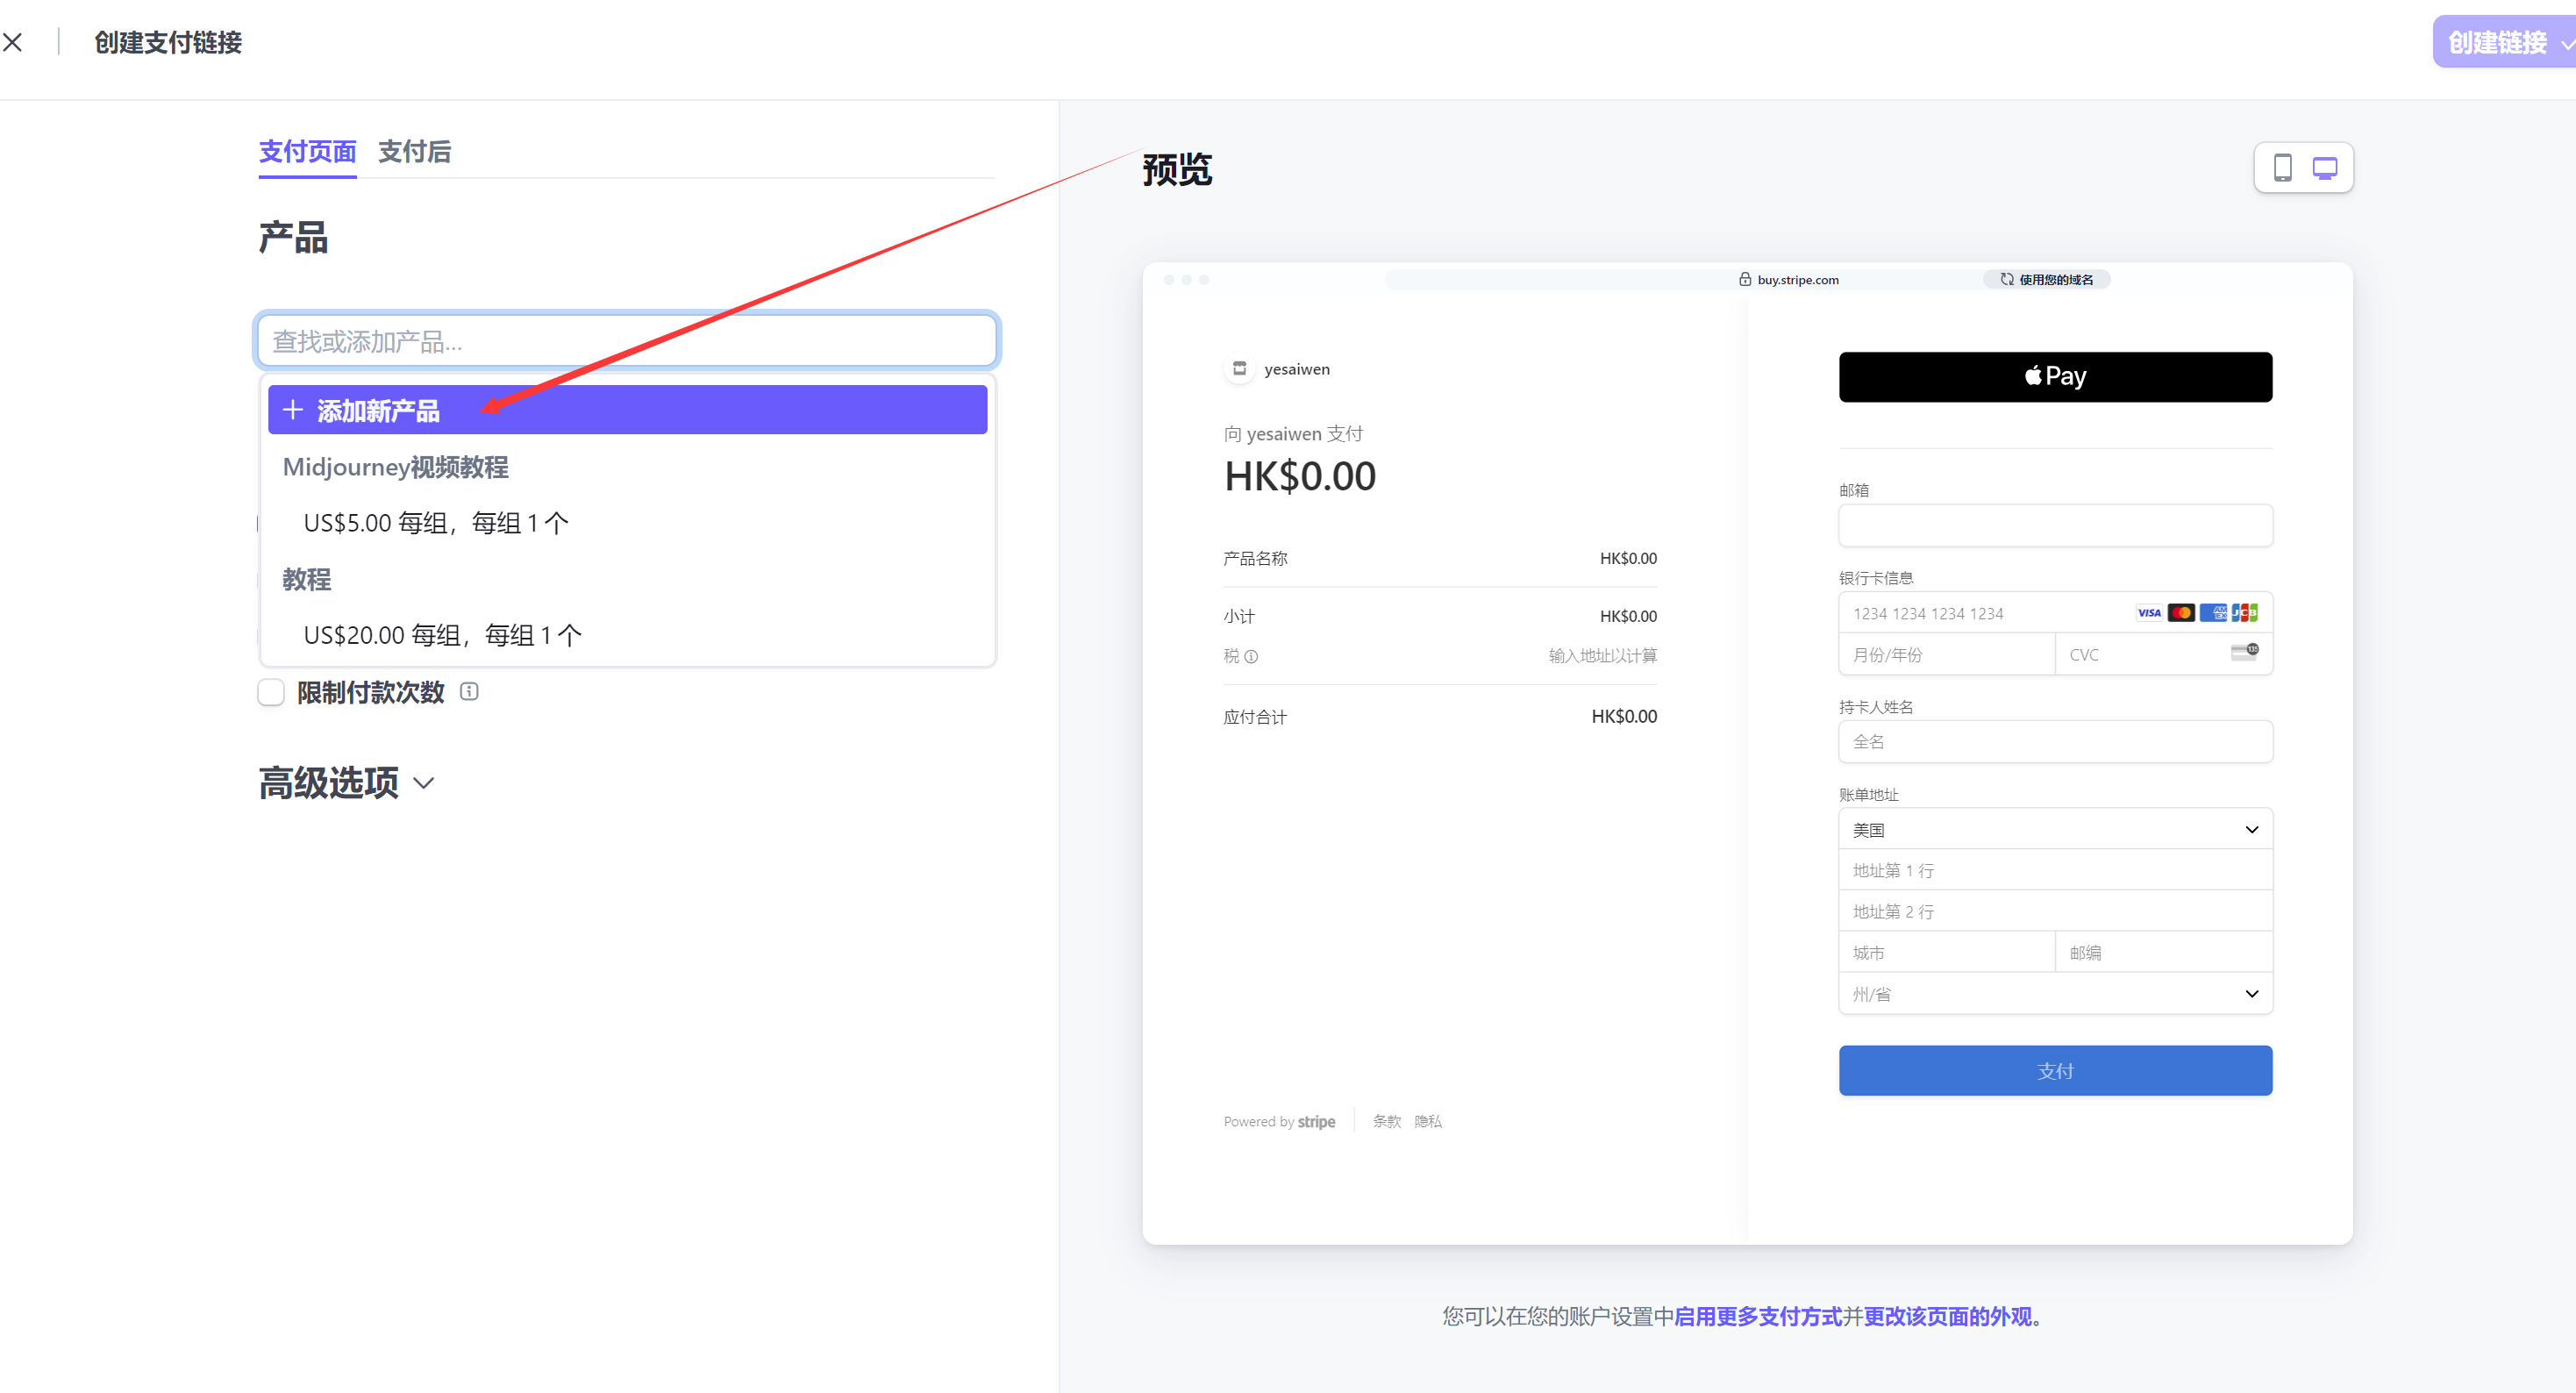
最后点击右上角的“创建链接”。

在左侧的“支付链接”里,可以看到支付链接。 把它复制发给别人,或者是放到网页上。
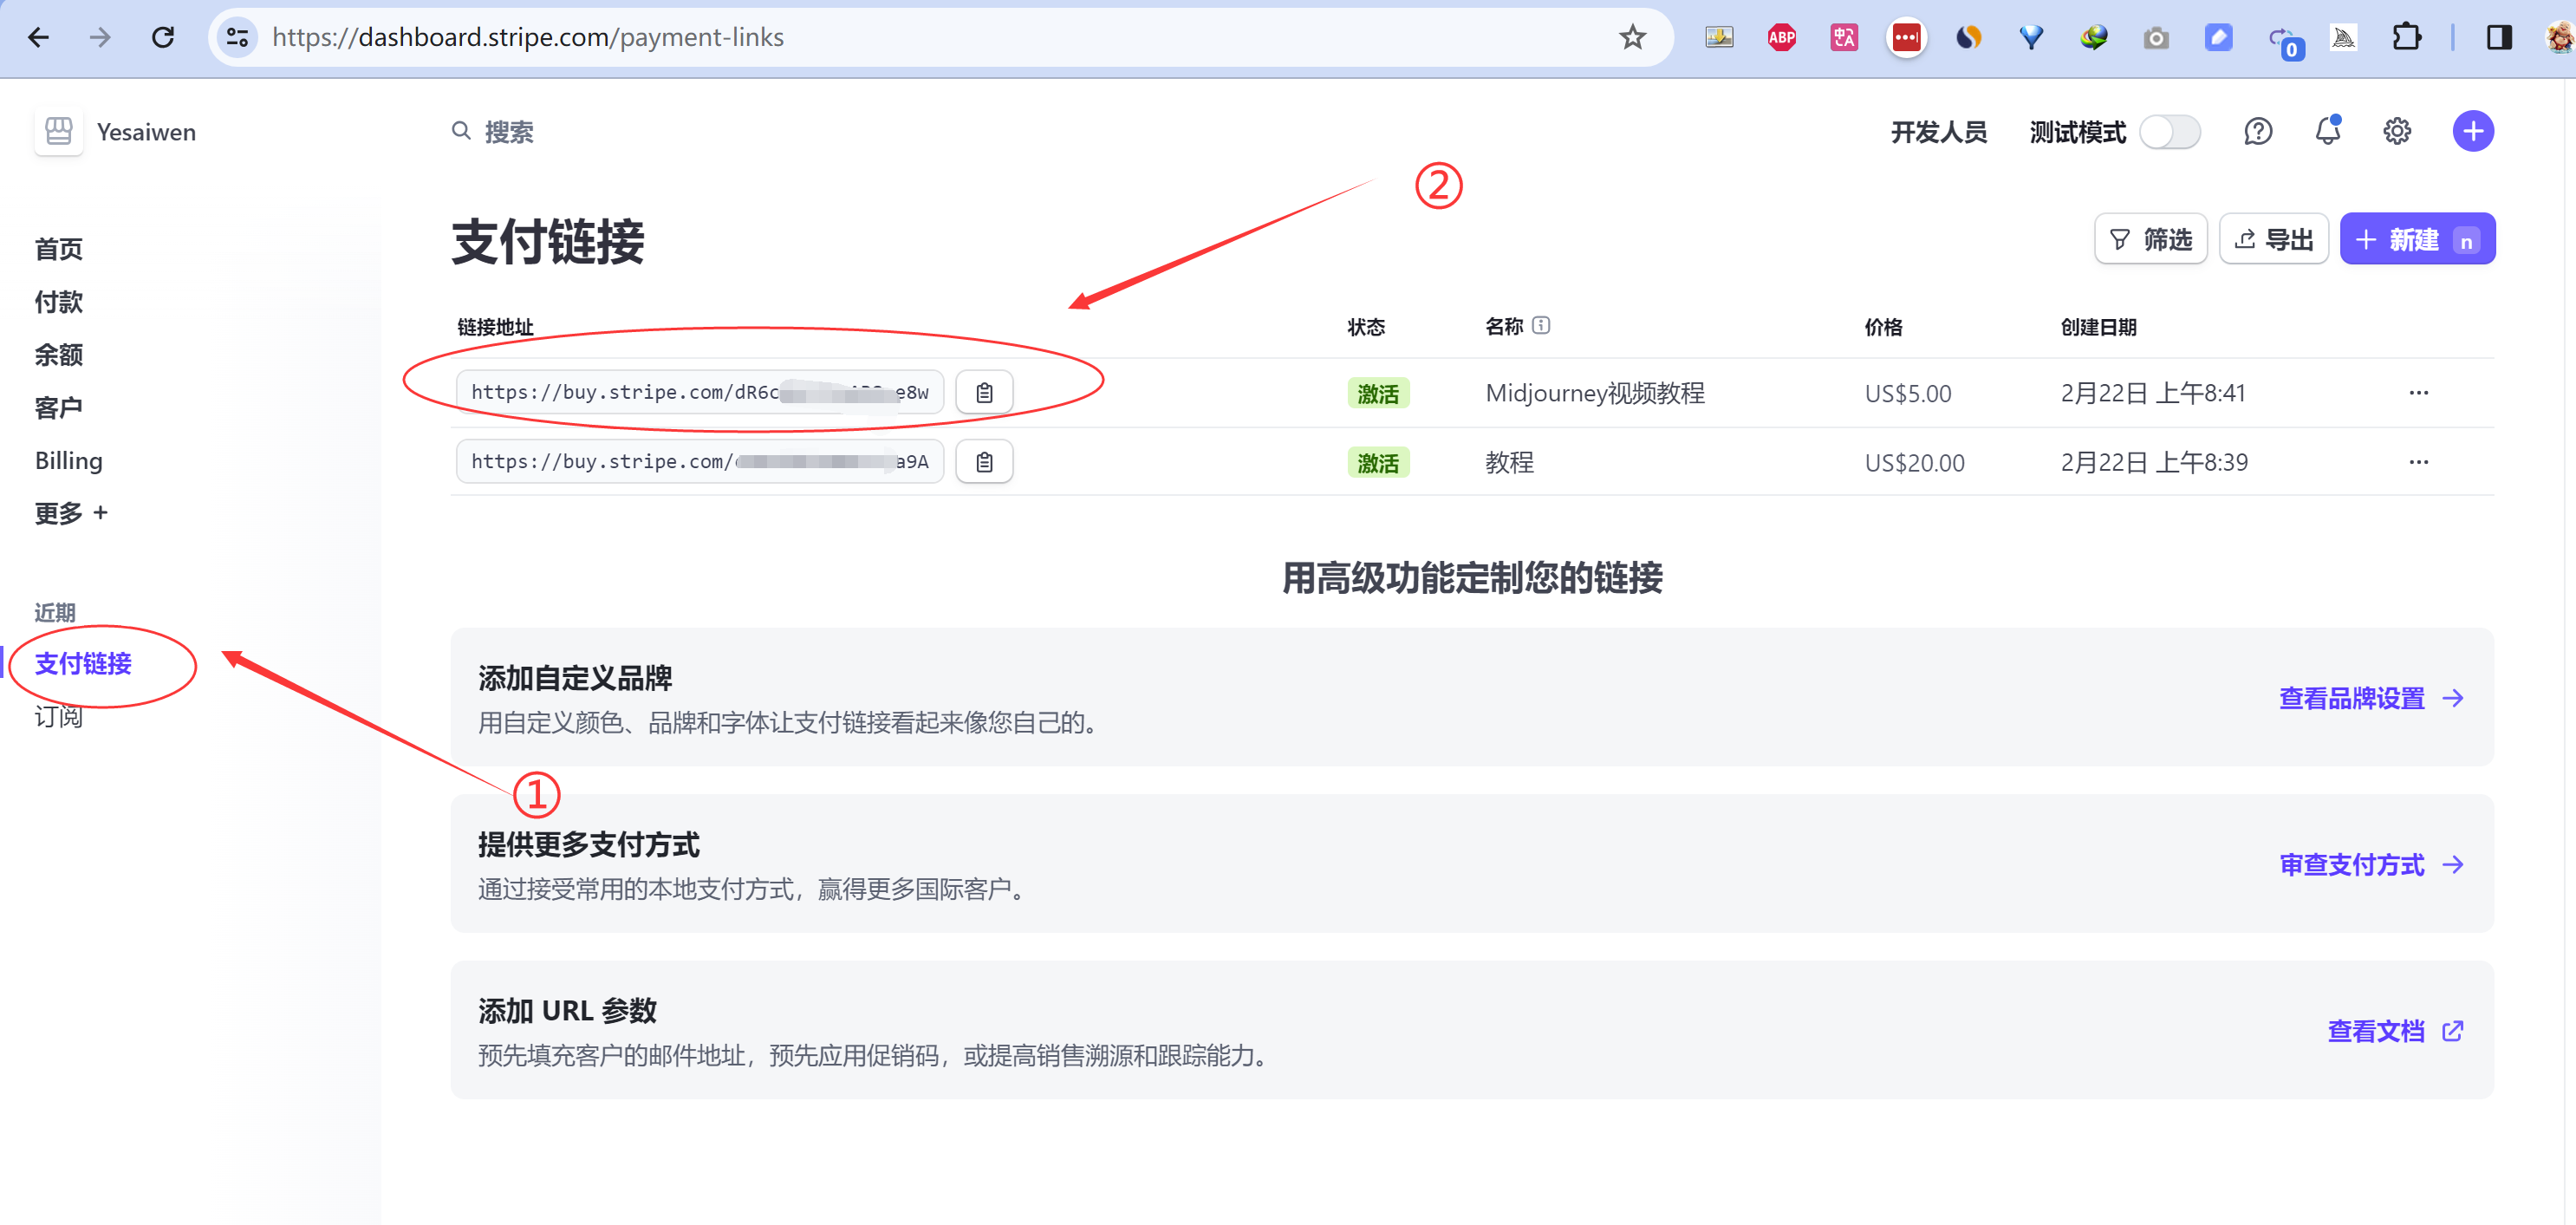
对方就可以用信用卡等国外的支付方式,付款了。

7.小结
本文介绍了大陆居民如何注册香港stripe:不需要去香港,也不要美国社保号等等。
所有需要的工具,都可以在大陆搞定。(Google voice,美国电话卡,在某宝都可以找到)
这种方法的优势是:操作简单、注册成本低,可以帮助我们快速跑通流程。
劣势是:提现手续费高。
个人建议:
- 阅读参考文章里,强烈推荐的第一篇文章:他将风险等,讲的非常详细。
- 先少量收款,进行测试。 量大的话,为了避免封号,还是要注册美国公司,申请美国stripe(参考文章教程里,有详细的步骤,不用出国,就是要花点钱)
参考文章
- 强烈推荐: Stripe注册与激活 | 如何注册激活美国/香港Stripe个人账户: https://www.waimaob2c.com/stripe
- 通过注册海外公司注册stripe教程: https://m.okjike.com/originalPosts/64d4e94e58c9056cf4fed028

发表评论