如何用ChatGPT批量设置Excel样式
如何用ChatGPT批量设置Excel样式
这是零基础玩ChatGPT+Python——办公自动化的第6节:利用ChatGPT修改Python代码,批量设置Excel表格的样式。
阅读对象:不会写Python代码,但是又需要用Python来提高自己工作效率的小伙伴。
教程目的:
利用ChatGPT修改Python代码,批量设置Excel表格的样式。
读者无需任何编程基础,会复制粘贴、安装软件就行。
需求:
有20张Excel表格,我调整了第一个表格,需要将其余19个表格的样式,调整的和第一个表一样。
一个一个调整,枯燥且无聊。
获取源代码后,让ChatGPT帮我们修改一下,直接运行,不到一秒就全部搞定。

一、软件准备
- ChatGPT账号。 如果没有账号,可以直接使用葱因智能(每天签到可以免费用10次): http://www.congyin-ai.com/#/login/register?code=c2Fpd2Vu
- vscode:免费。参考安装教程: http://yesaiwen.com/how-to-use-chatgpt-coding-python/
二、素材准备
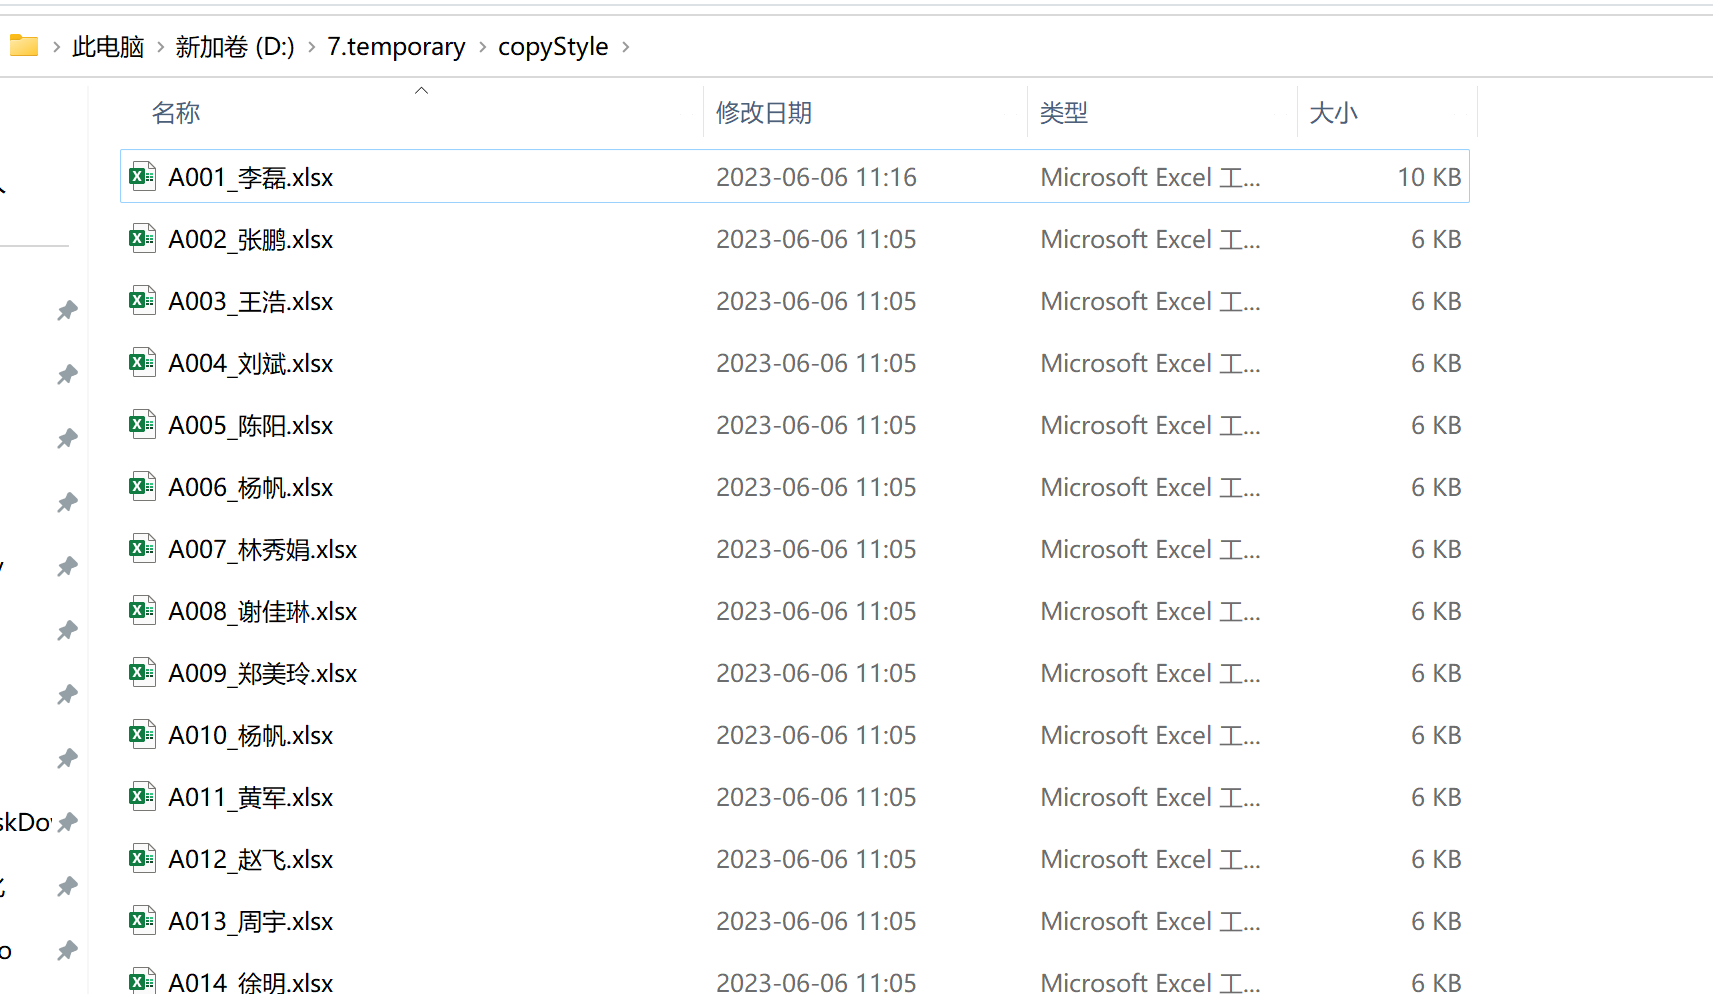
素材包含一个Excel文件夹,里面包含20个Excel文件,还有Python原码。
http://yesaiwen.com/chatgpt-python-resources/
下载后,解压,获取Excel文件夹的位置,和第一个文件的位置。例如:
文件位置:”D:\7.temporary\copyStyle\A001_李磊.xlsx“
文件夹位置` “D:\7.temporary\copyStyle”
三、操作步骤
安装模块
首先需要在vscode里,安装1个模块。 在vscode的终端里,输入这1个命令,后按回车:
pip install openpyxl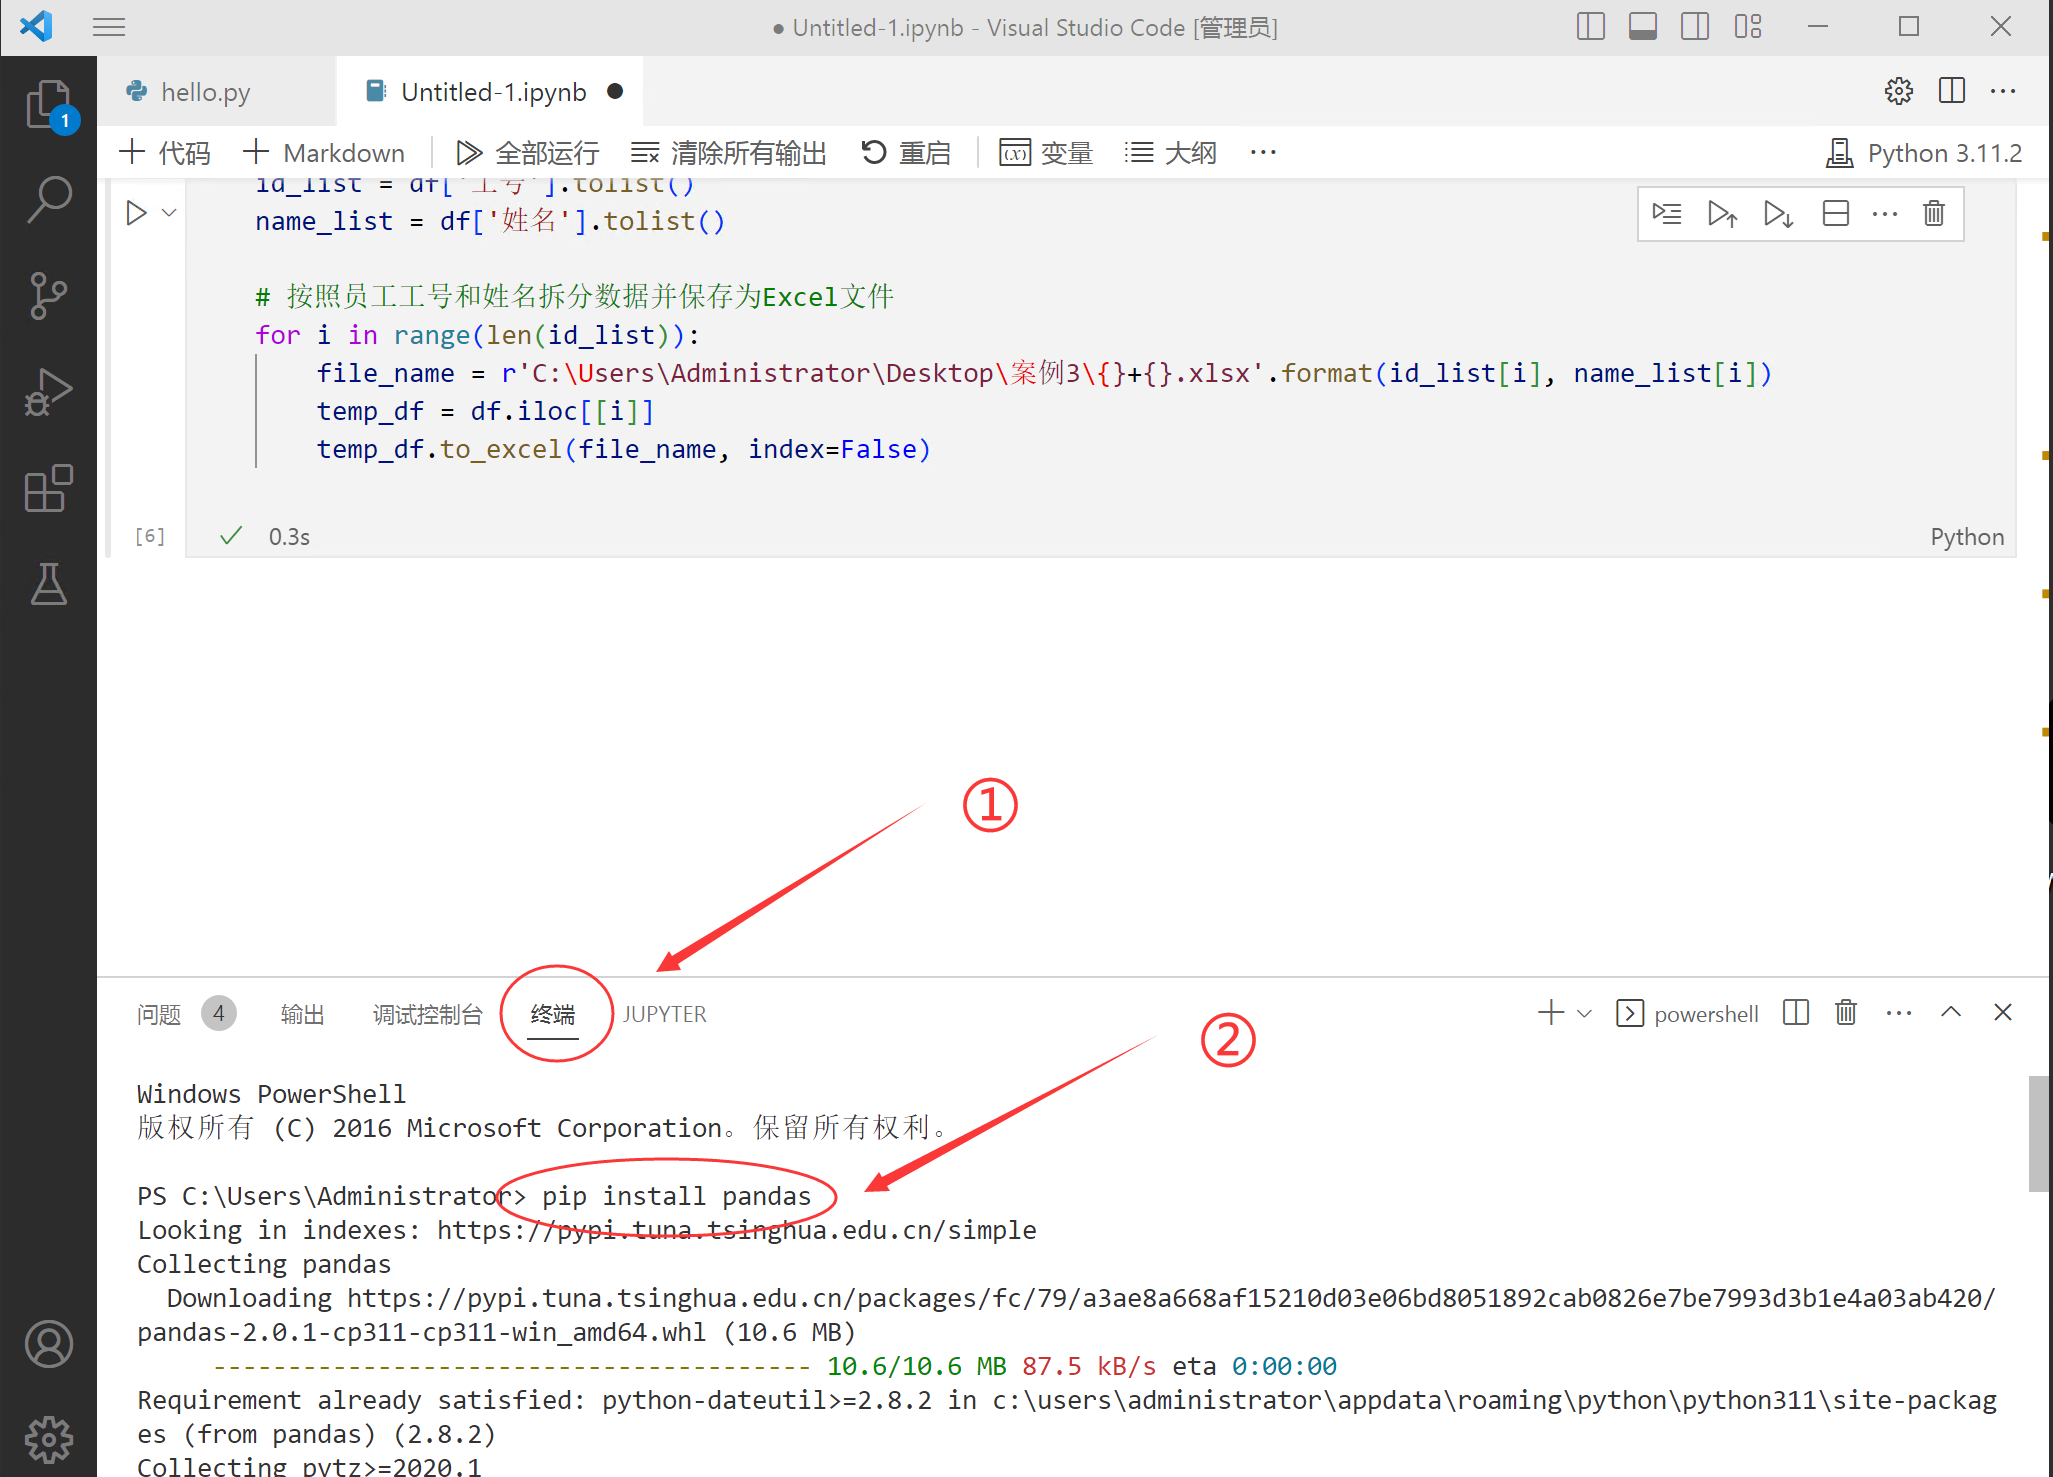
3.1.打开ChatGPT,输入提示词
提示词:
(提示词里文件的地址,和文件夹的地址,替换为自己电脑的地址)
任务:我需要将一个Excel文件(D:\7.temporary\copyStyle\A001_李磊.xlsx)的所有样式复制到同一文件夹(D:\7.temporary\copyStyle)下的其他Excel文件中。 下面这是原代码,请修改为适合我的代码:
import os
from openpyxl import load_workbook
from openpyxl.styles import Font, Border, Side, PatternFill, Alignment, Protection

# 定义一个函数来复制样式
def copy_style(cell_from, cell_to):
    if cell_from.has_style:
        font = Font(name=cell_from.font.name, bold=cell_from.font.bold, italic=cell_from.font.italic,
                    vertAlign=cell_from.font.vertAlign, underline=cell_from.font.underline,
                    strike=cell_from.font.strike, color=cell_from.font.color,
                    size=cell_from.font.size, u=cell_from.font.u)
        cell_to.font = font

        fill = PatternFill(fill_type=cell_from.fill.fill_type, fgColor=cell_from.fill.fgColor,
                           bgColor=cell_from.fill.bgColor)
        cell_to.fill = fill

        border = Border(left=Side(border_style=cell_from.border.left.border_style, color=cell_from.border.left.color),
                        right=Side(border_style=cell_from.border.right.border_style, color=cell_from.border.right.color),
                        top=Side(border_style=cell_from.border.top.border_style, color=cell_from.border.top.color),
                        bottom=Side(border_style=cell_from.border.bottom.border_style, color=cell_from.border.bottom.color))
        cell_to.border = border

        alignment = Alignment(horizontal=cell_from.alignment.horizontal, vertical=cell_from.alignment.vertical,
                              text_rotation=cell_from.alignment.text_rotation, wrap_text=cell_from.alignment.wrap_text,
                              shrink_to_fit=cell_from.alignment.shrink_to_fit, indent=cell_from.alignment.indent)
        cell_to.alignment = alignment

        protection = Protection(locked=cell_from.protection.locked, hidden=cell_from.protection.hidden)
        cell_to.protection = protection

# 加载样式源文件
src_wb = load_workbook('D:/7.temporary/copyStyle/A001_李磊.xlsx')
src_ws = src_wb.active

# 获取文件夹内的所有文件
files = os.listdir('D:/7.temporary/copyStyle')

for file in files:
    # 检查文件是否是Excel文件
    if file.endswith('.xlsx') and file != 'A001_李磊.xlsx':
        file_path = os.path.join('D:/7.temporary/copyStyle', file)
        wb = load_workbook(file_path)
        ws = wb.active

        # 复制列宽
        for col in src_ws.columns:
            for src_cell in col:
                try:
                    ws.column_dimensions[src_cell.column_letter].width = \
                        src_ws.column_dimensions[src_cell.column_letter].width
                except KeyError:
                    continue

        # 循环复制样式
        for row in ws:
            for cell in row:
                src_cell = src_ws[cell.coordinate]
                copy_style(src_cell, cell)

        # 保存修改后的文件
        wb.save(file_path)
注意:把原代码页复制粘贴到ChatGPT里

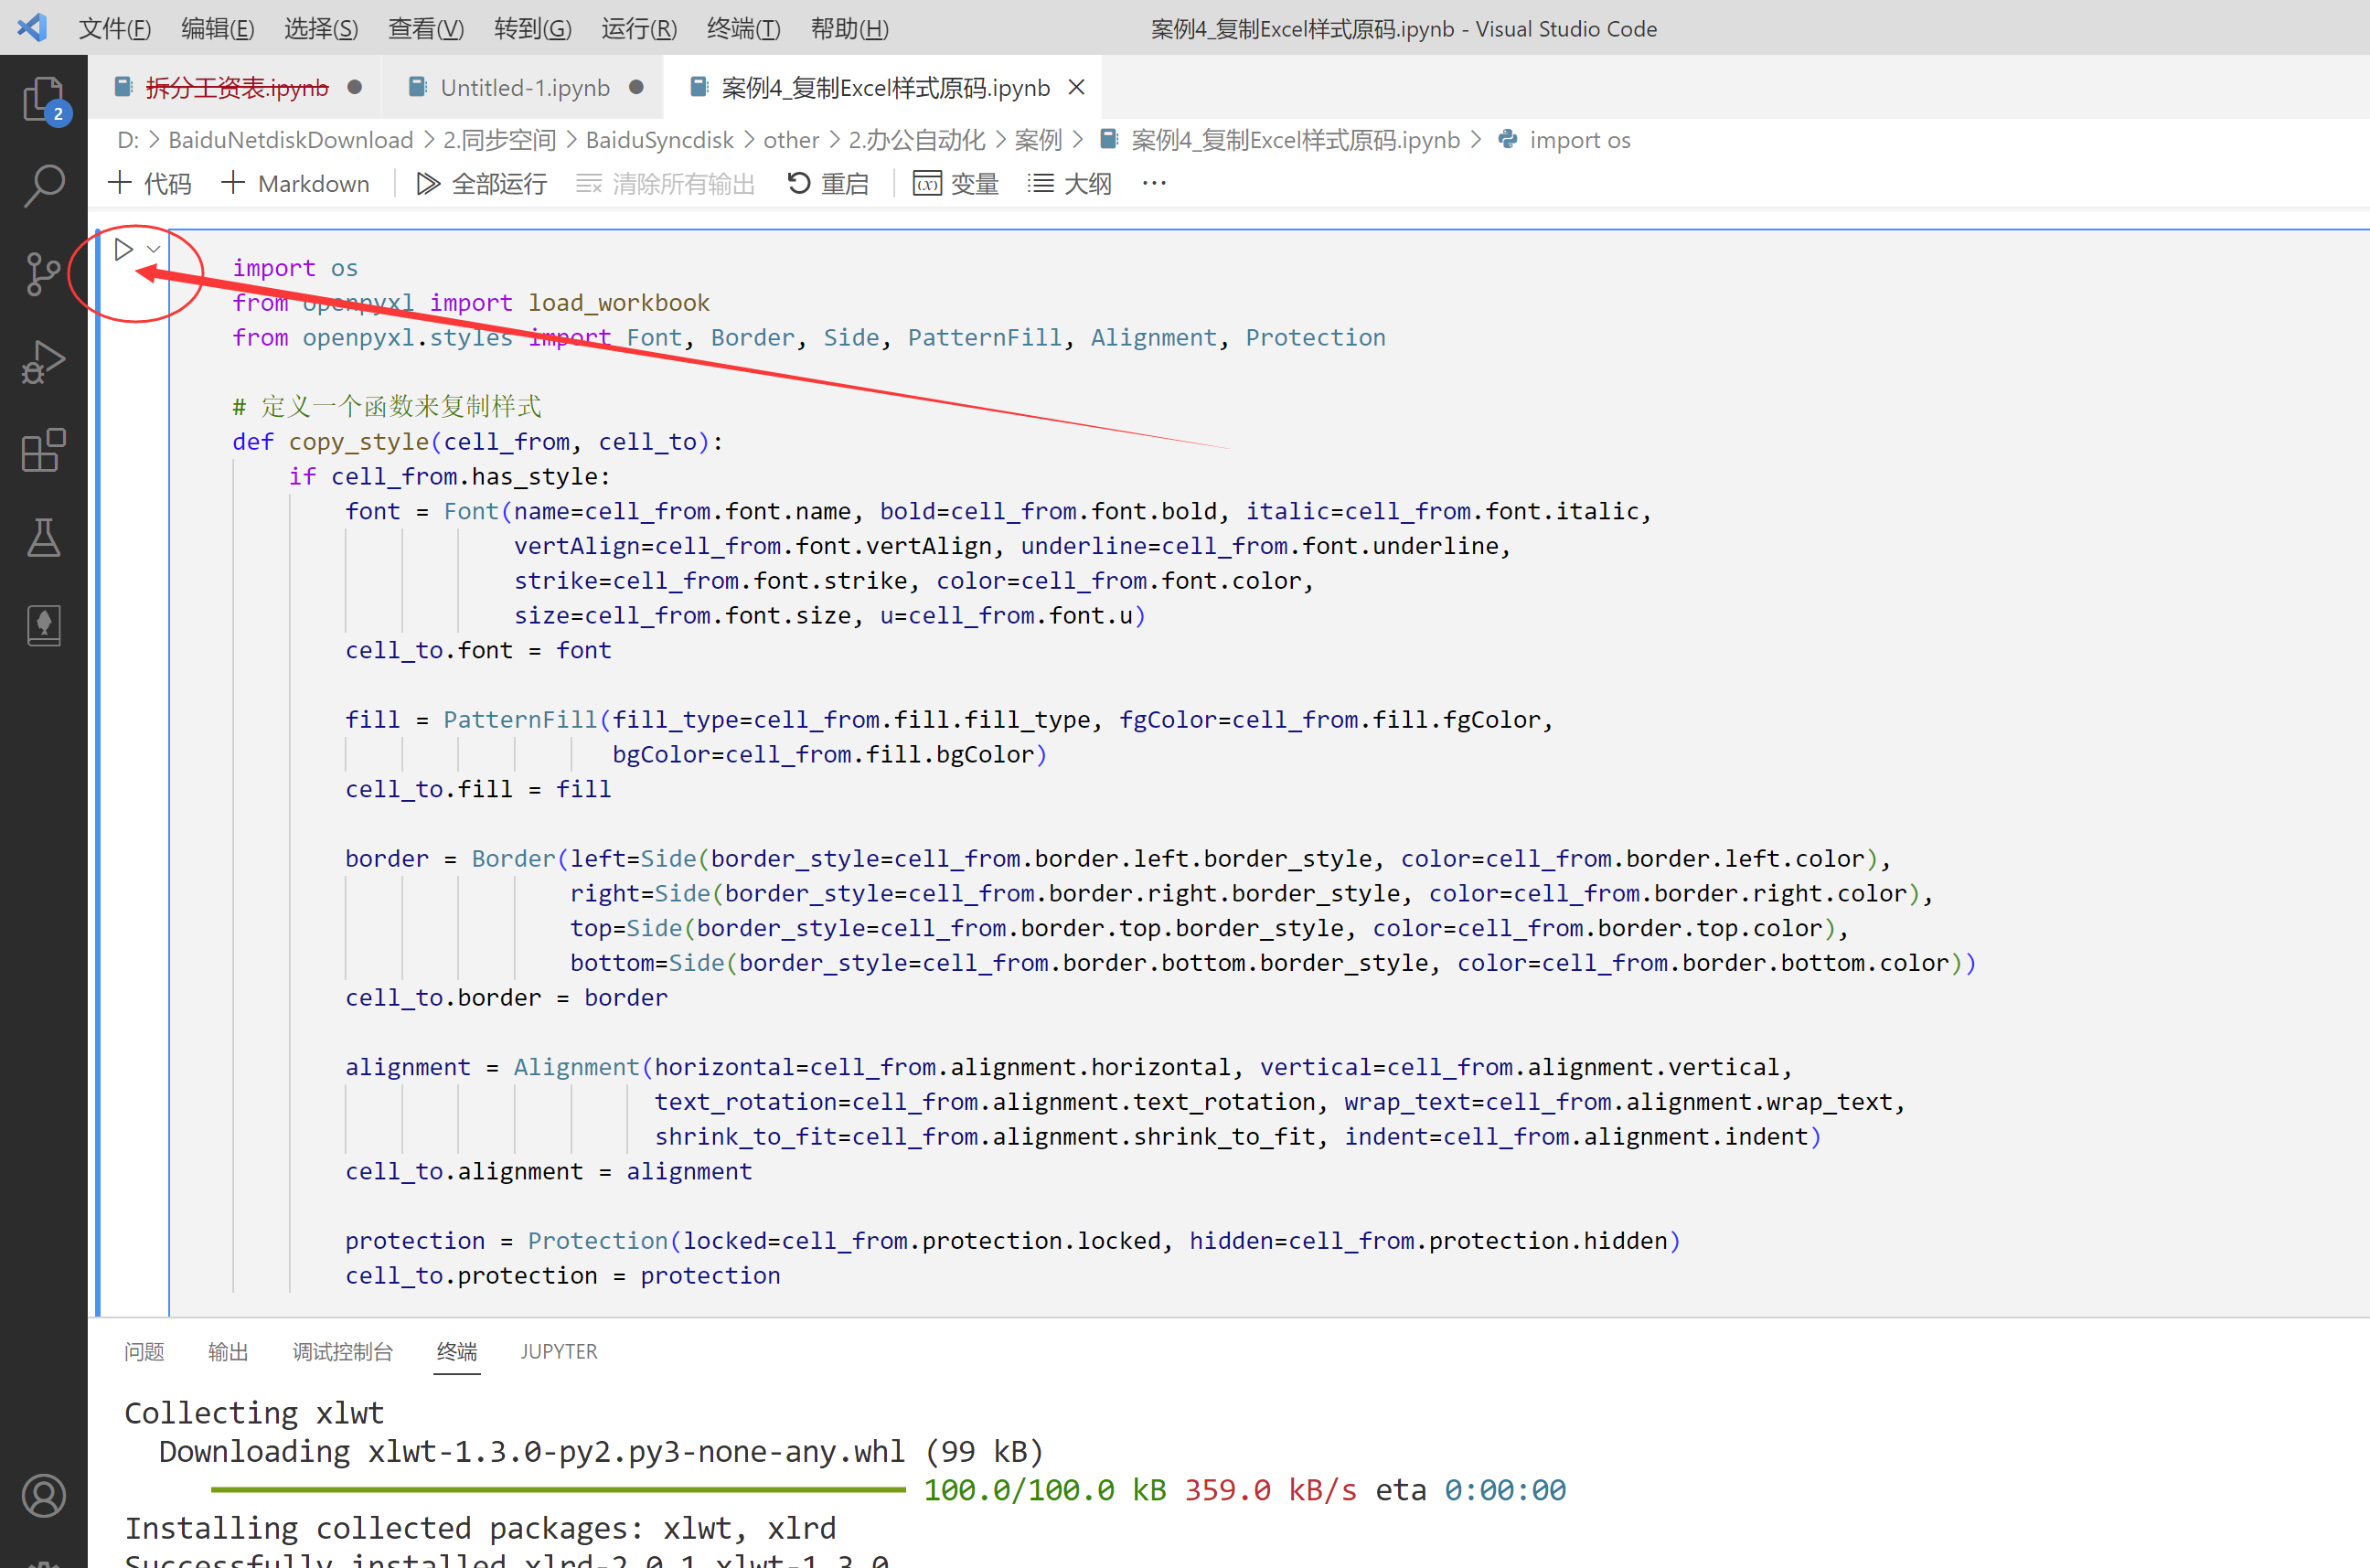
3.2.复制代码,并粘贴到vscode里
在vscode里,新建一个jupyter文件:
① 复制ChatGPT里给出的代码,粘贴到vscode里
② 点击“运行”
③ 当下面出现绿勾时,说明代码运行成功。
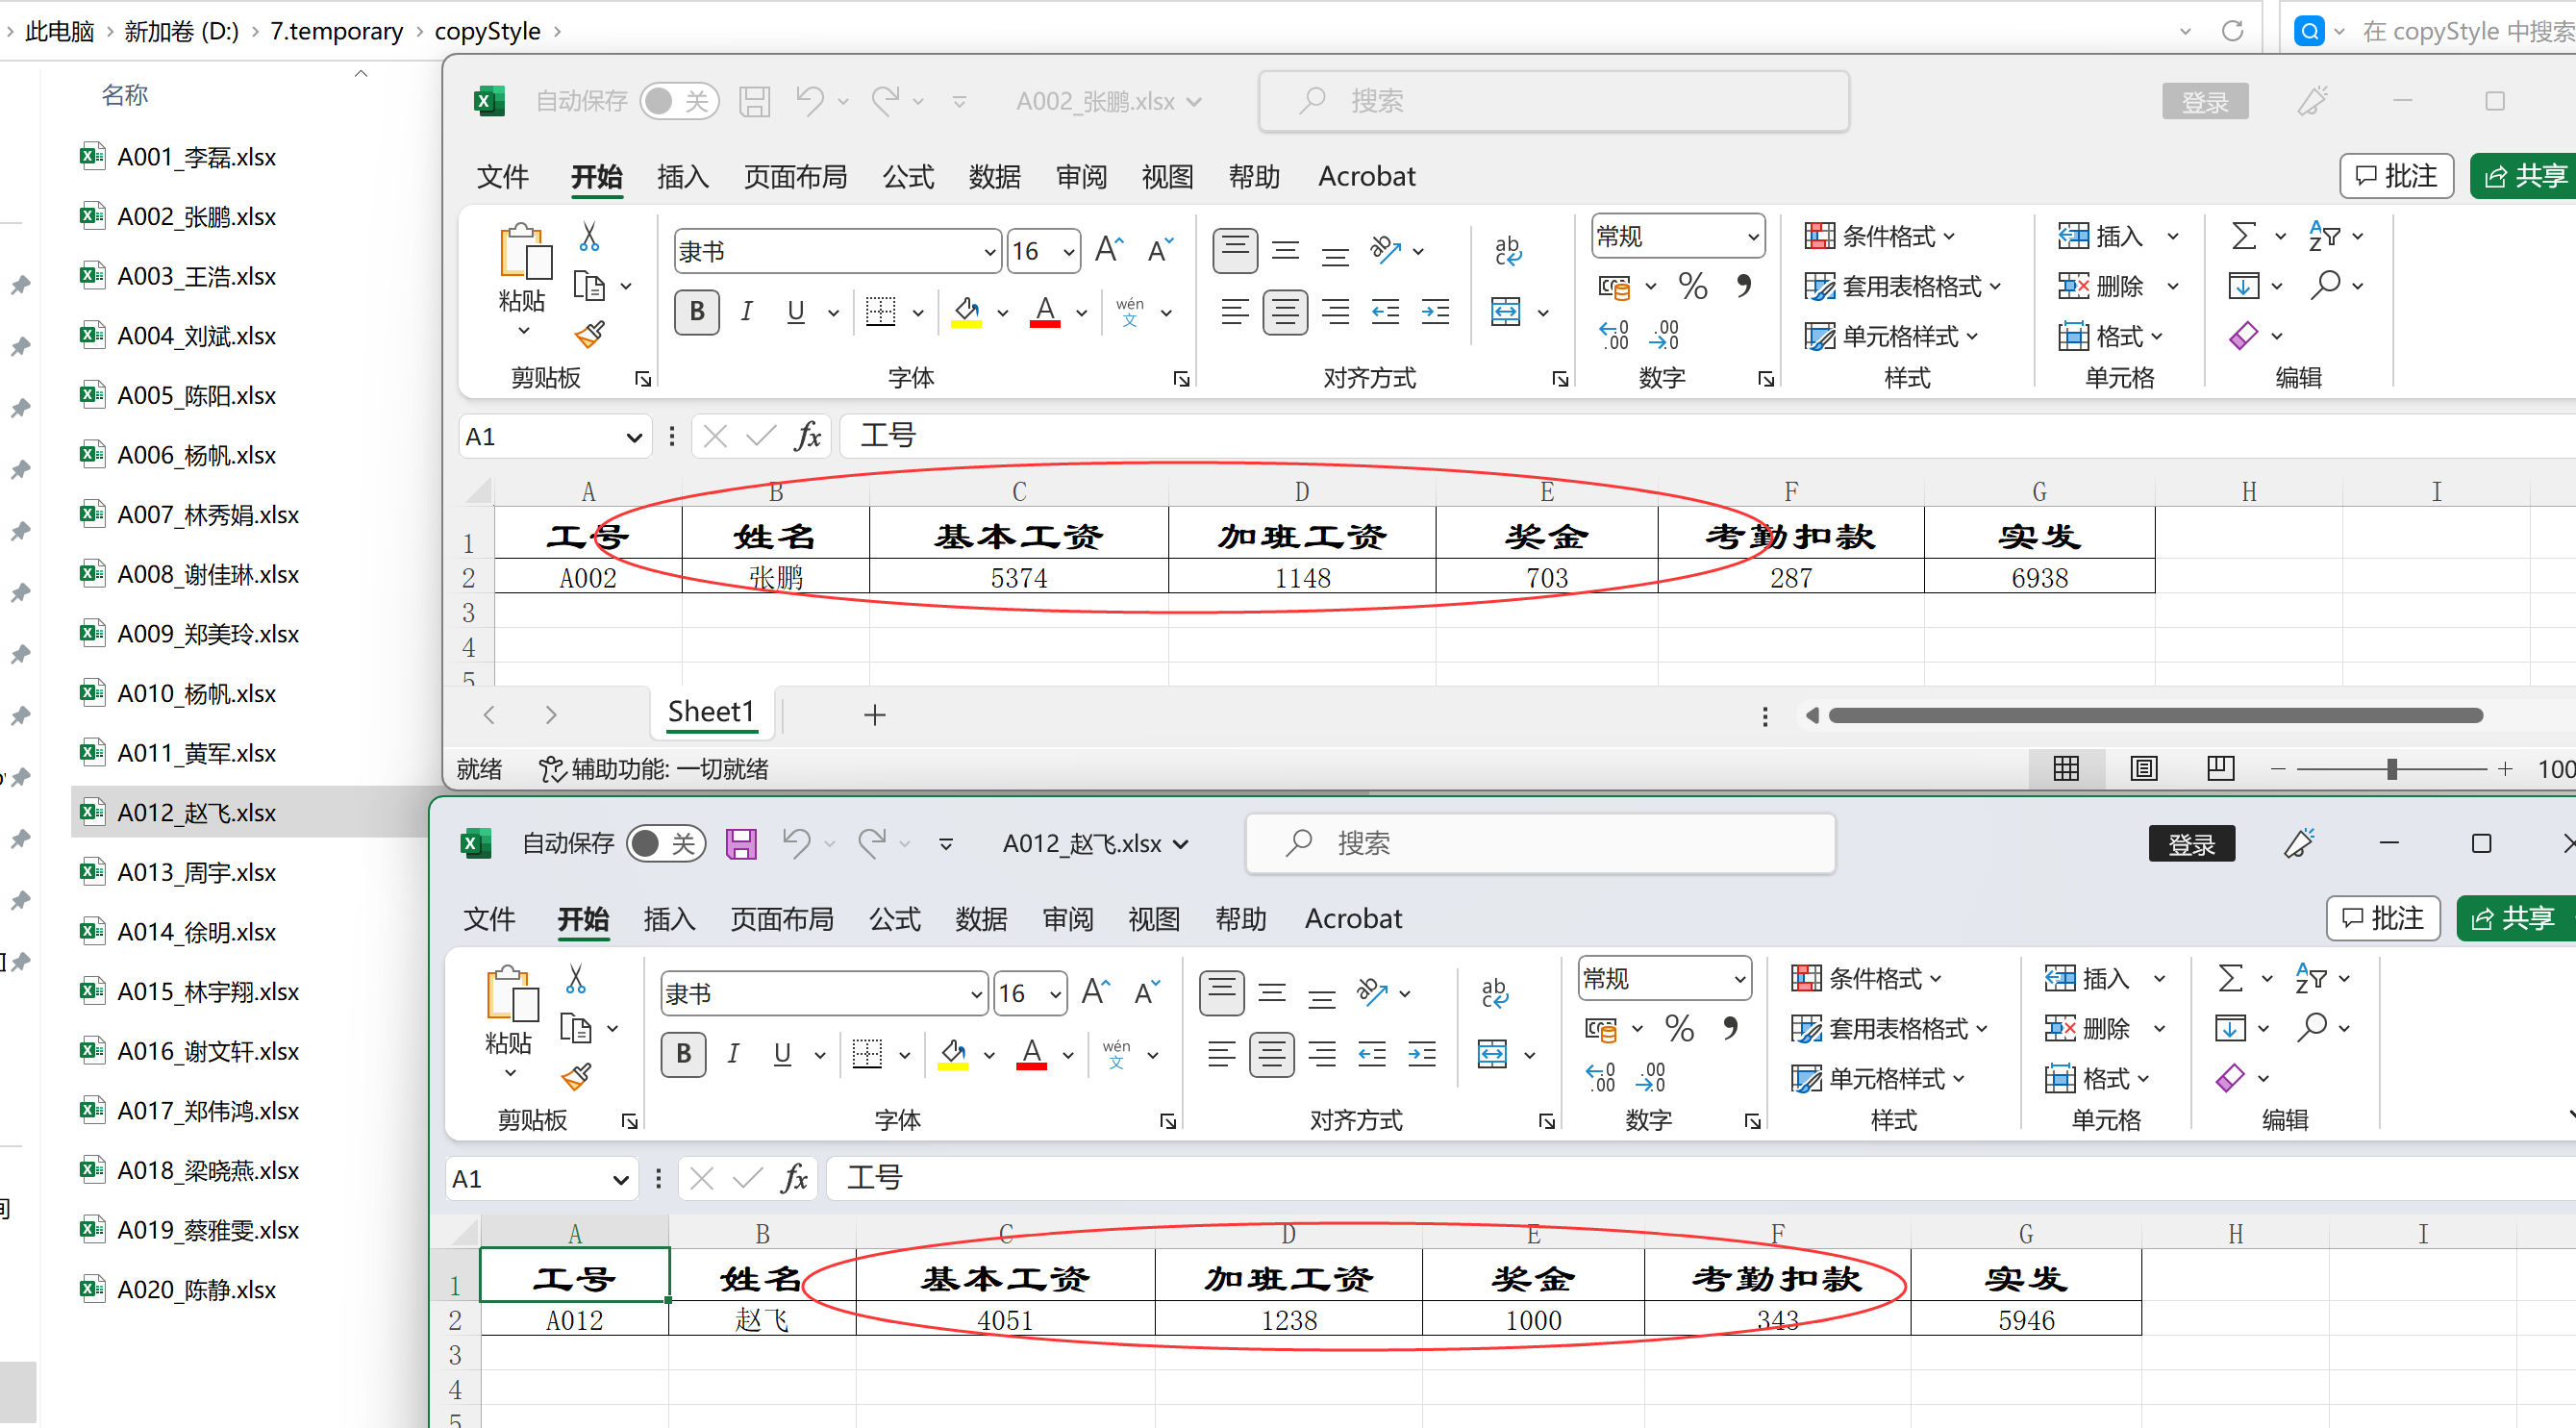
3.3 检查结果
用了0.7秒,19个Excel表格的格式设置完毕。
打开文件夹,可以看到里面其它19个Excel表格,样式都和第一个一致了。
四、小结
本来以为用ChatGPT写这个代码挺简单,没料到一直出错。
不过也没事,出错后,继续把错误粘贴到ChatGPT里,让它进行处理。
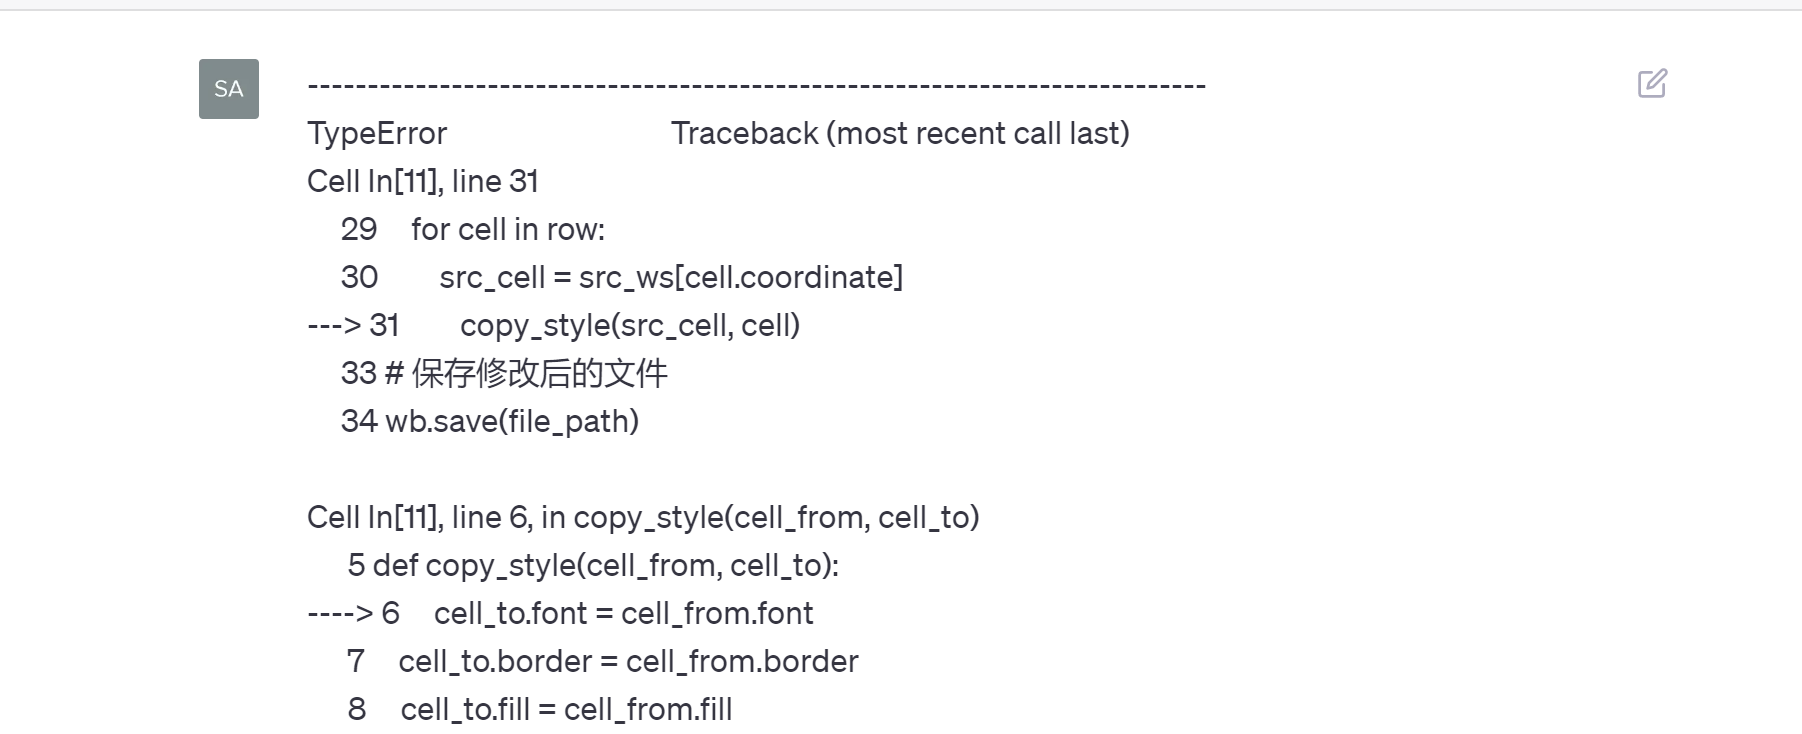
因为不懂Python代码,花了20分钟,才引导ChatGPT完全调试好代码。
2点经验:
- 积累别人的代码: 看到好的功能,就把代码收藏起来。用的时候,让ChatGPT直接修改就可以了。
- ChatGPT不是神: 解决问题还是需要一个过程,不要妄想把东西丢给ChatGPT,它就一定能给你解决。 ChatGPT的优势是封装了很多知识,但还是需要给与引导,才能获得理想的答案。 入门级的人,要对ChatGPT有充分的信心。

发表评论