如何在 Midjourney 上打造最逼真的照片——15.局部重绘
内容简介:
本文介绍了1种制作逼真照片的技巧:局部重绘。当生成的图片,有瑕疵或者逻辑错误的时候,可以用这个功能修改。
原作者:Henrique Centieiro & Bee Lee,叶赛文编译。
推荐原因:实用。
原文链接: https://levelup.gitconnected.com/create-the-most-photorealistic-images-on-midjourney-success-prompting-formula-100-cheat-codes-part-5-983c6ec5ea6a
1.局部重绘(vary region)是什么?
局部重绘是Midjourney的一项功能,可以对生成的图片,进行局部修改。
2.如何使用局部重绘?
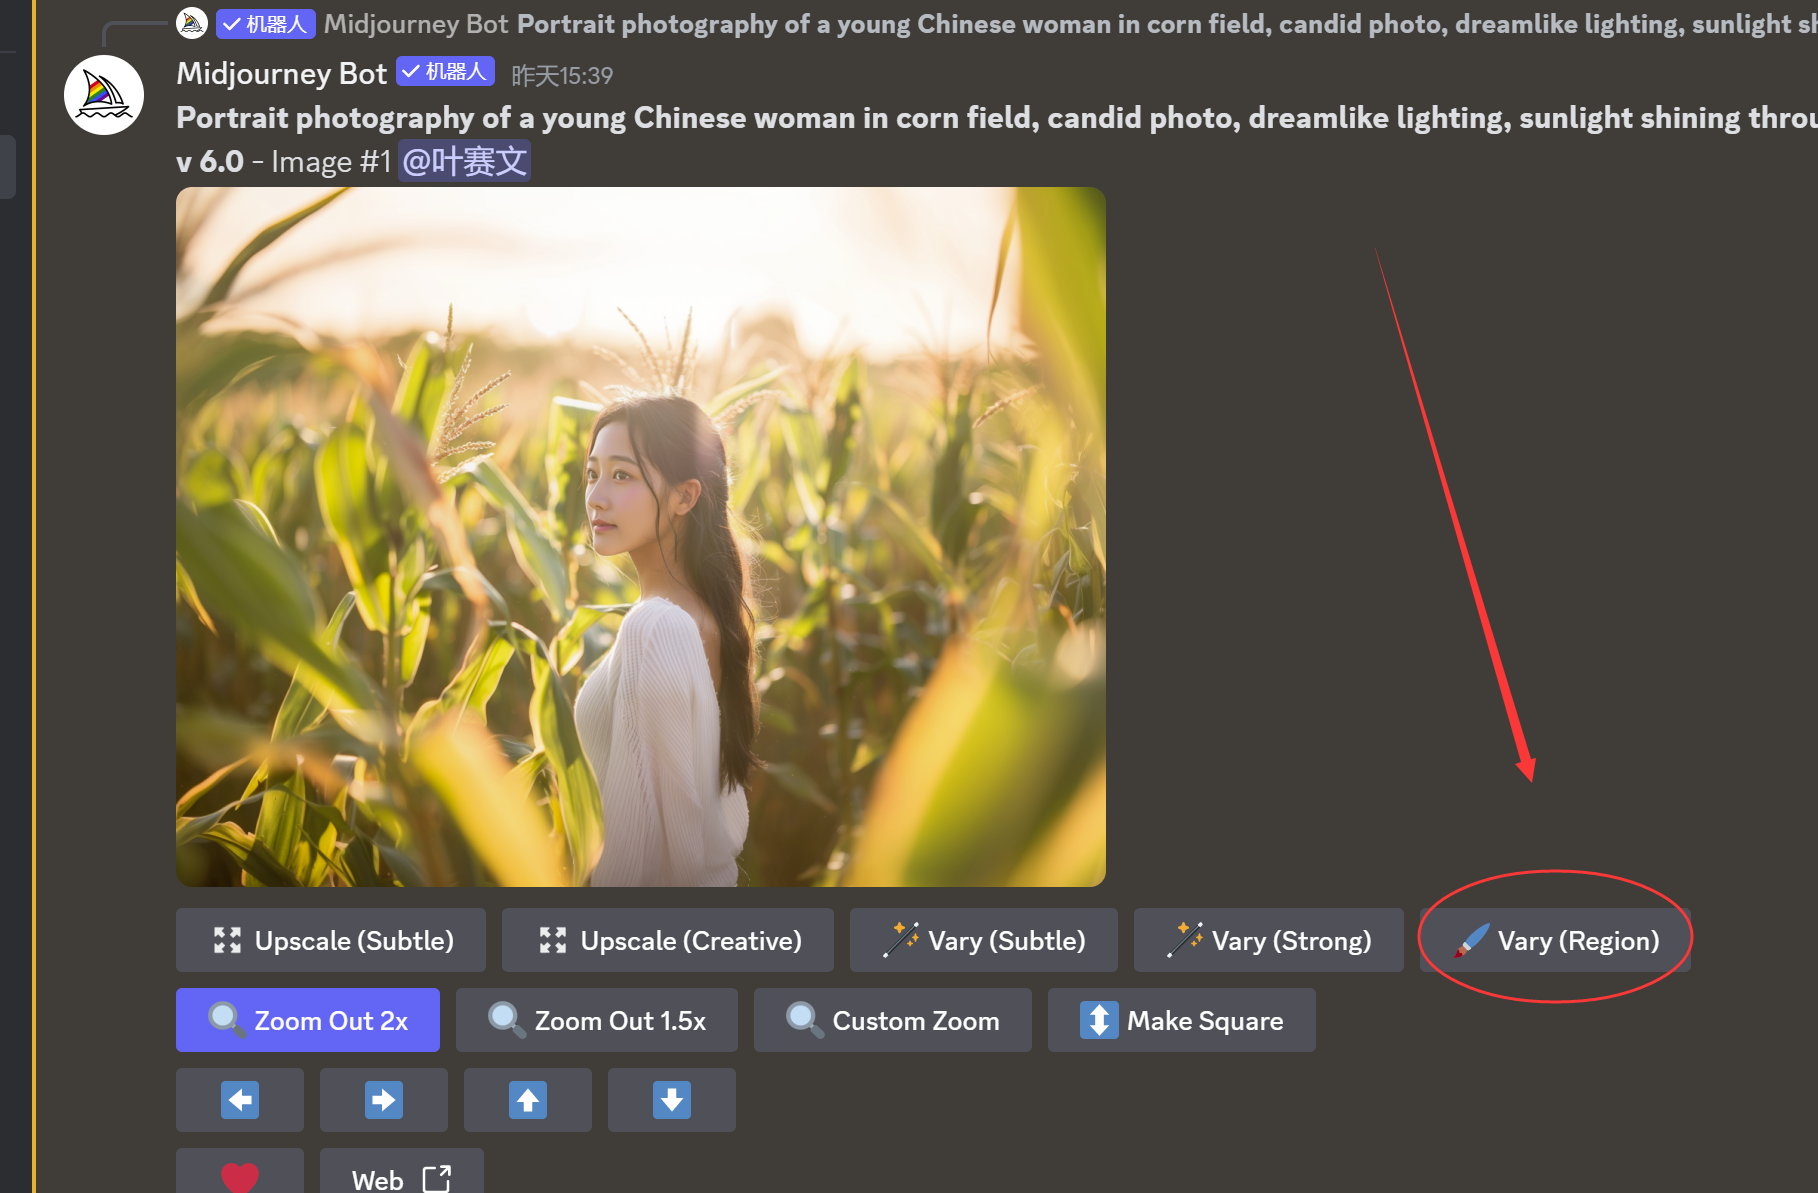
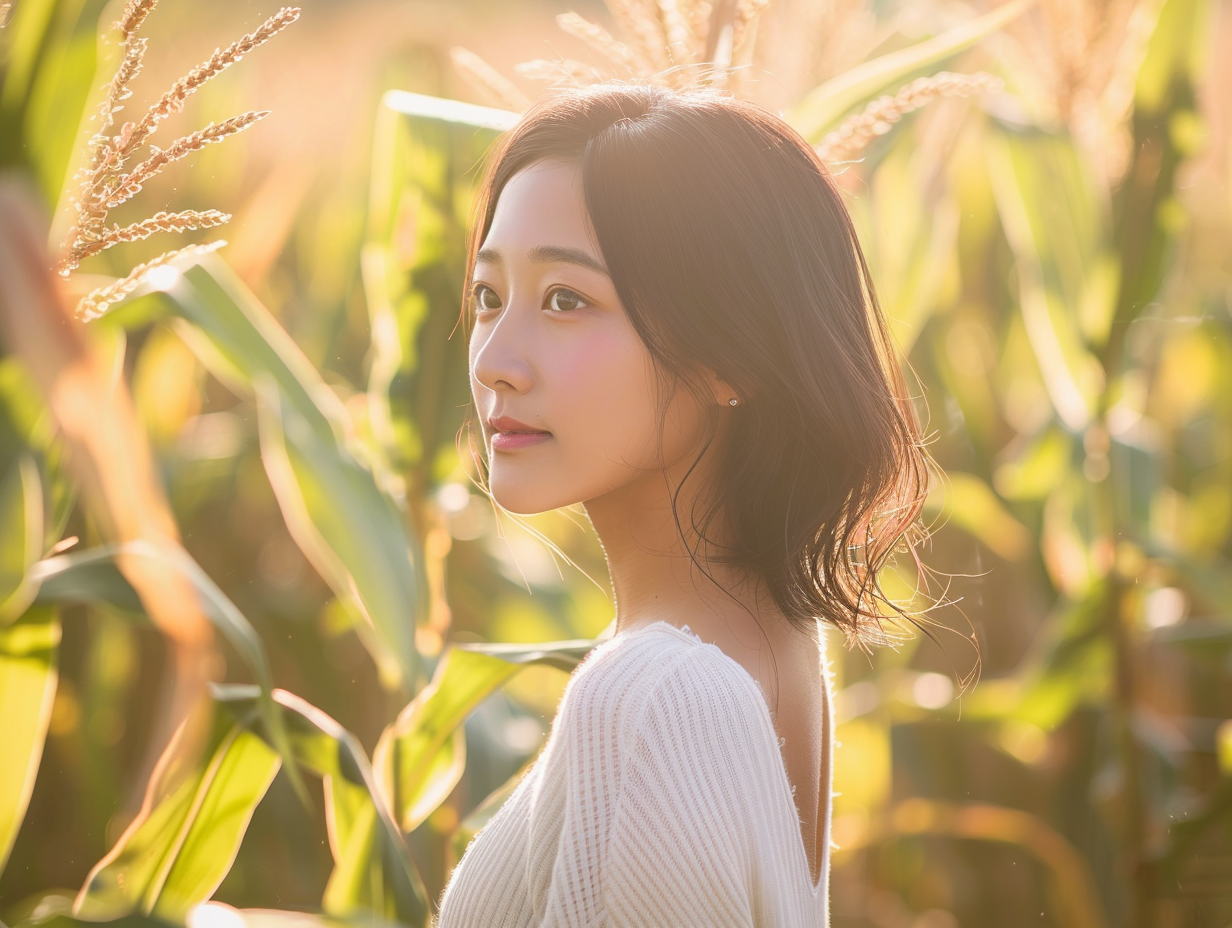
本文以给图片中的人物,添加太阳镜(sunglasses)为例,来演示局部重绘的功能。
2.1 生成一幅画,并且放大它

就会出现局部重绘(vary region)的按钮。

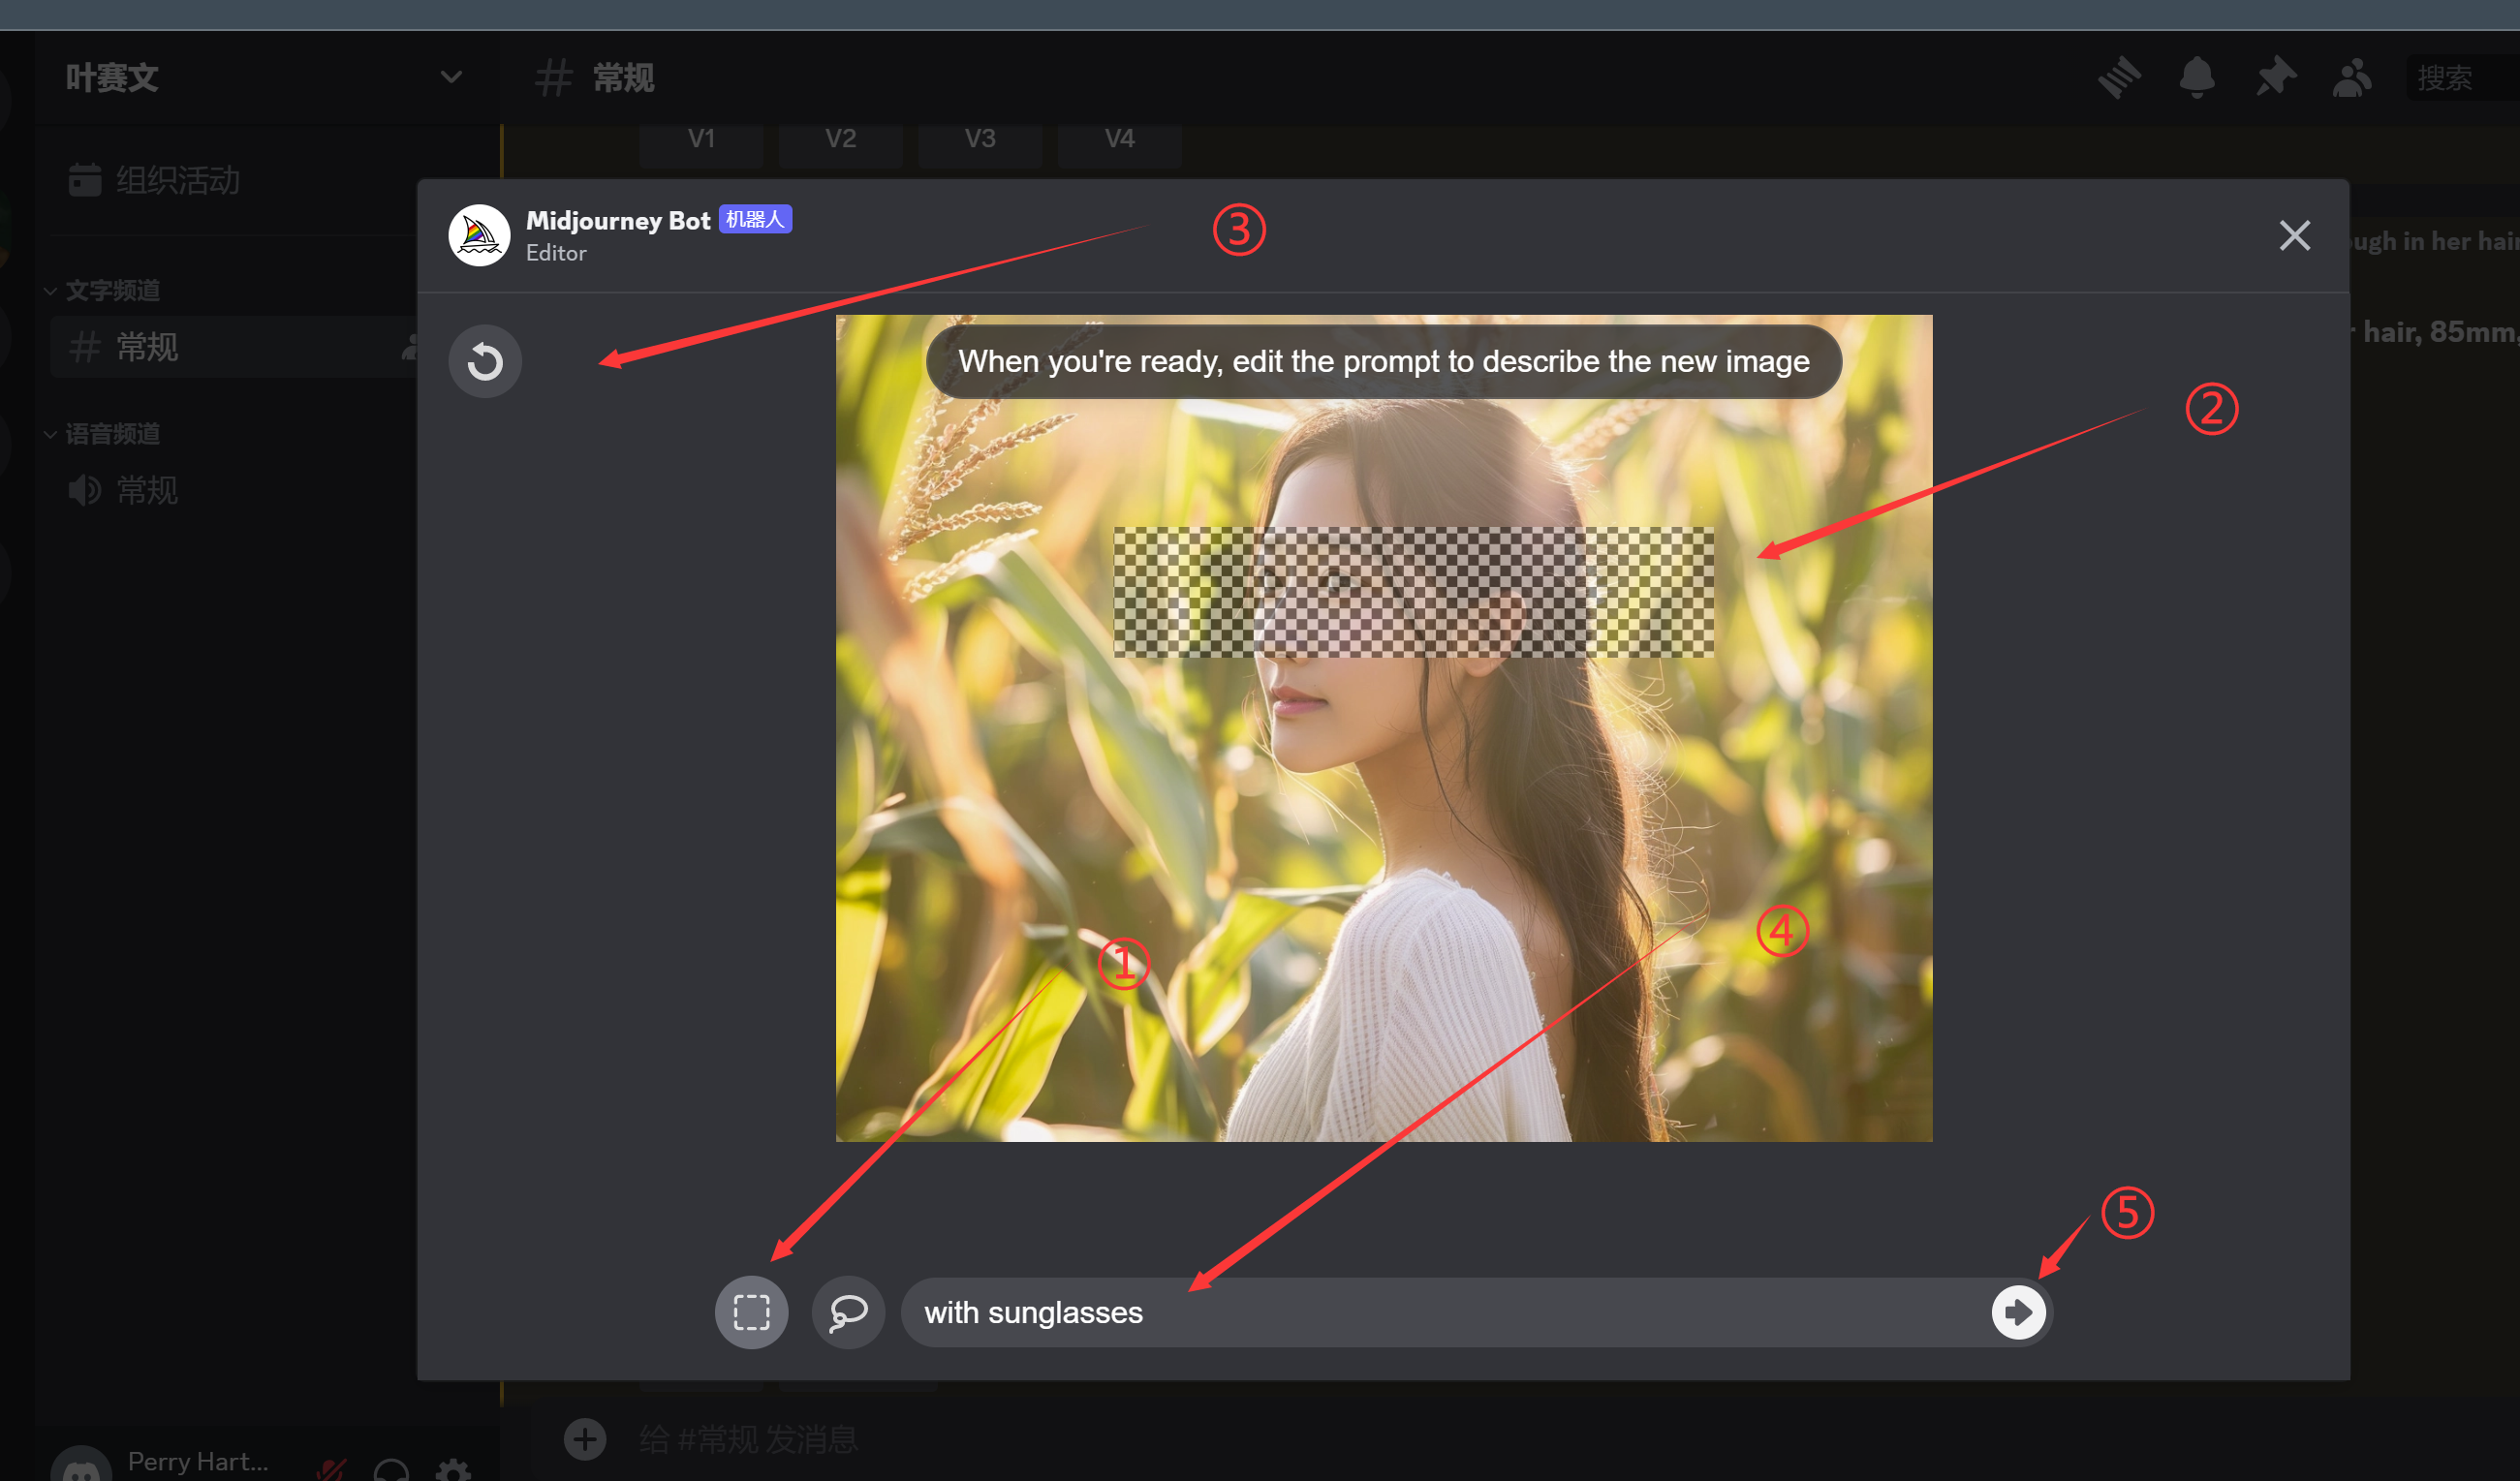
2.2 选择“选区”
点击局部重绘(vary region)
① 选择工具:可以是矩形,也可以是使用套索工具
② 在图片中,选择需要修改的部分
③ 重做:后退一步
④ 写提示词:把旧的提示词可以删掉,写上新的提示词。
⑤ 发送
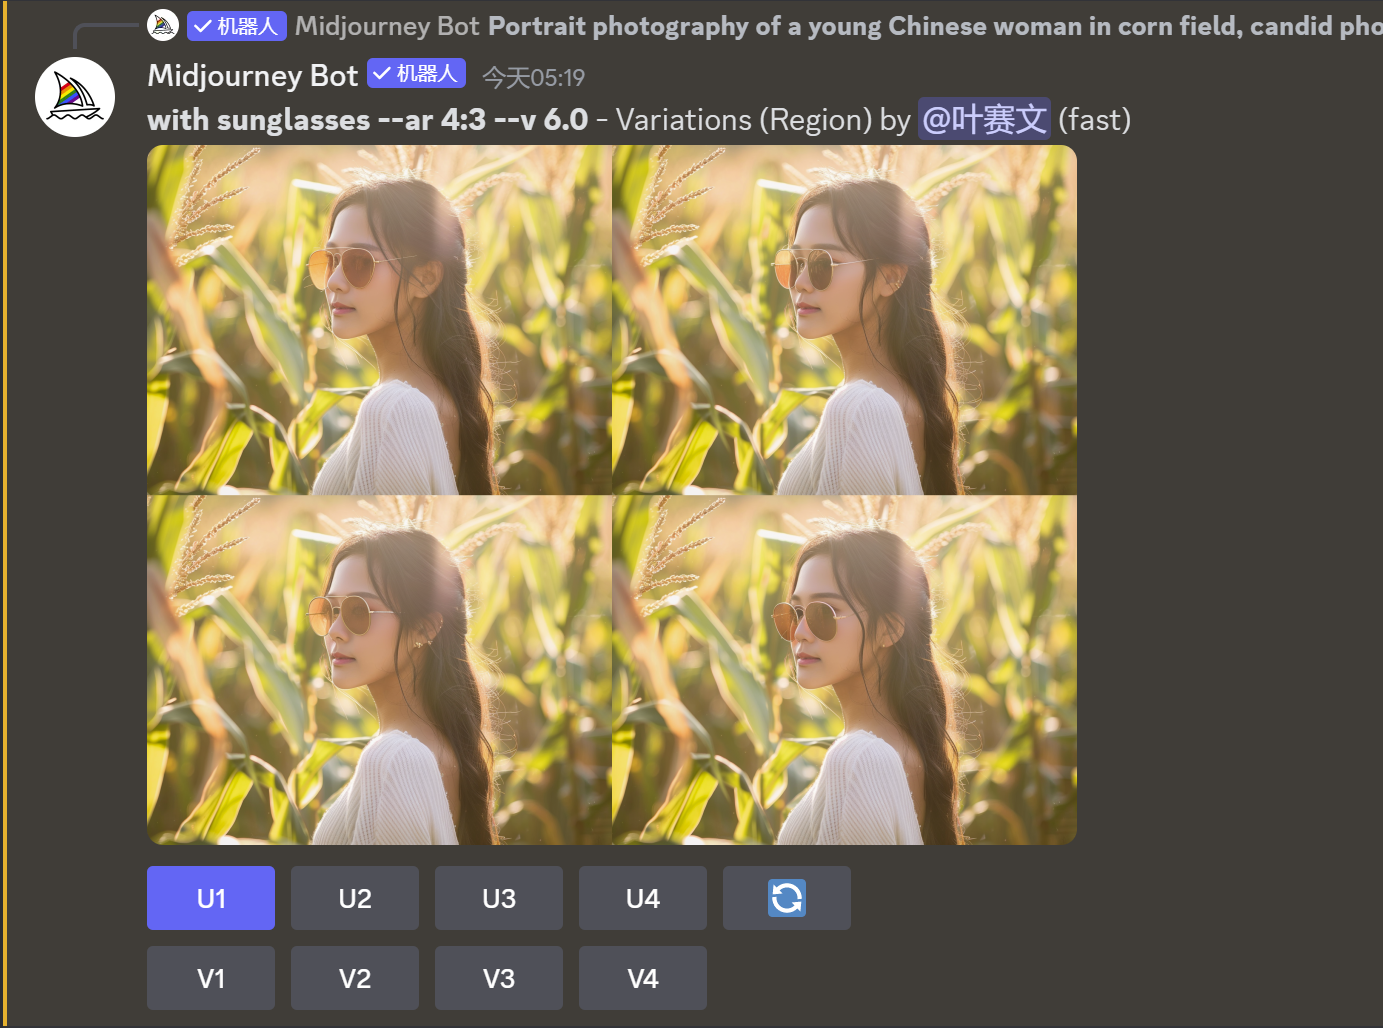
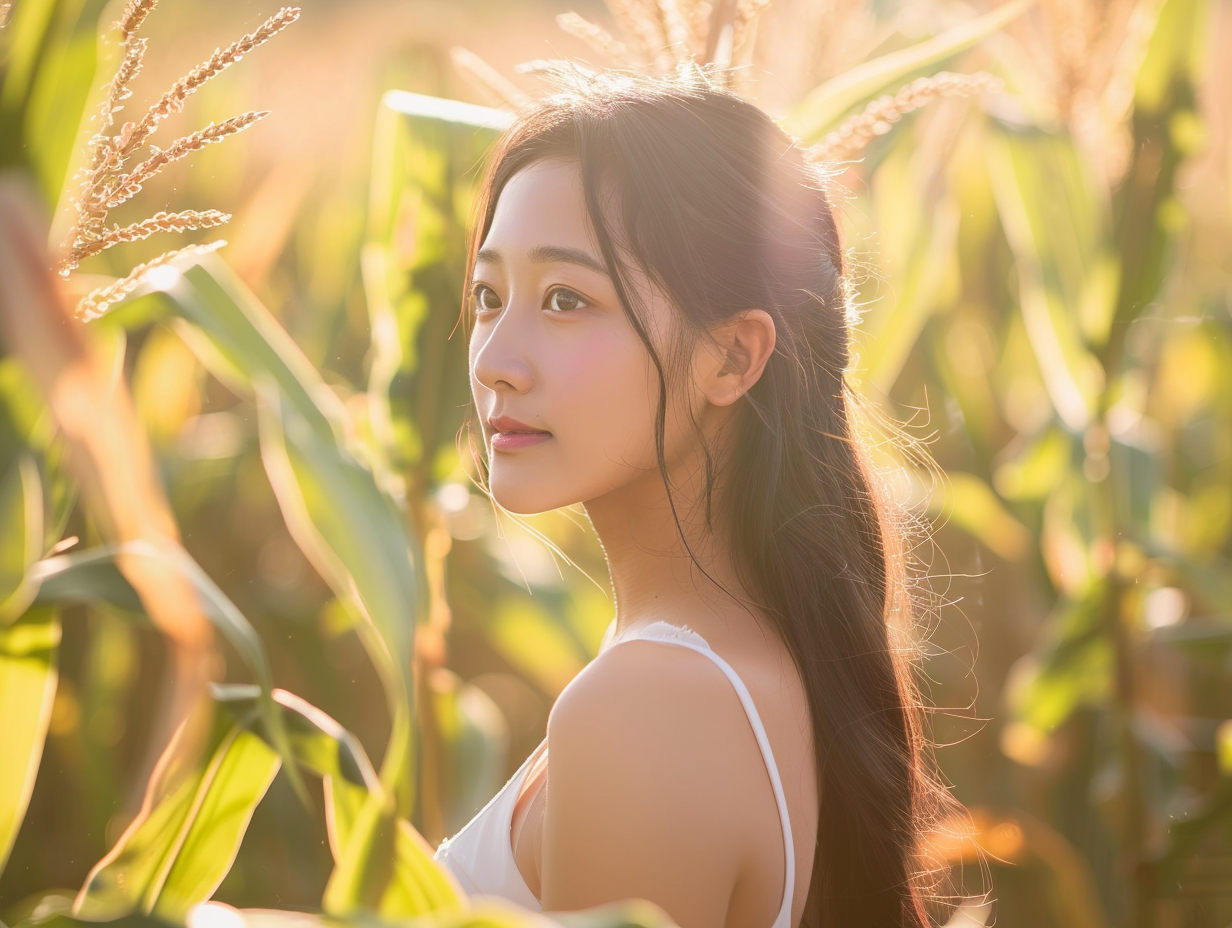
2.3 最终效果
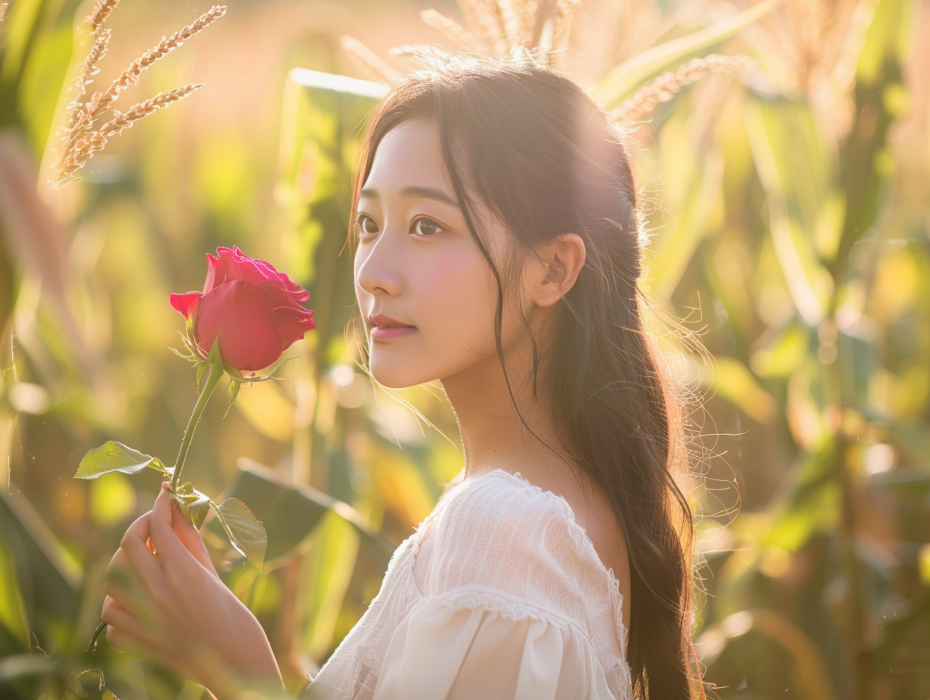
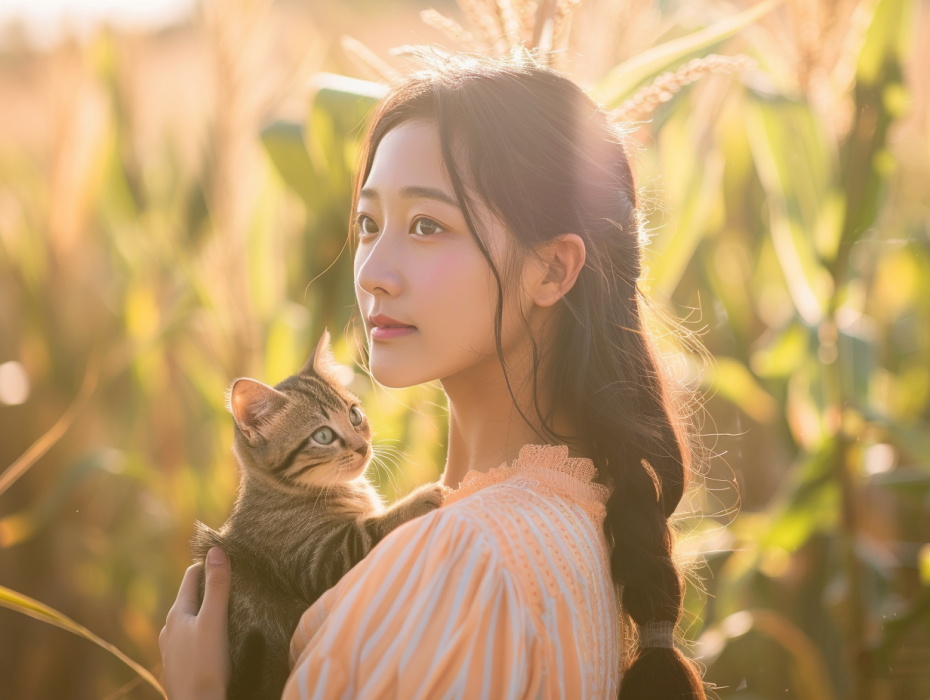
2.4 其它效果
更换服饰:
改变发型
手持玫瑰花(注意:Midjourney目前,还是无法完美地处理手。所以,尽量避开手)
抱着一只小猫
3.小结
Midjourney的局部重绘(vary region)功能,可以修改、更换图片的局部,是一个非常重要的功能。
需要注意的是,Midjourney目前对于手的处理,还不是很完美。 所以,最好不要在画面中出现手。
好工具推荐
一个集美剧、音乐和AI工具为一体的服务商:
优惠码: ysw ,有九折优惠

发表评论